In this tutorial, I’ll be teaching you how to use a combination of a cello string and a wad of copper to string together your circuit. If you’re a string player, you’ll know that broken strings are a fact of life – Why not use the strings creatively? It’s quite simple!
Here’s what’ll you’ll need:

Wires + Alligator clips
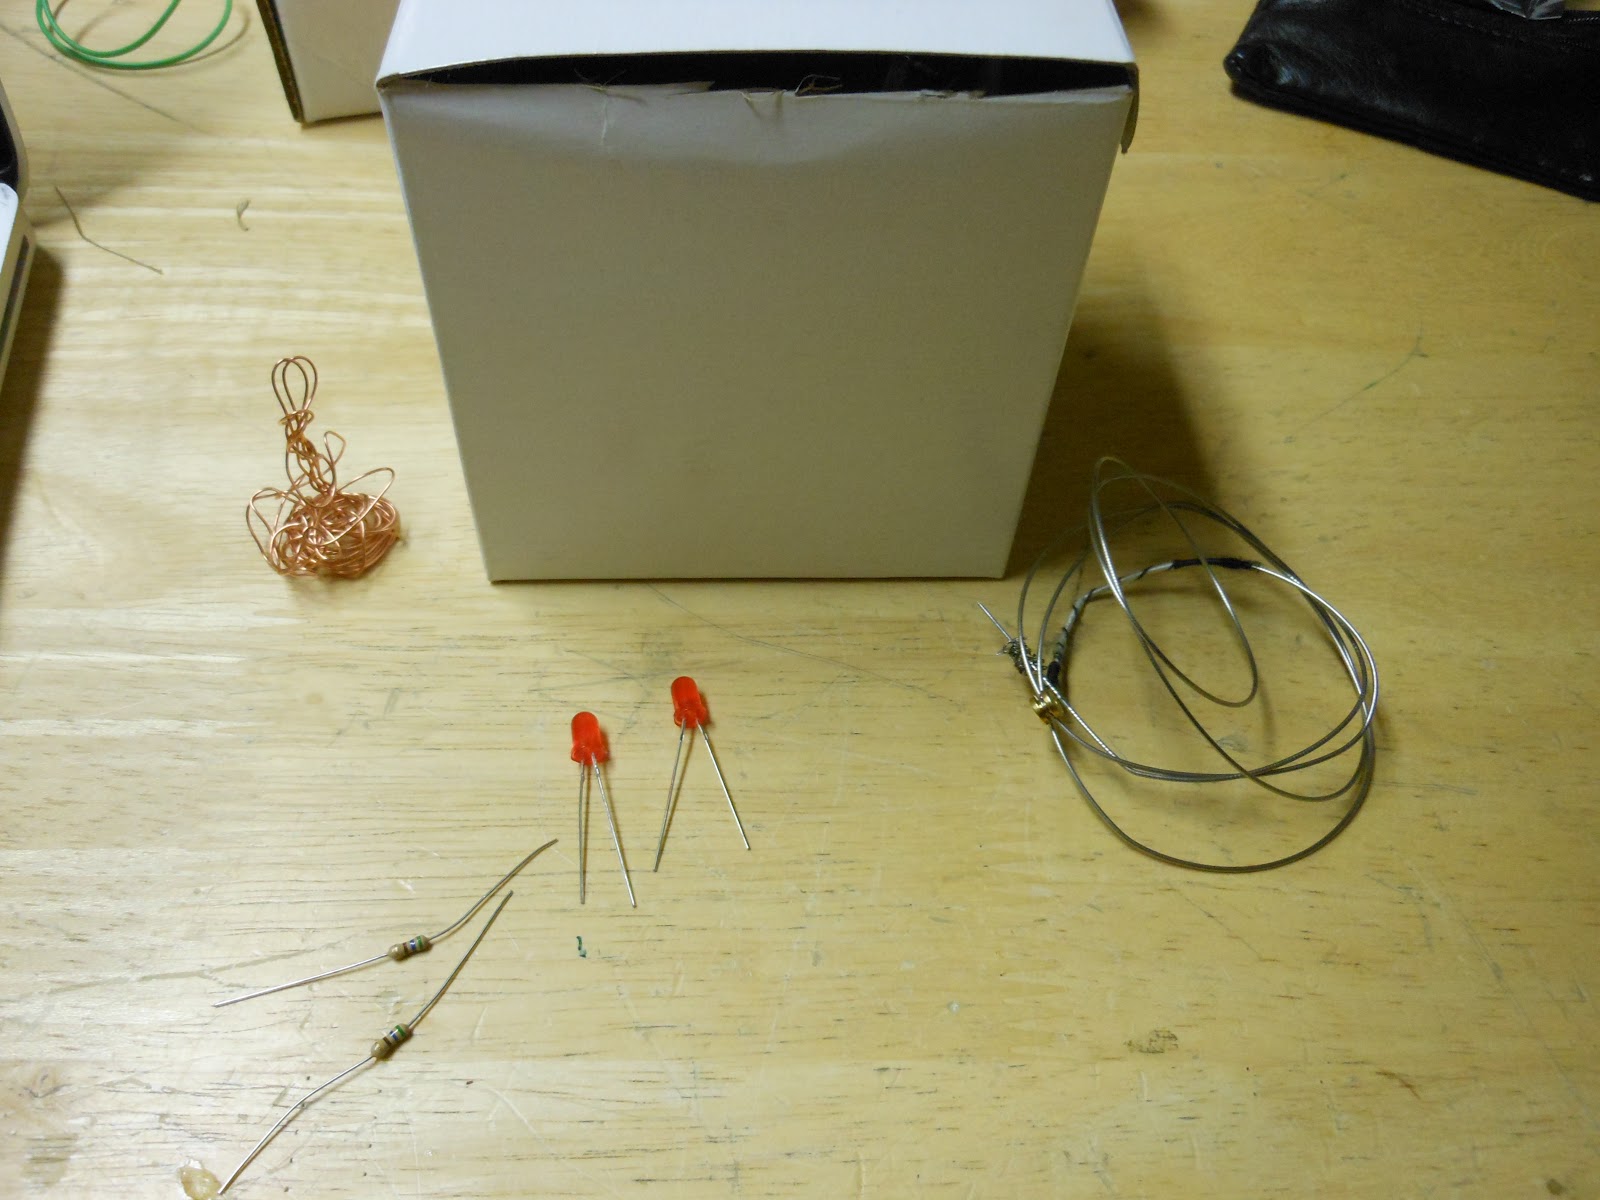
Copper, your cello string, LEDs and resistors, and a box to rig your circuit to!
Taking these materials, here’s how you’ll need to string together your circuit:
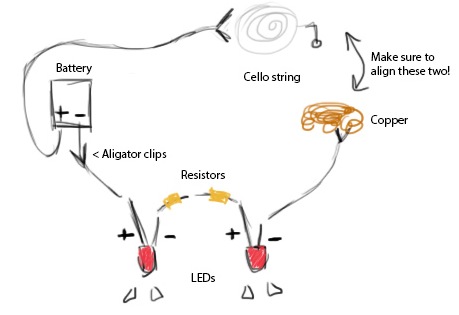
Going clockwise, connect the first LED the negative side if the battery. From the positive side of the battery, alligator clip it to your musical string. Here’s the tricky part – you’ll have to rig your box so when you close it, the cello string will touch the copper!
Using an alligator clip, attach it to your other LED, and put resistors within the two to it will not blow a fuse. Red LEDs like the one I use take up 2V each (4V total), so using two ‘Brown Black Orange Gold’ will work fine for this circuit.
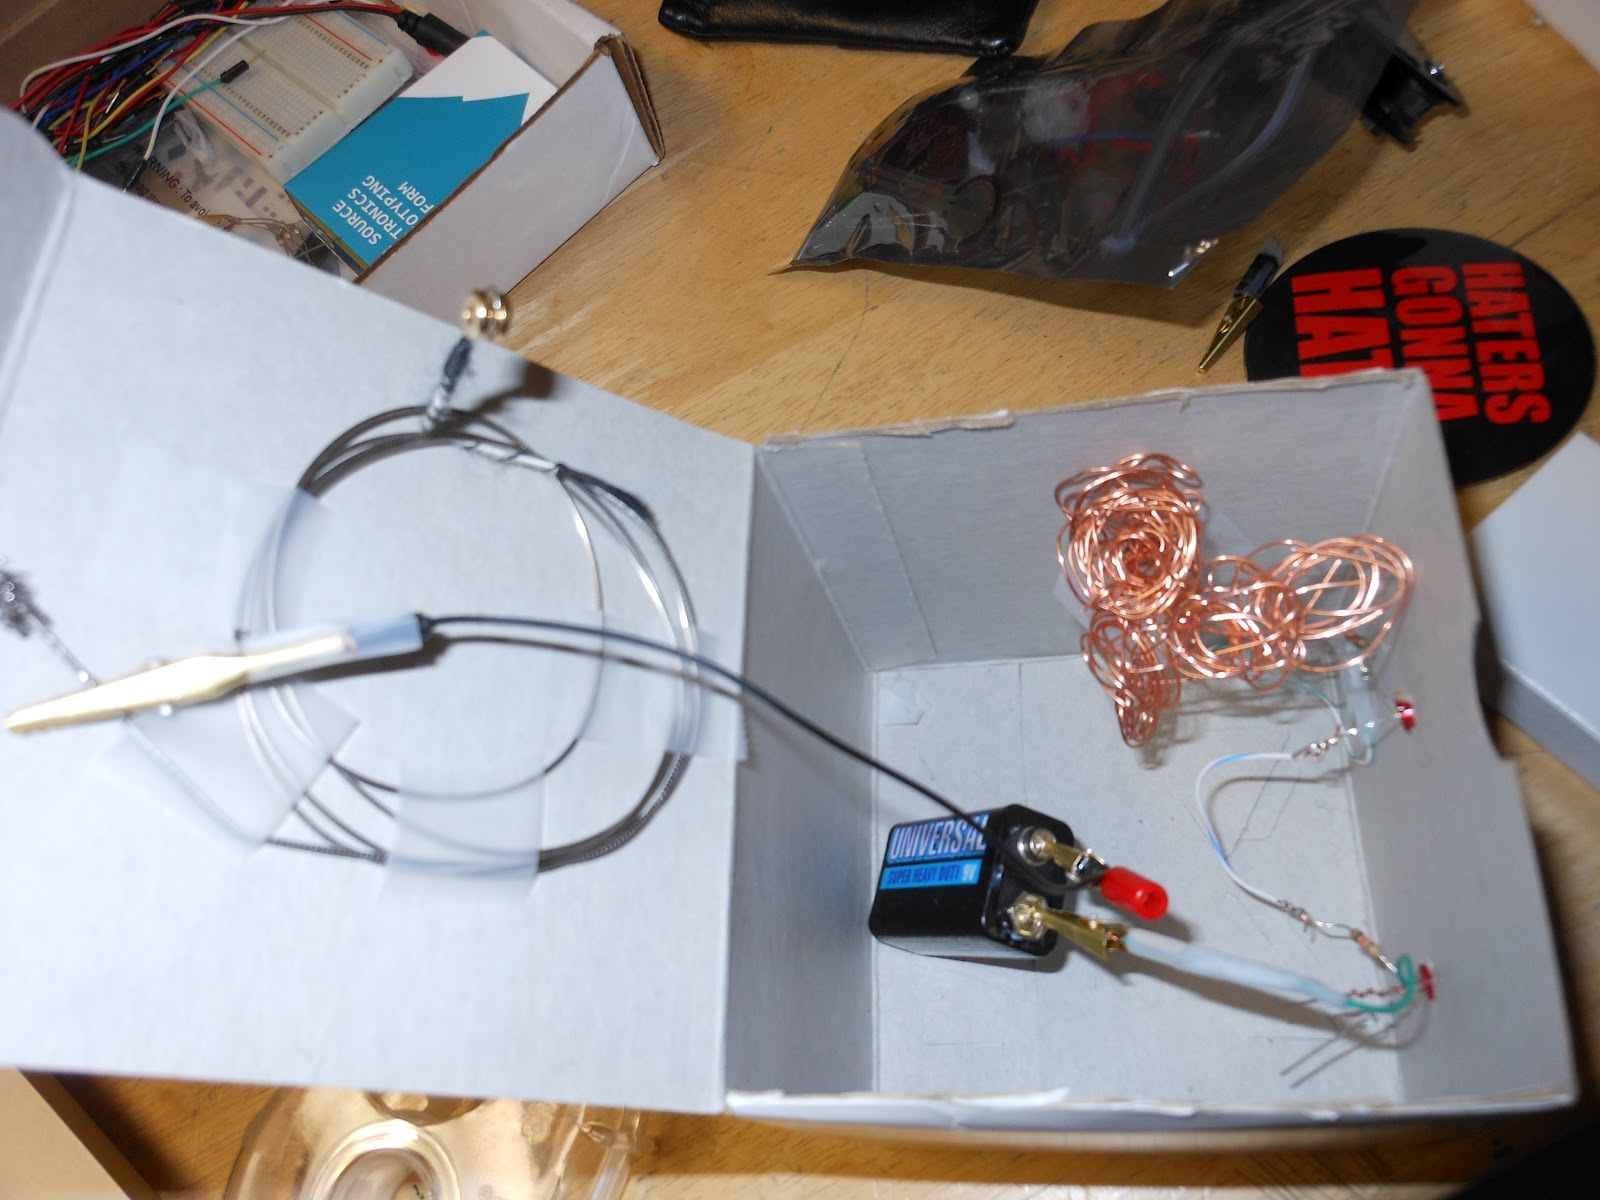
Here’s how I rigged my box. I placed the cello string at the top lid of the box, and place the copper on the side of the box. When you close the lid of the box, the string should fall within the copper wire nest you’ve created, and the circuit will close!
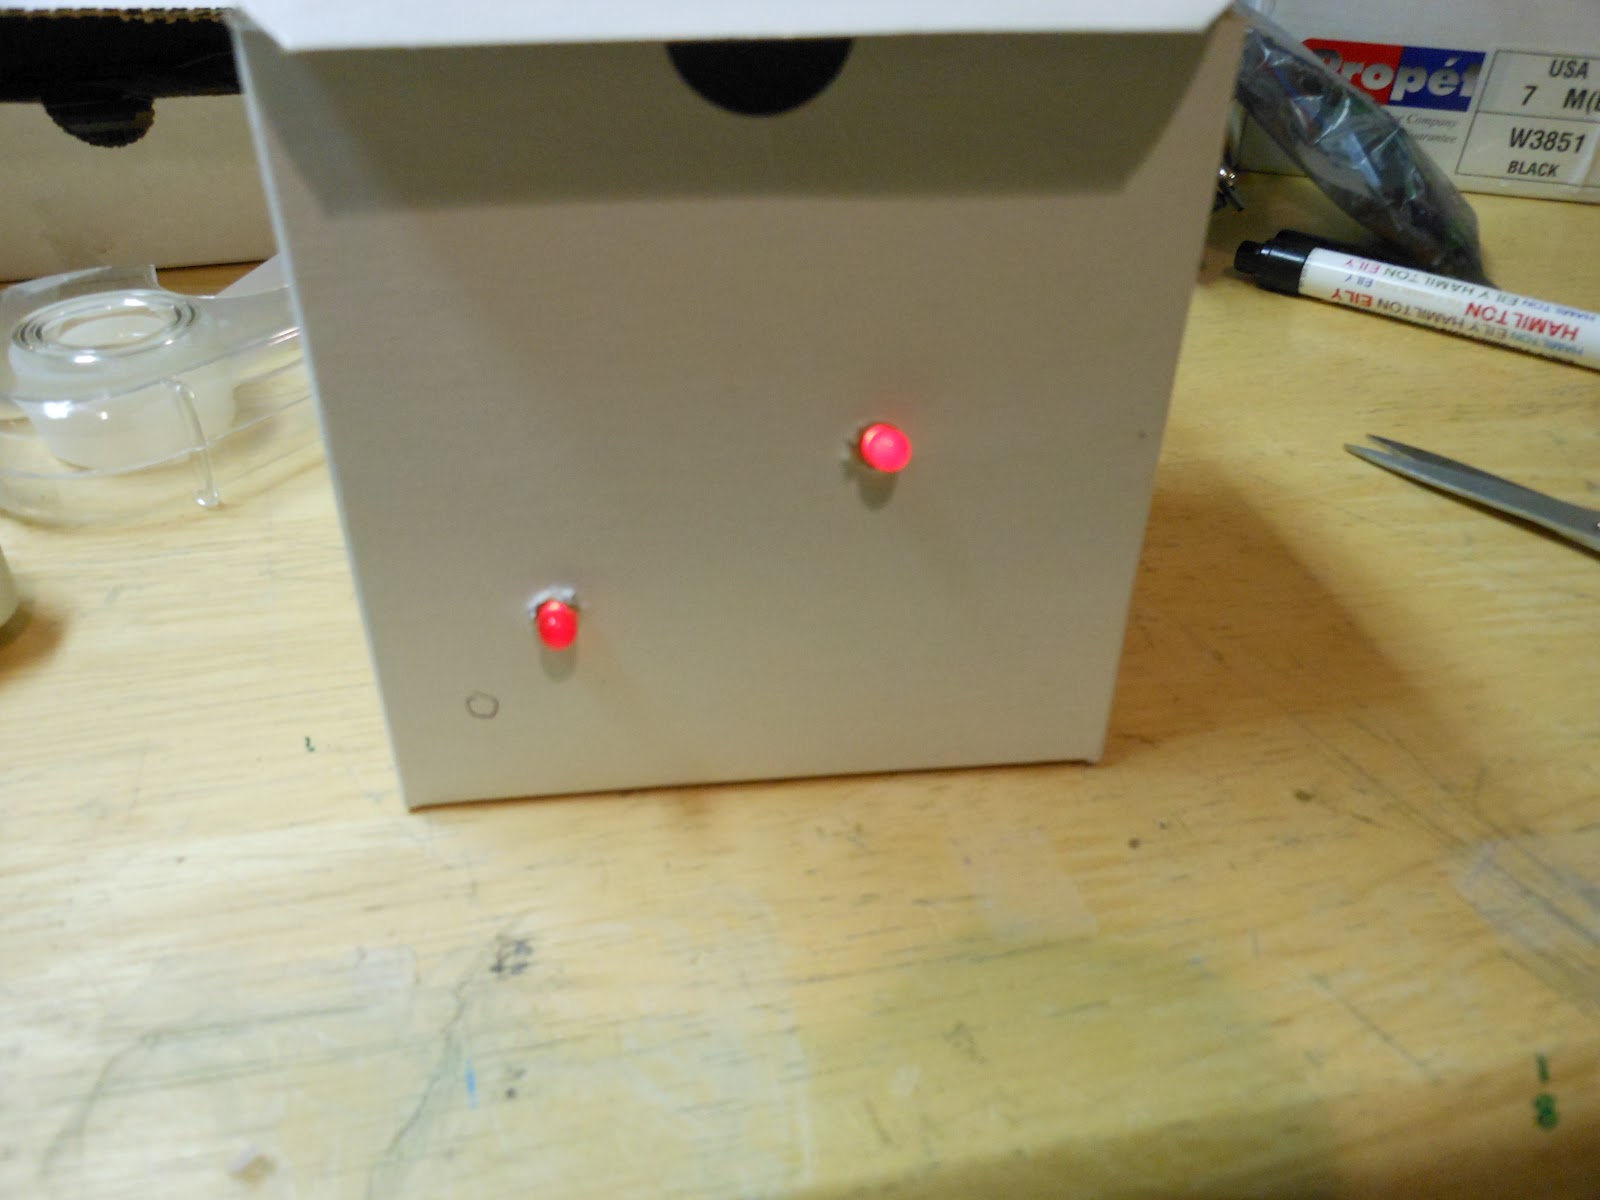
Success! When place correctly, the LEDs will light up. Now put a cool decoration on your box, and you’ve got a new toy to show others! How cool are you?
This informative post has the potent to give precise info about the string instruments that have positive effect on music. Electric Cello is also one of the best musical instrument which can bring your music in perfect rhythm.