4. “NewEnhancedWavelength(NEW)” or call it “(NEW) Feel”
Materials:
-3 motors?
-3 toy servos?
-Flexible wire from home depot.
-Some Hard mendable wire from home depot.
-Some really strong glue
-Another Bread Board
-Another switch.
-Neck Pillow
Purpose: To give another feel and edition to the previous
Metal Head. I want it to be like a clip on to enhance the experience or
relaxation. Or just go the other way and give a really goose bumpy feel to
allow a new sensation of feeling the chilly yet relaxing feel to it.
Inspired by: Student’s everyday stress and their needs to
get in a more relaxed state. Shoulders I
am looking at are always a problem with the now a days 10 to 20 pound book bags
that we wear now. Back problems, shoulder problems, and head problems are what
is effecting the population these days. This invention though will attack the
shoulders.
Build-up: Since this neck device is applied to the previous
Metal Head project, I would love to modify the hat as well and try to if not
hide the wires to give it a more commercial product feel, or to make it more
ridiculous for a feel for laughs and giggles. Keep the wires exposed but in a way
where it means something as a tester to see how long a person can stand the
weird sensation as a Halloween product game as being the Guinea pig in a mad scientist experiment.
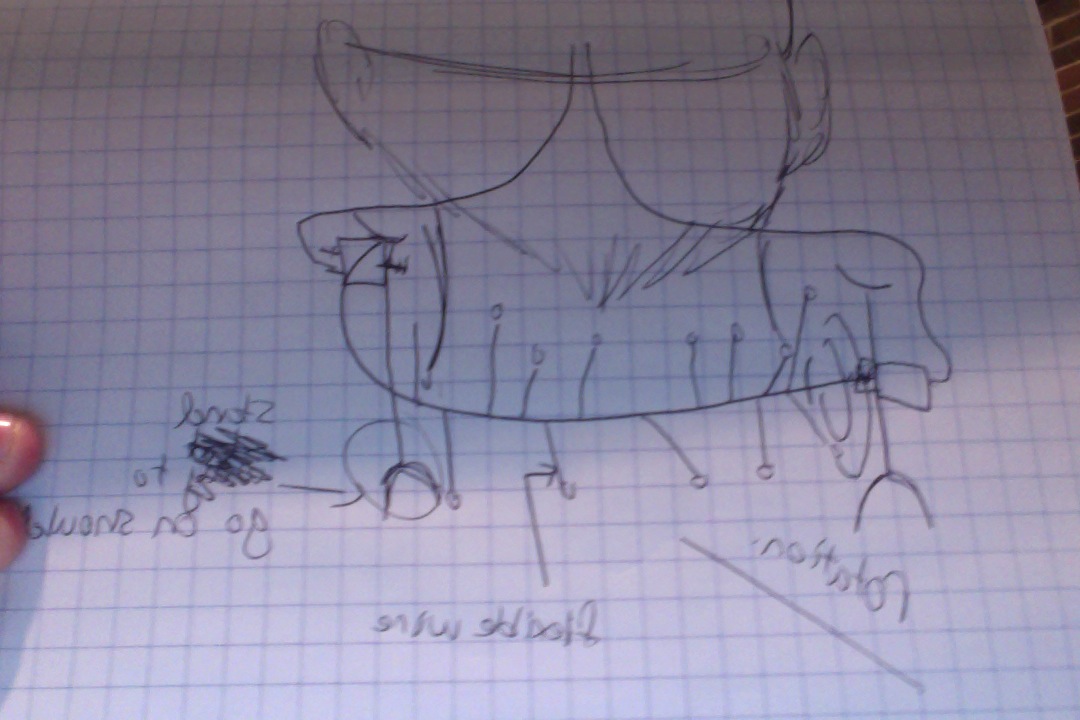
So first look for wire for frame to keep motors protected
and supports the neck a big to put in the neck pillow and to apply at least 3
strong rotation motors or one strong rotation motor.
Locate a small metal peg
or stick to attach and will super wire or hot glue it depends on how strong the
adhesive is to the metal. Then get some type of smooth wheels, I can try to
find spare parts from the flea market or 3 rotating metal flower looking wheels,
which is still in debate of what type of motors to use using a strong motor, I
would love to use or find a way to use the little 2 metal motors and apply the
same concept with the hat of giving it space within the neck pillow so no
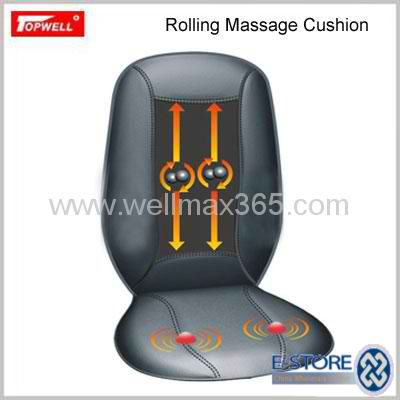
restraint or friction would fall upon these three motors. I am influenced by
the real motors in the back chair massager, which are kind of big and bulky.
These will motors go slowly down the back and rotate like pounding your back. For
this I would still want to apply this and concentrate solely on the neck area.
The wires
would be hooked up on another breadboard, and connected to the same button as
last time, or to make it more optional to the person using the device include a
secondary button.
-Other solution would be to use three toy servos in place of
the protected rotation to get a up and down rotation and applying smooth
pebbles with strong adhesive to two poles hooked up in the toy servos. These
poles going around the neck and will go up and down smoothing the neck out.
– Then my other solution would be to buy some flexible wires
and glue some little wires with taped ends to a pole that is erected into the
air around your shoulder and let them go in a circular motion with the strong
motor and allow that to go in play at full speed and achieve a tinglish
feeling. The support will be by two strong poles and a strong yet comfortable
should rests on both shoulders to make sure the device stay on shoulders.
Inspired again from this device.
These are my ideas so far and hopefully they will become a reality.
QUESTIONS:
1)What do you think I could use as a good motor that won’t stop so easily?
2) Do you have any ideas of how to go about massaging the neck?
3) Should this project be mean’t for commercial purchases or for a tester for a Halloween gag to see how long you can take it kind of mechanism? Other Advice to how I go about doing this I would be glad to hear about.
UPDATE TO PROJECT IDEA
Project: SOMBRERO
Has the same functions as the shoulder massager BUT it is going to be another massaging crazy hat.
Functions:
–Stepper motor will basically lead the car around the head but counting each sound to the music at the same time. These will be hooked up to a button. AND to get that massaging head feel I am going to hook up a pager motor within the car so when the car rides around the head you can feel the vibration. Like a real race car is on you and hopefully get a tingly weird feel as well. (I would like if possible dunno if i have time make a four LED race course around the outer rim of the hat so when the car goes around the hat the car going over the LED will close the circuit causing it to light up.) Possibilities are endless with this crazy hat.
Basic concept of the sombrero and as the other hat the bread board and the arduino will be attached to the hat. I forgot to change the piezo into a buzzer. It essentially is a buzzer that will be playing music and I hope to find the mariachi music or it can be the Can Can song.
The stepper motor will be hooked up to a Violin String I have acquired a D string for now.
A pager motor hooked up to the car. Can’t wait to see that in action.
Materials:
-Violin String(I had to grab some of my Violin string and it is not cheap as it wasn’t broken the ones i found.)
– -EasyDriver
Stepper Motor Driver- 2.75- http://www.allelectronics.com/make-a-store/item/SMT-102/STEPPER-MOTOR-W/SCREW-MECHANISM/1.html
This is the one I purchased HOPEFULLY it’ll come. I don’t trust online purchasing of anything so if
this works I may get more if it fails to function.
If I don’t get this in time I will be forced to use a DC motor.
-Coupler Brushless- I am going to see if I can purchase some around here.(seeing some around 8.99)for i don’t know if I am spelling it right online. This will weigh down the violin wire on the Stepper Motor.
1) I like the idea you had in having 3 strong rotation motors, so that the power not just being put into one motor, and you could have motors dedicated to certain spots on the head or neck. 2) Something you may want to try for a neck massager is getting a neck pillow and attaching the motor with small marbles or beads, which might not be bad materials to use as a massager, and put them inside the pillow. You could even add some kind of massager component in the neck pillow to massage the shoulders! 3) I say make this as close to a "massager" as possible (I would DEFINITELY pay for one of those!). I would say have the motor go at a slower, more rhythmic speed.
2) An idea on how you might have alternative ways to massage the neck might be using a necklace or scarf. Instead of using a neck pillow, maybe using something smaller and wearable may be an alternative of the neck pillow. You can get a necklace with marble size beads and those can act as tiny massagers.


 Basic concept of the sombrero and as the other hat the bread board and the arduino will be attached to the hat. I forgot to change the piezo into a buzzer. It essentially is a buzzer that will be playing music and I hope to find the mariachi music or it can be the Can Can song.
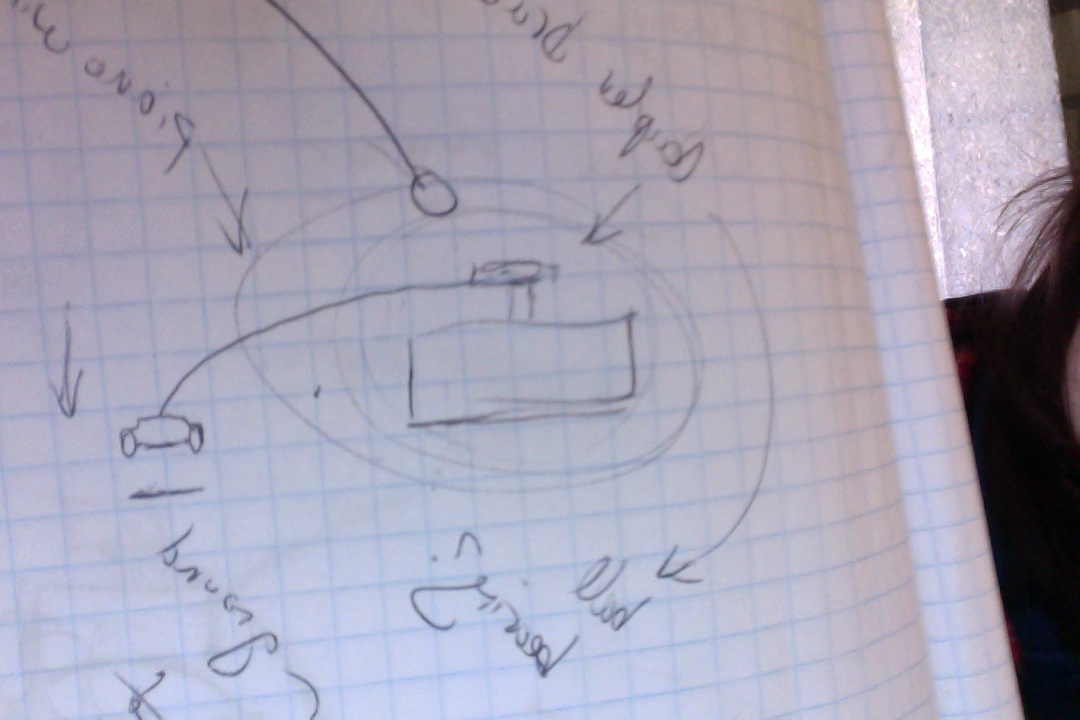
 This is the one I purchased HOPEFULLY it’ll come. I don’t trust online purchasing of anything so if
1) I like the idea you had in having 3 strong rotation motors, so that the power not just being put into one motor, and you could have motors dedicated to certain spots on the head or neck.
2) Something you may want to try for a neck massager is getting a neck pillow and attaching the motor with small marbles or beads, which might not be bad materials to use as a massager, and put them inside the pillow. You could even add some kind of massager component in the neck pillow to massage the shoulders!
3) I say make this as close to a "massager" as possible (I would DEFINITELY pay for one of those!). I would say have the motor go at a slower, more rhythmic speed.
2) An idea on how you might have alternative ways to massage the neck might be using a necklace or scarf. Instead of using a neck pillow, maybe using something smaller and wearable may be an alternative of the neck pillow. You can get a necklace with marble size beads and those can act as tiny massagers.