Laptop Light Show:

For this project I wanted to remain with using light like I have for the semester. All semester I had been interested in creating a light show that was responsive to sound that would be mounted on the back of a television, laptop, or desktop monitor. To make my idea a little more original I had to do a lot of research on how I would do this. When we had to watch Casey Reas I was interested in the Processing application he had mentioned so I did a little more research on it. I came across a code that was able to take the Arduino code that I was using for my RGB LED strips, and then make it 1000x cooler.
The Processing code that I found does a few things. The first part of the code sets a value for 256 tonal values so that pretty much any color can be displayed on the RGB LEDs. This helps in creating a smooth transition between colors, at times making an ambient effect with the lights, and at other times creating fast paced flickering. The other part of the code was a little more sophisticated. This program runs while I am displaying whatever it is I am displaying on my monitor and isn’t uploaded to the Arduino like the other ones, instead it runs directly from my computer and through the Arduino. This code divides a computer screen into however many segments you decide (In my case 25) and averages the RGB values and gives that segment its own RGB value. This value is then displayed on the designated LED. The program is constantly scanning the computer so there is no delay between what is displayed on the screen and what is displayed on the LEDs. This allows for a super accurate light show to be produced based off of what is being displayed on my screen.

I tried to find out some more about Processing but there isn’t a lot of information about all of its capabilities. Here is how the website describes it:
“Processing is an open source programming language and environment for people who want to create images, animations, and interactions. Initially developed to serve as a software sketchbook and to teach fundamentals of computer programming within a visual context, Processing also has evolved into a tool for generating finished professional work. Today, there are tens of thousands of students, artists, designers, researchers, and hobbyists who use Processing for learning, prototyping, and production.”
It is basically using programming language builds on the Java language, but uses a simplified syntax and graphics programming model. The interface of the program is almost identical to the Arduino’s interface.

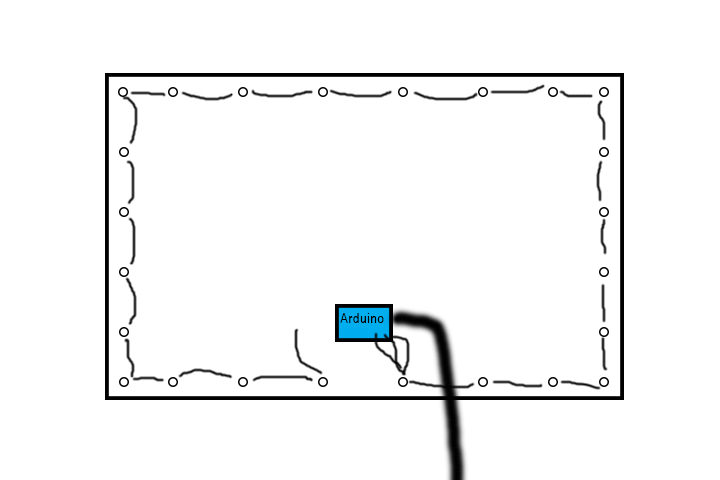
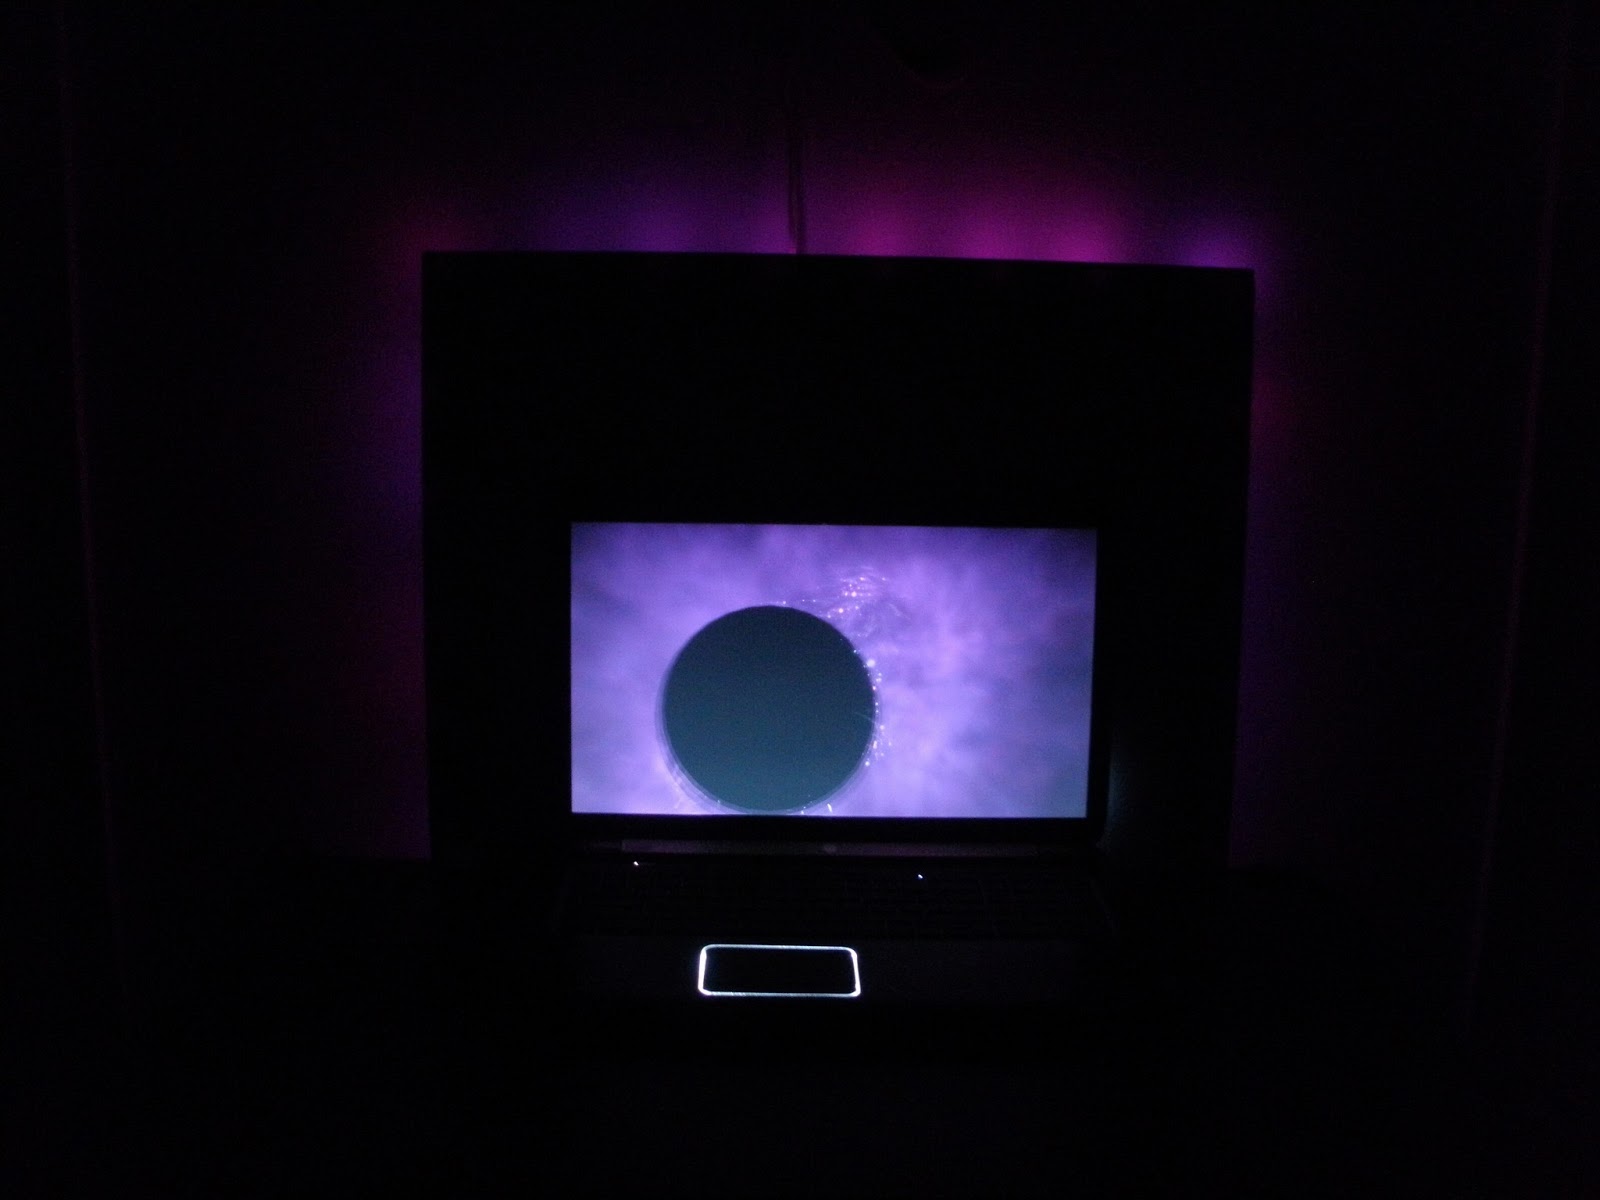
I decided to mount my project on a foam board for right now. I originally did this just to keep all the LEDs stable and test out my project. I really liked how it turned out and haven’t really decided where I want to commit to place it long term. The foam board is about 30″ diagonal, so you can imagine this on the back of a TV or large monitor. The lights, depending on the effect that you want, should be from 1″- 6″ from a wall to allow for the light to be reflected and diffused on a wall.The Arduino is there in the center and wires are connected to pins 11, 13, and GRD that connect into the RGB LEDs. The RGB LEDs are powered by a 5V DC external power supply.
Other Pictures:

Video: (Watch the full thing it is pretty sweet)
Code:
Arduino-
#include <SPI.h>
#define LED_DDR DDRB
#define LED_PORT PORTB
#define LED_PIN _BV(PORTB5)
static const uint8_t magic[] = {‘A’,’d’,’a’};
#define MAGICSIZE sizeof(magic)
#define HEADERSIZE (MAGICSIZE + 3)
#define MODE_HEADER 0
#define MODE_HOLD 1
#define MODE_DATA 2
static const unsigned long serialTimeout = 15000;
void setup()
{
uint8_t
buffer[256],
indexIn = 0,
indexOut = 0,
mode = MODE_HEADER,
hi, lo, chk, i, spiFlag;
int16_t
bytesBuffered = 0,
hold = 0,
c;
int32_t
bytesRemaining;
unsigned long
startTime,
lastByteTime,
lastAckTime,
t;
LED_DDR |= LED_PIN;
LED_PORT &= ~LED_PIN;
Serial.begin(115200);
SPI.begin();
SPI.setBitOrder(MSBFIRST);
SPI.setDataMode(SPI_MODE0);
SPI.setClockDivider(SPI_CLOCK_DIV16);
uint8_t testcolor[] = { 0, 0, 0, 255, 0, 0 };
for(char n=3; n>=0; n–) {
for(c=0; c<25000; c++) {
for(i=0; i<3; i++) {
for(SPDR = testcolor[n + i]; !(SPSR & _BV(SPIF)); );
}
}
delay(1);
}
Serial.print(“Adan”);
startTime = micros();
lastByteTime = lastAckTime = millis();
for(;;) {
t = millis();
if((bytesBuffered < 256) && ((c = Serial.read()) >= 0)) {
buffer[indexIn++] = c;
bytesBuffered++;
lastByteTime = lastAckTime = t;
} else {
if((t – lastAckTime) > 1000) {
Serial.print(“Adan”);
lastAckTime = t;
}
if((t – lastByteTime) > serialTimeout) {
for(c=0; c<32767; c++) {
for(SPDR=0; !(SPSR & _BV(SPIF)); );
}
delay(1);
lastByteTime = t;
}
}
switch(mode) {
case MODE_HEADER:
if(bytesBuffered >= HEADERSIZE) {
for(i=0; (i<MAGICSIZE) && (buffer[indexOut++] == magic[i++]););
if(i == MAGICSIZE) {
hi = buffer[indexOut++];
lo = buffer[indexOut++];
chk = buffer[indexOut++];
if(chk == (hi ^ lo ^ 0x55)) {
bytesRemaining = 3L * (256L * (long)hi + (long)lo + 1L);
bytesBuffered -= 3;
spiFlag = 0;
mode = MODE_HOLD;
} else {
indexOut -= 3;
}
}
bytesBuffered -= i;
}
break;
case MODE_HOLD:
if((micros() – startTime) < hold) break;
LED_PORT &= ~LED_PIN;
mode = MODE_DATA;
case MODE_DATA:
while(spiFlag && !(SPSR & _BV(SPIF)));
if(bytesRemaining > 0) {
if(bytesBuffered > 0) {
SPDR = buffer[indexOut++];
bytesBuffered–;
bytesRemaining–;
spiFlag = 1;
}
if((bytesBuffered < 32) && (bytesRemaining > bytesBuffered)) {
startTime = micros();
hold = 100 + (32 – bytesBuffered) * 10;
mode = MODE_HOLD;
}
} else {
startTime = micros();
hold = 1000;
LED_PORT |= LED_PIN;
mode = MODE_HEADER;
}
}
}
}
void loop()
{
}
—————————————————————————————————————————————————————————————————————–
Processing (pt 1)-
import processing.serial.*;
int N_LEDS = 25;
void setup()
{
byte[] buffer = new byte[6 + N_LEDS * 3];
Serial myPort;
int i, hue1, hue2, bright, lo, r, g, b, t, prev, frame = 0;
long totalBytesSent = 0;
float sine1, sine2;
noLoop();
// Assumes the Arduino is the first/only serial device. If this is not the
// case, change the device index here. println(Serial.list()); can be used
// to get a list of available serial devices.
myPort = new Serial(this, Serial.list()[0], 115200);
// A special header / magic word is expected by the corresponding LED
// streaming code running on the Arduino. This only needs to be initialized
// once because the number of LEDs remains constant:
buffer[0] = ‘A’; // Magic word
buffer[1] = ‘d’;
buffer[2] = ‘a’;
buffer[3] = byte((N_LEDS – 1) >> 8); // LED count high byte
buffer[4] = byte((N_LEDS – 1) & 0xff); // LED count low byte
buffer[5] = byte(buffer[3] ^ buffer[4] ^ 0x55); // Checksum
sine1 = 0.0;
hue1 = 0;
prev = second(); // For bandwidth statistics
for (;;) {
sine2 = sine1;
hue2 = hue1;
// Start at position 6, after the LED header/magic word
for (i = 6; i < buffer.length; ) {
// Fixed-point hue-to-RGB conversion. ‘hue2’ is an integer in the
// range of 0 to 1535, where 0 = red, 256 = yellow, 512 = green, etc.
// The high byte (0-5) corresponds to the sextant within the color
// wheel, while the low byte (0-255) is the fractional part between
// the primary/secondary colors.
lo = hue2 & 255;
switch((hue2 >> 8) % 6) {
case 0:
r = 255;
g = lo;
b = 0;
break;
case 1:
r = 255 – lo;
g = 255;
b = 0;
break;
case 2:
r = 0;
g = 255;
b = lo;
break;
case 3:
r = 0;
g = 255 – lo;
b = 255;
break;
case 4:
r = lo;
g = 0;
b = 255;
break;
default:
r = 255;
g = 0;
b = 255 – lo;
break;
}
// Resulting hue is multiplied by brightness in the range of 0 to 255
// (0 = off, 255 = brightest). Gamma corrrection (the ‘pow’ function
// here) adjusts the brightness to be more perceptually linear.
bright = int(pow(0.5 + sin(sine2) * 0.5, 2.8) * 255.0);
buffer[i++] = byte((r * bright) / 255);
buffer[i++] = byte((g * bright) / 255);
buffer[i++] = byte((b * bright) / 255);
// Each pixel is slightly offset in both hue and brightness
hue2 += 40;
sine2 += 0.3;
}
// Slowly rotate hue and brightness in opposite directions
hue1 = (hue1 + 4) % 1536;
sine1 -= .03;
// Issue color data to LEDs and keep track of the byte and frame counts
myPort.write(buffer);
totalBytesSent += buffer.length;
frame++;
// Update statistics once per second
if ((t = second()) != prev) {
print(“Average frames/sec: “);
print(int((float)frame / (float)millis() * 1000.0));
print(“, bytes/sec: “);
println(int((float)totalBytesSent / (float)millis() * 1000.0));
prev = t;
}
}
}
void draw()
{
}