Project 3: Prototype Documentation
Materials:
- A Photo Frame 11″ x 14″
- Black or any color Plexiglass for the border(optional) 13″ x 16″
- 1 meter Neo Pixel Lights
- Bread board
- HC-SRO4 Ultrasonic Sensor
- Arduino Uno
- 9V Power Source
- Wooden Box with lid
Tools
- Hot Glue Gun
- Soldering Iron/Stand
- Scotch tape
- Scissors
- Electric Tape/Copper tape
- Hand Saw
- Machine Saw
Instructions:
- This project is a prototype so some of the instructions will not incorporate what I am doing, but it is needed in the long run.
- With a hand saw or drill saw, cut a small opening for the wires to go through and saw the lid in half like so:

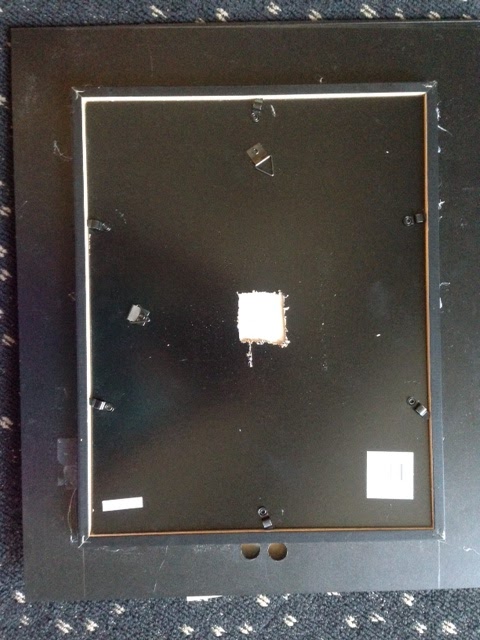
3. Cut a small square opening the frame itself for when the wires go through for the alarm clock.
4. Hot glue gun half the lid onto the frame so it becomes a resting board for the box that holds all the wires.

5.OPTIONAL: Cut out a frame from the plexiglass or wood based board using a machine saw that cuts from the middle out. Choose whichever design you prefer. and cut. MAKE SURE there is overlapping from the photo frame and the new border and hot gun that down.
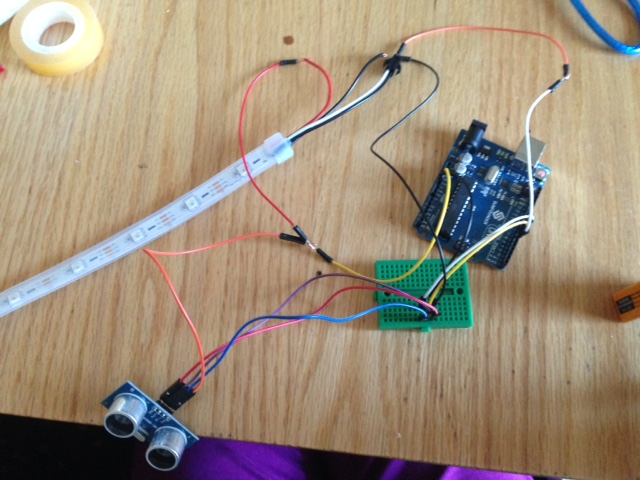
6. Now for the circuit. Use this diagram to help guide you. You do not need a capacitor or DC converter. Combine VCC of Ultra Sonic and 5V of the Neopixel together and put that into the 5V on the Arduino Uno. Then do the same for all the grounds. The rest of the wires are same.
7. It should look like this:
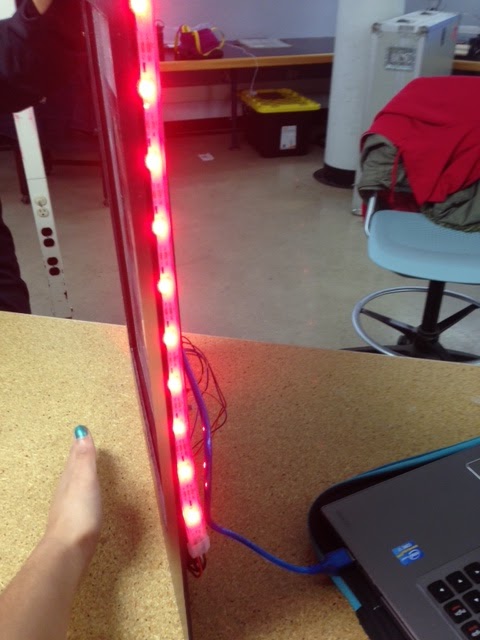
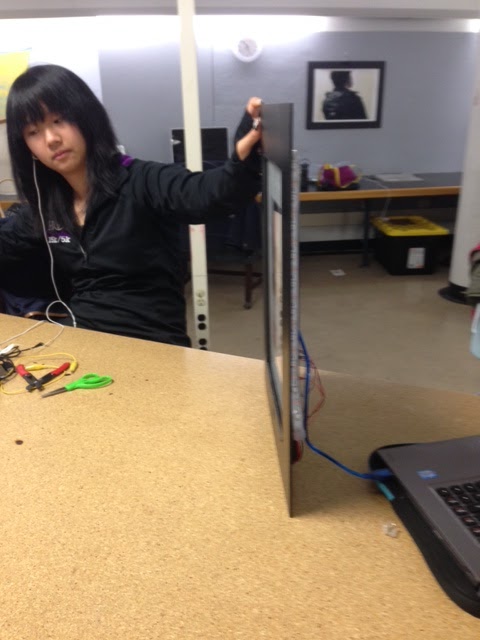
8. Your frame should look like this. Put the sensor through the holes and use the wooden box to keep the wires together and take it in.

9. Here is the Arduino Code:
// Turning NeoPixels on and off using a HC-SRO4 Ping Sensor
/*
This sketch reads a HC-SR04 ultrasonic rangefinder and returns the
distance to the closest object in range. To do this, it sends a pulse
to the sensor to initiate a reading, then listens for a pulse
to return. The length of the returning pulse is proportional to
the distance of the object from the sensor.
The Arduino then takes this information and illuminates a strip of
NeoPixel’s based on the distance of the object from the sensor.
*/
//Tell the Arduino IDE to include the FastLED library
#include <FastLED.h>
#include <Adafruit_NeoPixel.h>
#ifdef __AVR__
#include <avr/power.h>
#endif
//Setup the variables for the HC-SR04
const int trigPin = 8;
const int echoPin = 7;
//Setup the variables for the NeoPixel Strip
#define NUM_LEDS 30 // How many leds in your strip?
#define DATA_PIN 6 // What pin is the NeoPixel’s data line connected to?
CRGB leds[NUM_LEDS]; // Define the array of leds
Adafruit_NeoPixel strip = Adafruit_NeoPixel(30, DATA_PIN, NEO_GRB + NEO_KHZ800);
void setup() {
// initialize serial communication:
Serial.begin(9600);
FastLED.addLeds<NEOPIXEL, DATA_PIN>(leds, NUM_LEDS);
strip.begin();
strip.show(); // Initialize all pixels to ‘off’
}
void loop()
{
// establish variables for duration of the ping,
// and the distance result in inches and centimeters:
long duration, inches, cm;
// The sensor is triggered by a HIGH pulse of 10 or more microseconds.
// Give a short LOW pulse beforehand to ensure a clean HIGH pulse:
pinMode(trigPin, OUTPUT);
digitalWrite(trigPin, LOW);
delayMicroseconds(2);
digitalWrite(trigPin, HIGH);
delayMicroseconds(5);
digitalWrite(trigPin, LOW);
// Read the signal from the sensor: a HIGH pulse whose
// duration is the time (in microseconds) from the sending
// of the ping to the reception of its echo off of an object.
pinMode(echoPin, INPUT);
duration = pulseIn(echoPin, HIGH);
Serial.print(duration);
Serial.println();
// convert the time into a distance
inches = microsecondsToInches(duration);
cm = microsecondsToCentimeters(duration);
Serial.print(inches);
Serial.print(“in, “);
Serial.print(cm);
Serial.print(“cm”);
Serial.println();
if ((inches <= 20))
{
fill_solid( &(leds[0]), NUM_LEDS /*number of leds*/, CRGB::Red); //{whitestrobe(30); //rainbowCycle(uint8_t
FastLED.show();
}
else if (inches >= 11) {
fill_solid( &(leds[0]), NUM_LEDS /*number of leds*/, CRGB::Black);
FastLED.show();
}
delay(100);
}
//// Slightly different, this makes the rainbow equally distributed throughout
//void rainbowCycle(uint8_t wait) {
// uint16_t i, j;
//
// for (j = 0; j < 256 * 5; j++) { // 5 cycles of all colors on wheel
// for (i = 0; i < strip.numPixels(); i++) {
// strip.setPixelColor(i, Wheel(((i * 256 / strip.numPixels()) + j) & 255));
// }
// strip.show();
// delay(wait);
// }
//}
//uint32_t Wheel(byte WheelPos) {
// WheelPos = 255 – WheelPos;
// if (WheelPos < 85) {
// return strip.Color(255 – WheelPos * 3, 0, WheelPos * 3);
// }
// if (WheelPos < 170) {
// WheelPos -= 85;
// return strip.Color(0, WheelPos * 3, 255 – WheelPos * 3);
// }
// WheelPos -= 170;
// return strip.Color(WheelPos * 3, 255 – WheelPos * 3, 0);
//}
long microsecondsToInches(long microseconds)
{
// According to Parallax’s datasheet for the PING))), there are
// 73.746 microseconds per inch (i.e. sound travels at 1130 feet per
// second). This gives the distance travelled by the ping, outbound
// and return, so we divide by 2 to get the distance of the obstacle.
// See: http://www.parallax.com/dl/docs/prod/acc/28015-PING-v1.3.pdf
return microseconds / 74 / 2;
}
long microsecondsToCentimeters(long microseconds)
{
// The speed of sound is 340 m/s or 29 microseconds per centimeter.
// The ping travels out and back, so to find the distance of the
// object we take half of the distance travelled.
return microseconds / 29 / 2;
}