Creative Switch Project: Fashion Meets Tech
By: Dorinda Barlow &Wasan Hayajneh
Learn how to step by step on how to integrate LED lights onto a jacket through a circuit current.
Materials Needed
- *Fabric (Of your choice, possibly a thick fabric)
- Thread
- Scissors
- Model
- LED Lights (2) or more
- Conductive Tape
- Wire (Any wire that is tested to be conductive)
- Button Battery Cell Holder
- Marker
Steps
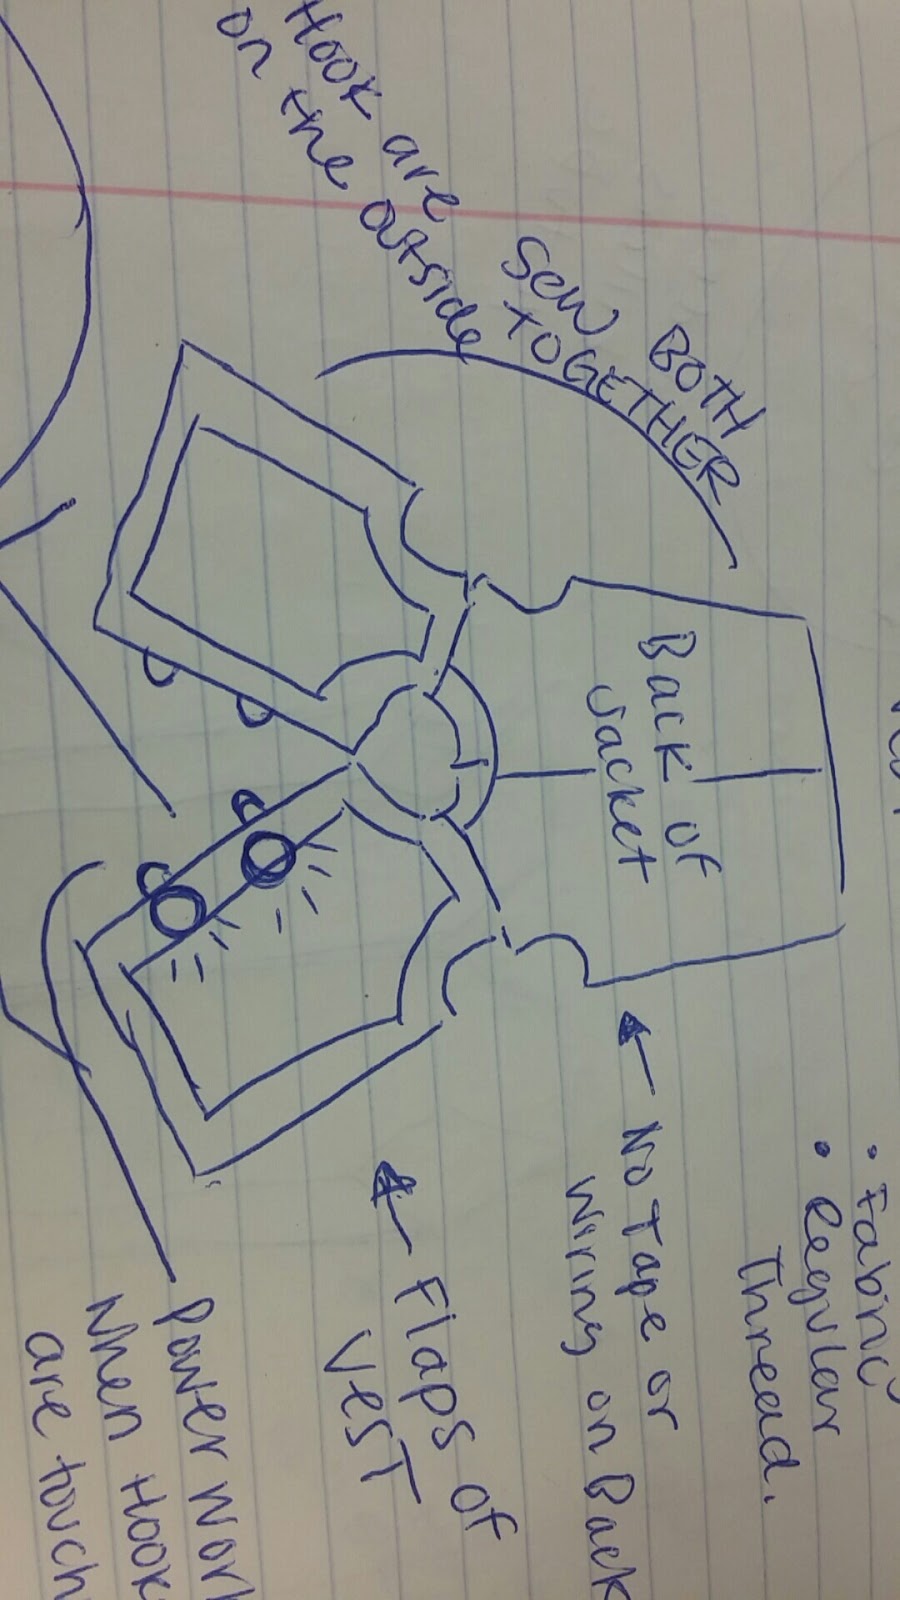
- Sketch out the jacket, the base outline of how you would cut out and sew together.

Shown above is the blueprint for how we will transfer over to the fabric and cut out. 1a. We used denim material because It’s thicker and won’t fall apart easily.
 |
| The front and Back flap but folder together |
 |
| Once it’s to correct size you want, cut the front flap down the middle to create two. Use your marker to create two dots alongside where the “Buttons” LED lights would go. |
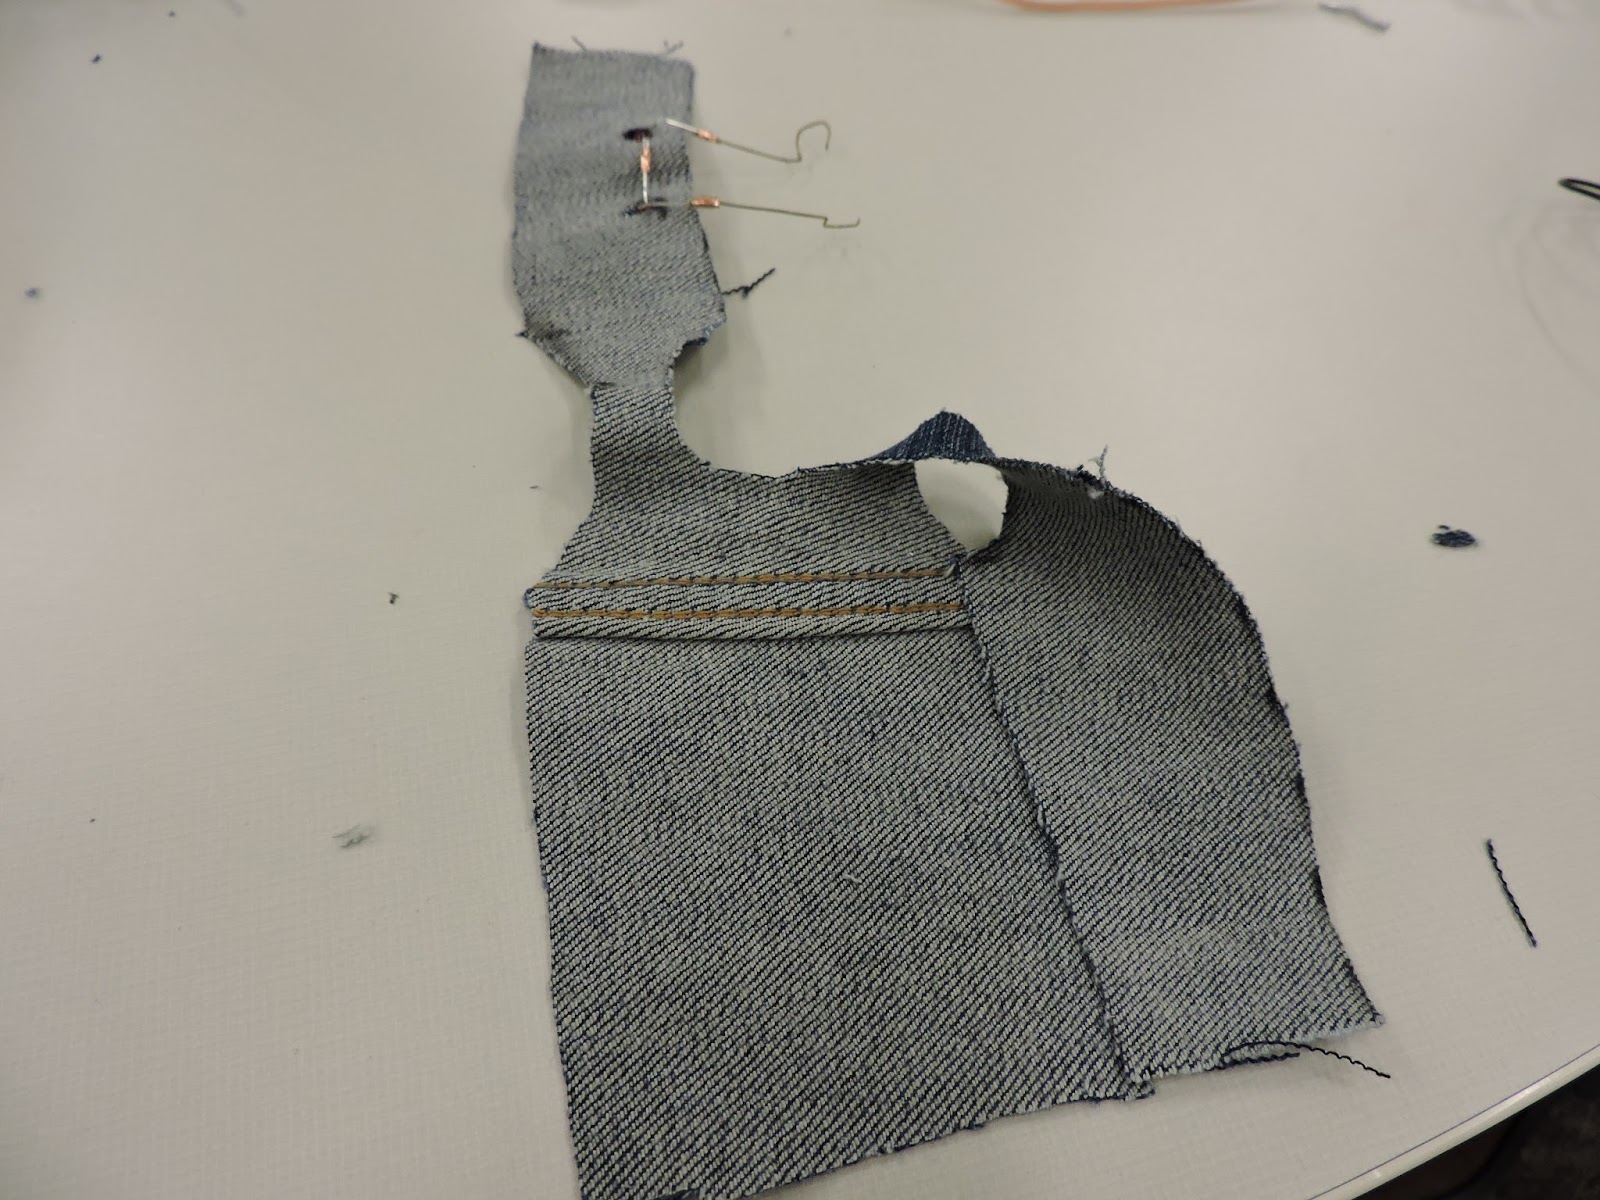
Step 2. Now you are going to construct the circuit of the LED Lights and add the hooks on them as well.
 |
| The Red LED Lights are connected via Negative and Positive together by using the Conductive tape The hooks are made of simple wire |
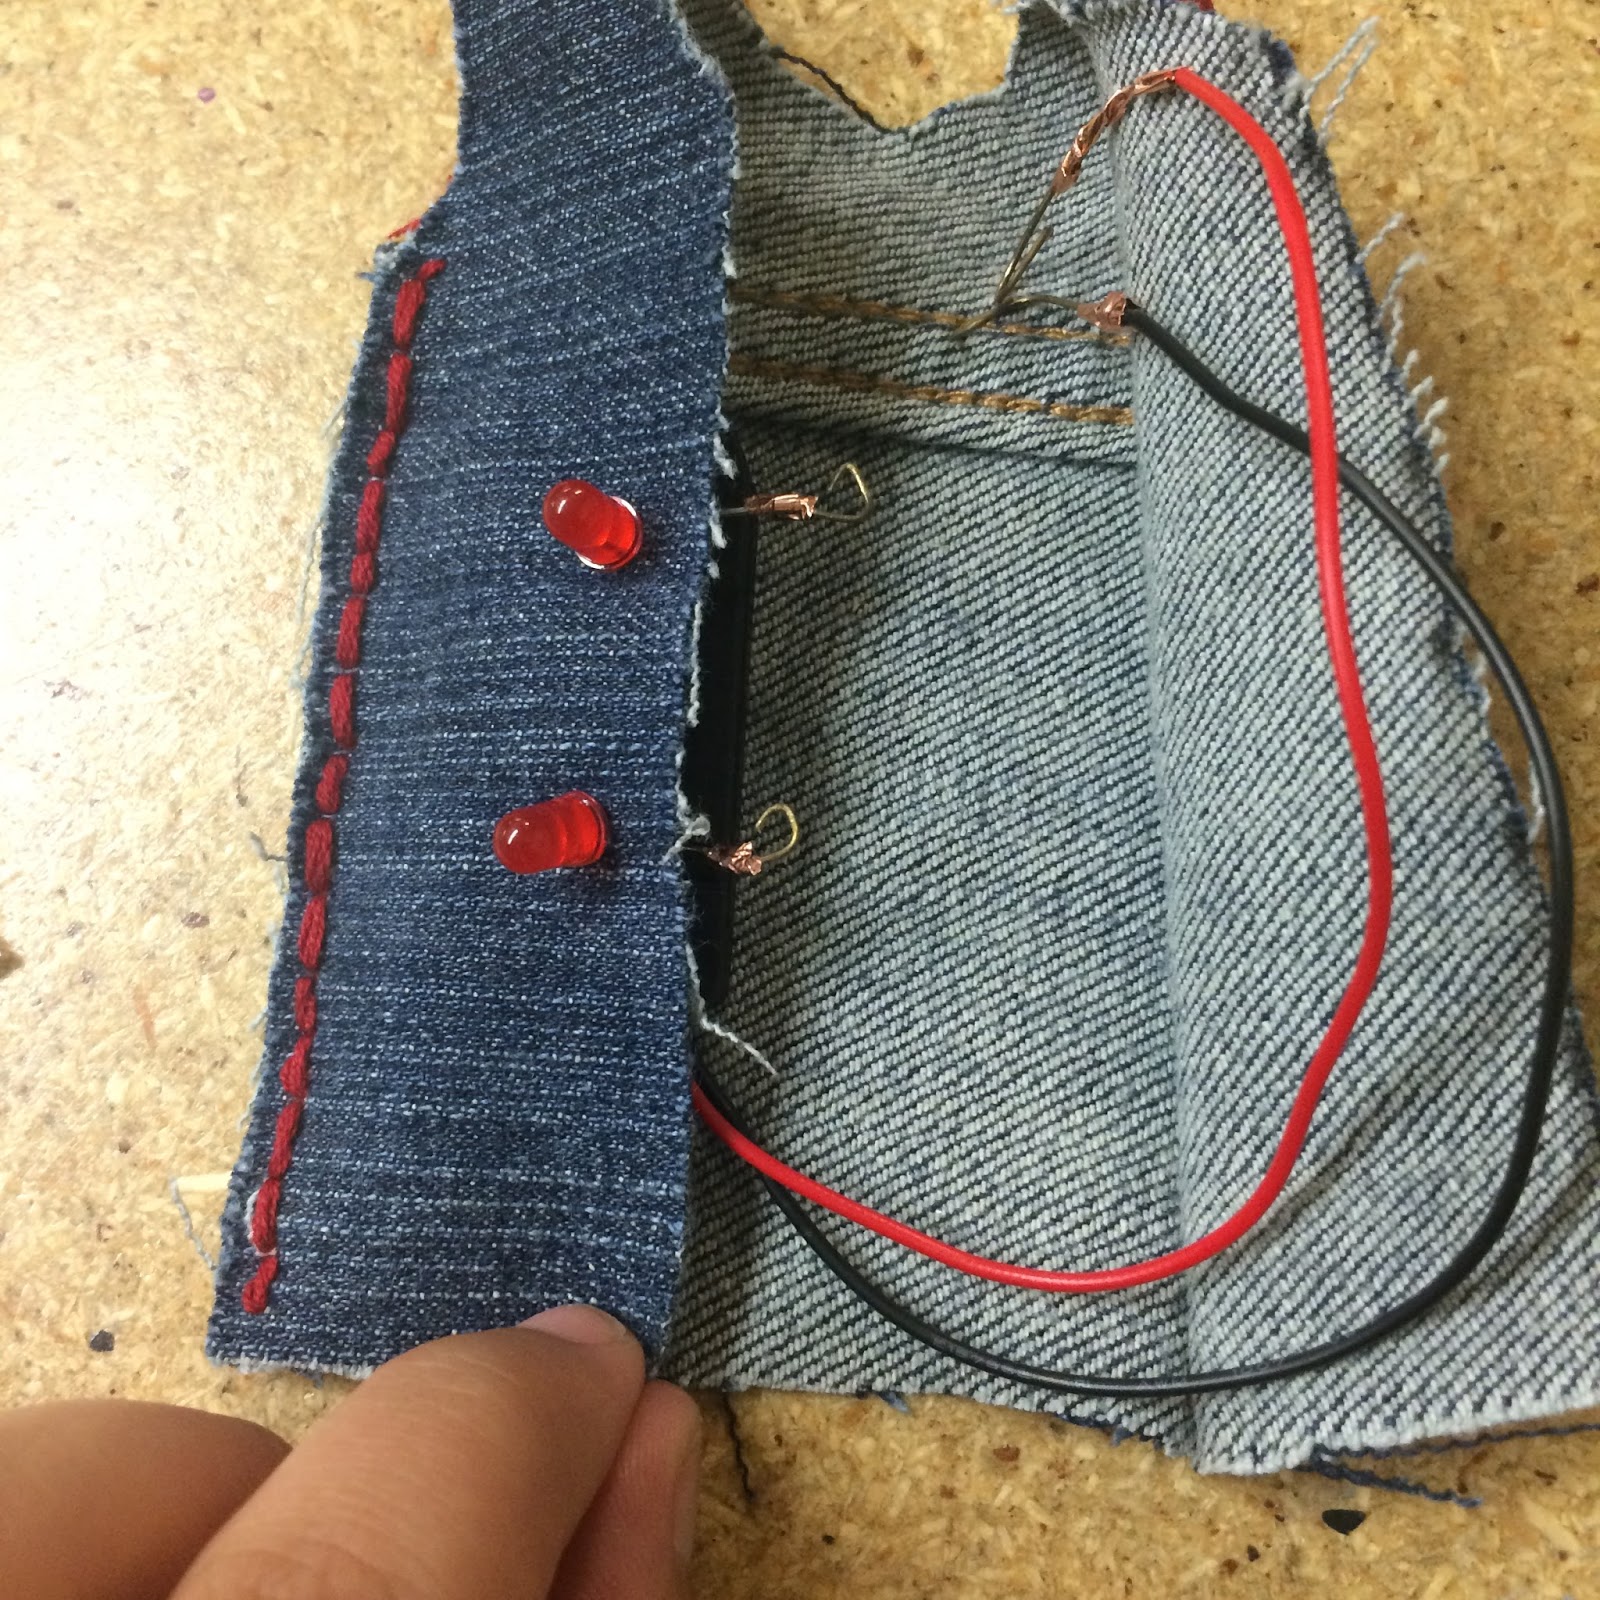
Step 3. Attach one pair of hooks to the LED lights the other to the button battery cell holder wires via connecting them Negative and Positive.
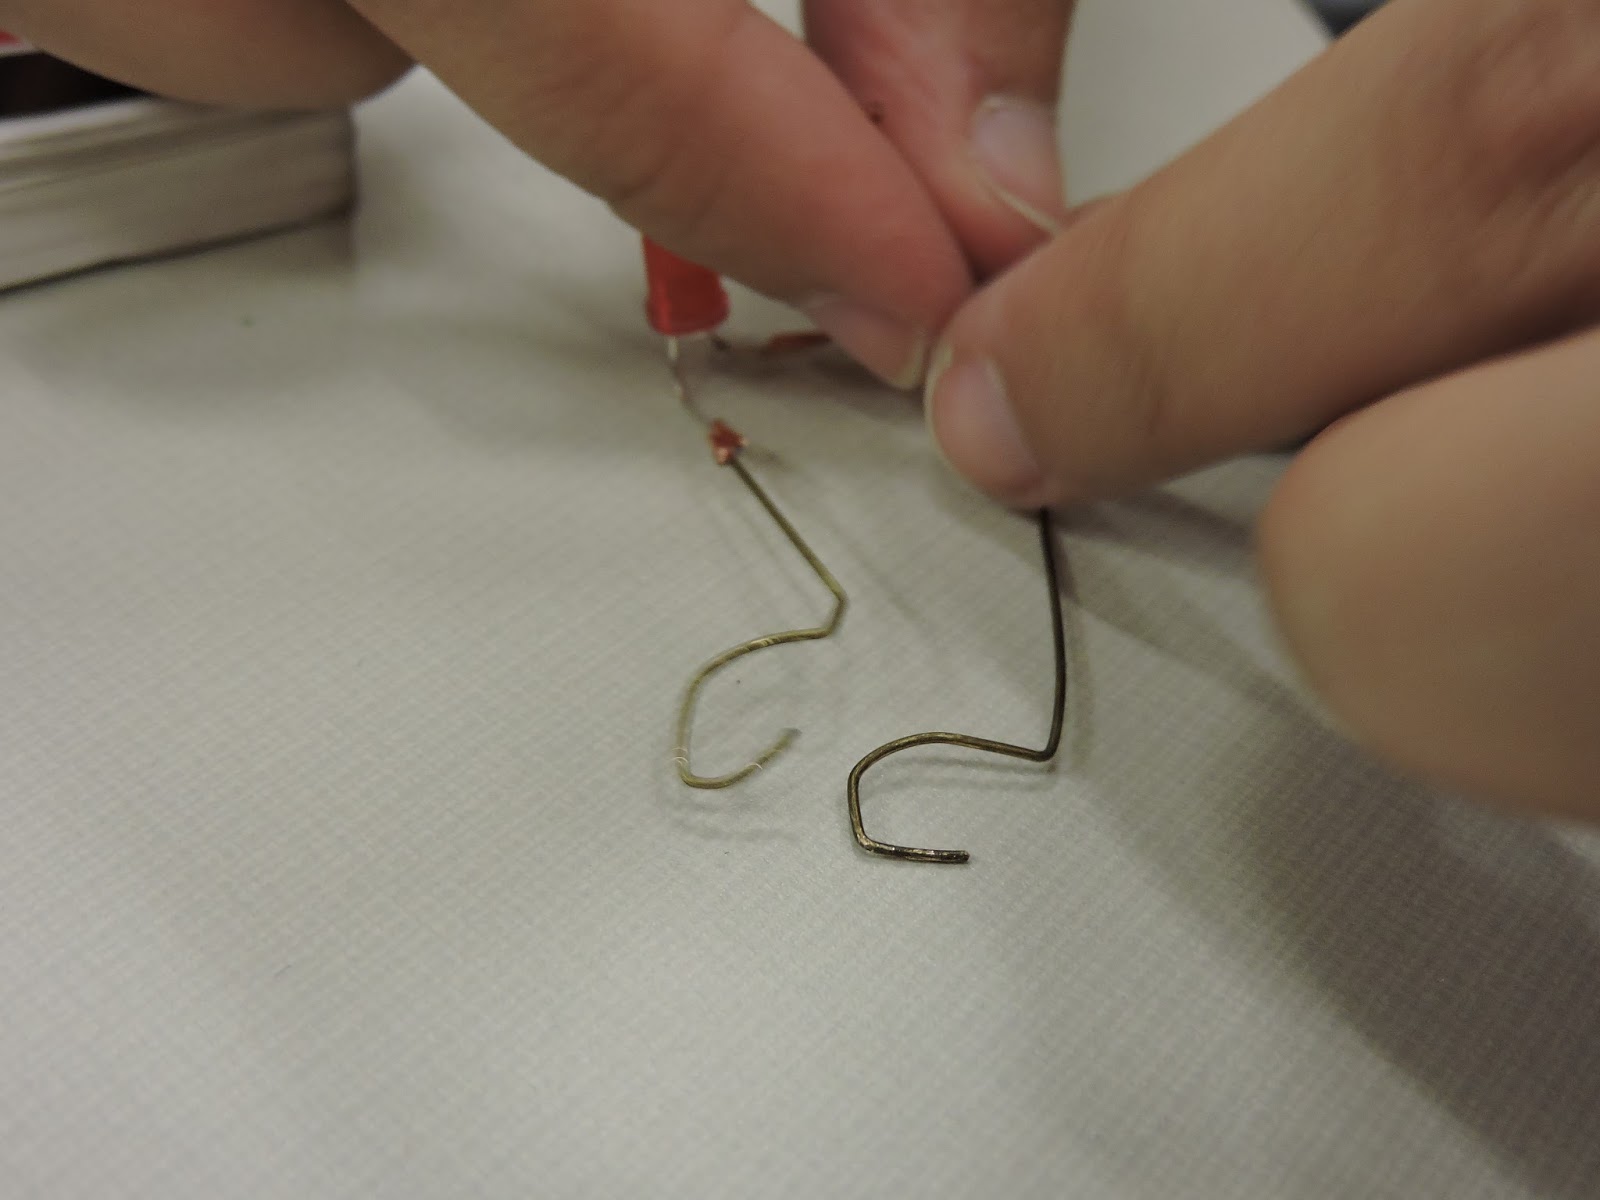 |
| Bend Them into hooks. |
Step 4. Now insert the LED lights into the holes made in the jacket to represent the Buttons.
 |
| The slashed lines for the Holes to go. |
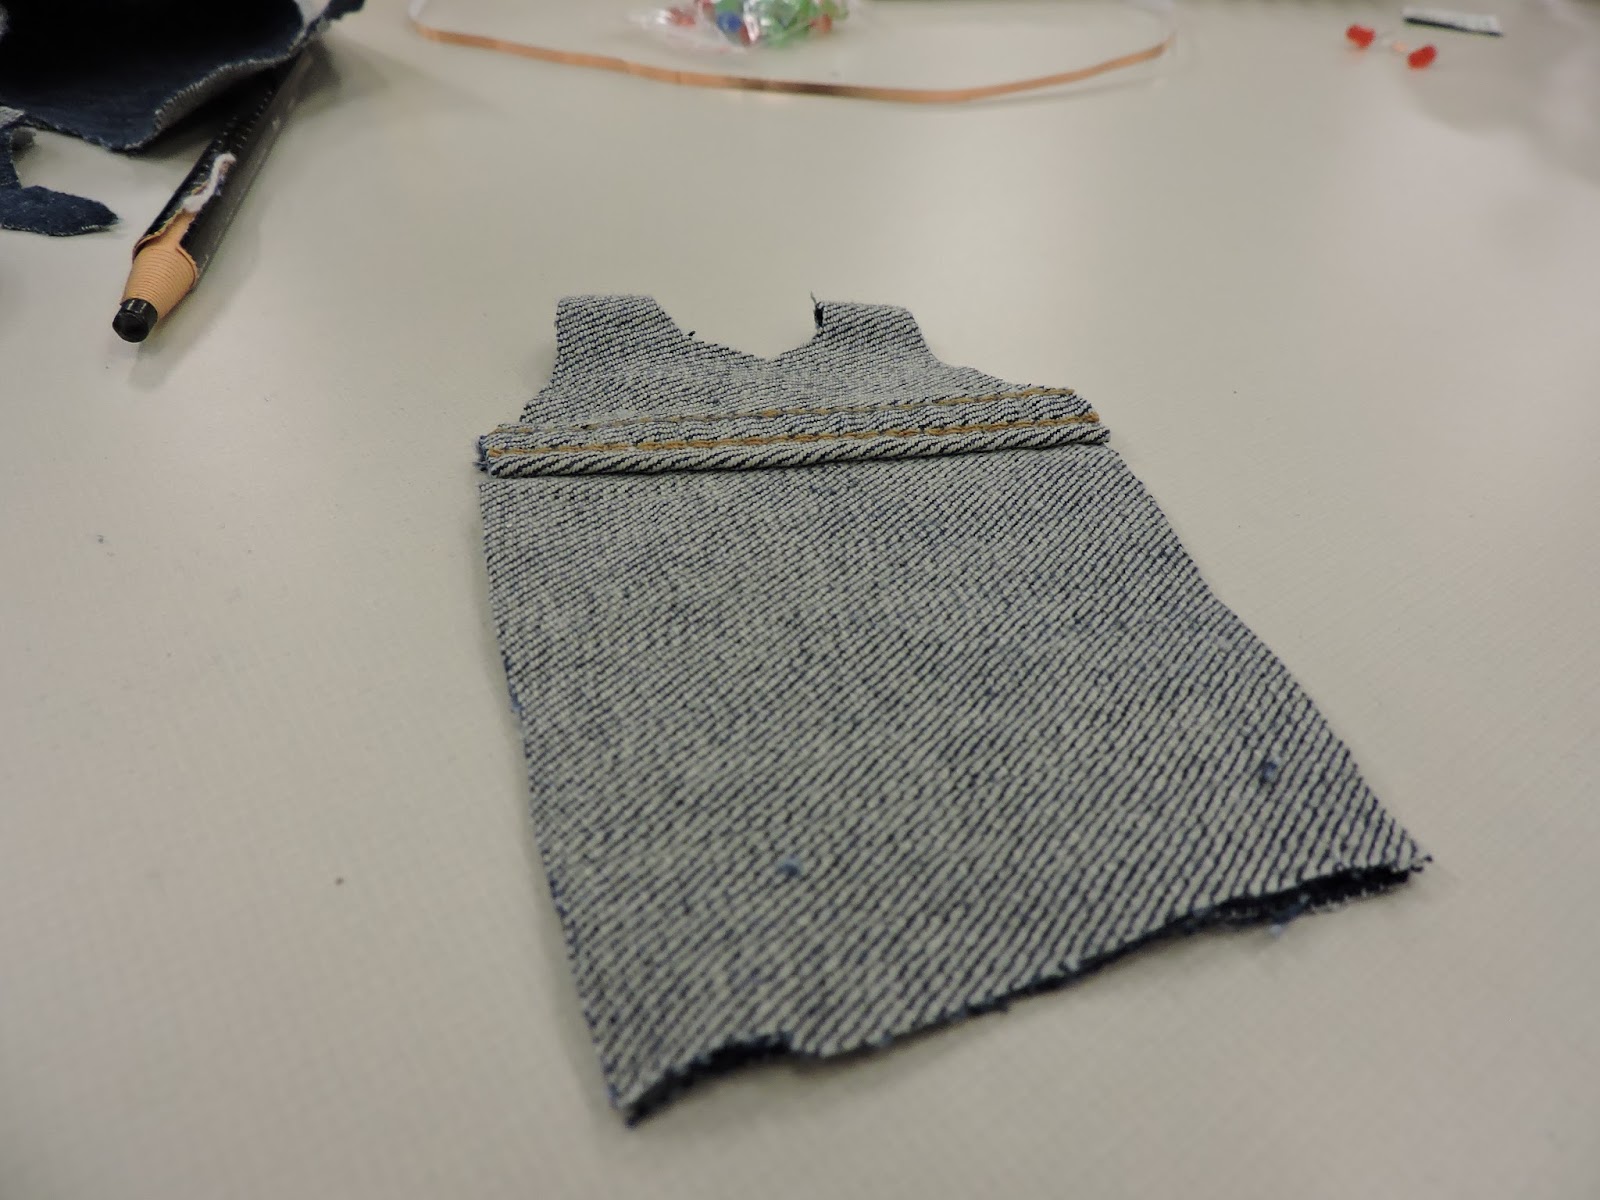
Step 5. Begin to sew your jacket together on the sides and place the LED lights onto one side.
 |
| along both sides and the top |
Step 6. Place the button battery Cell holder into the jacket and tape or sew it in. Once that’s done add the other pair of hooks as stated earlier to the Red and Black wire ends via the Negative and Positive sides.

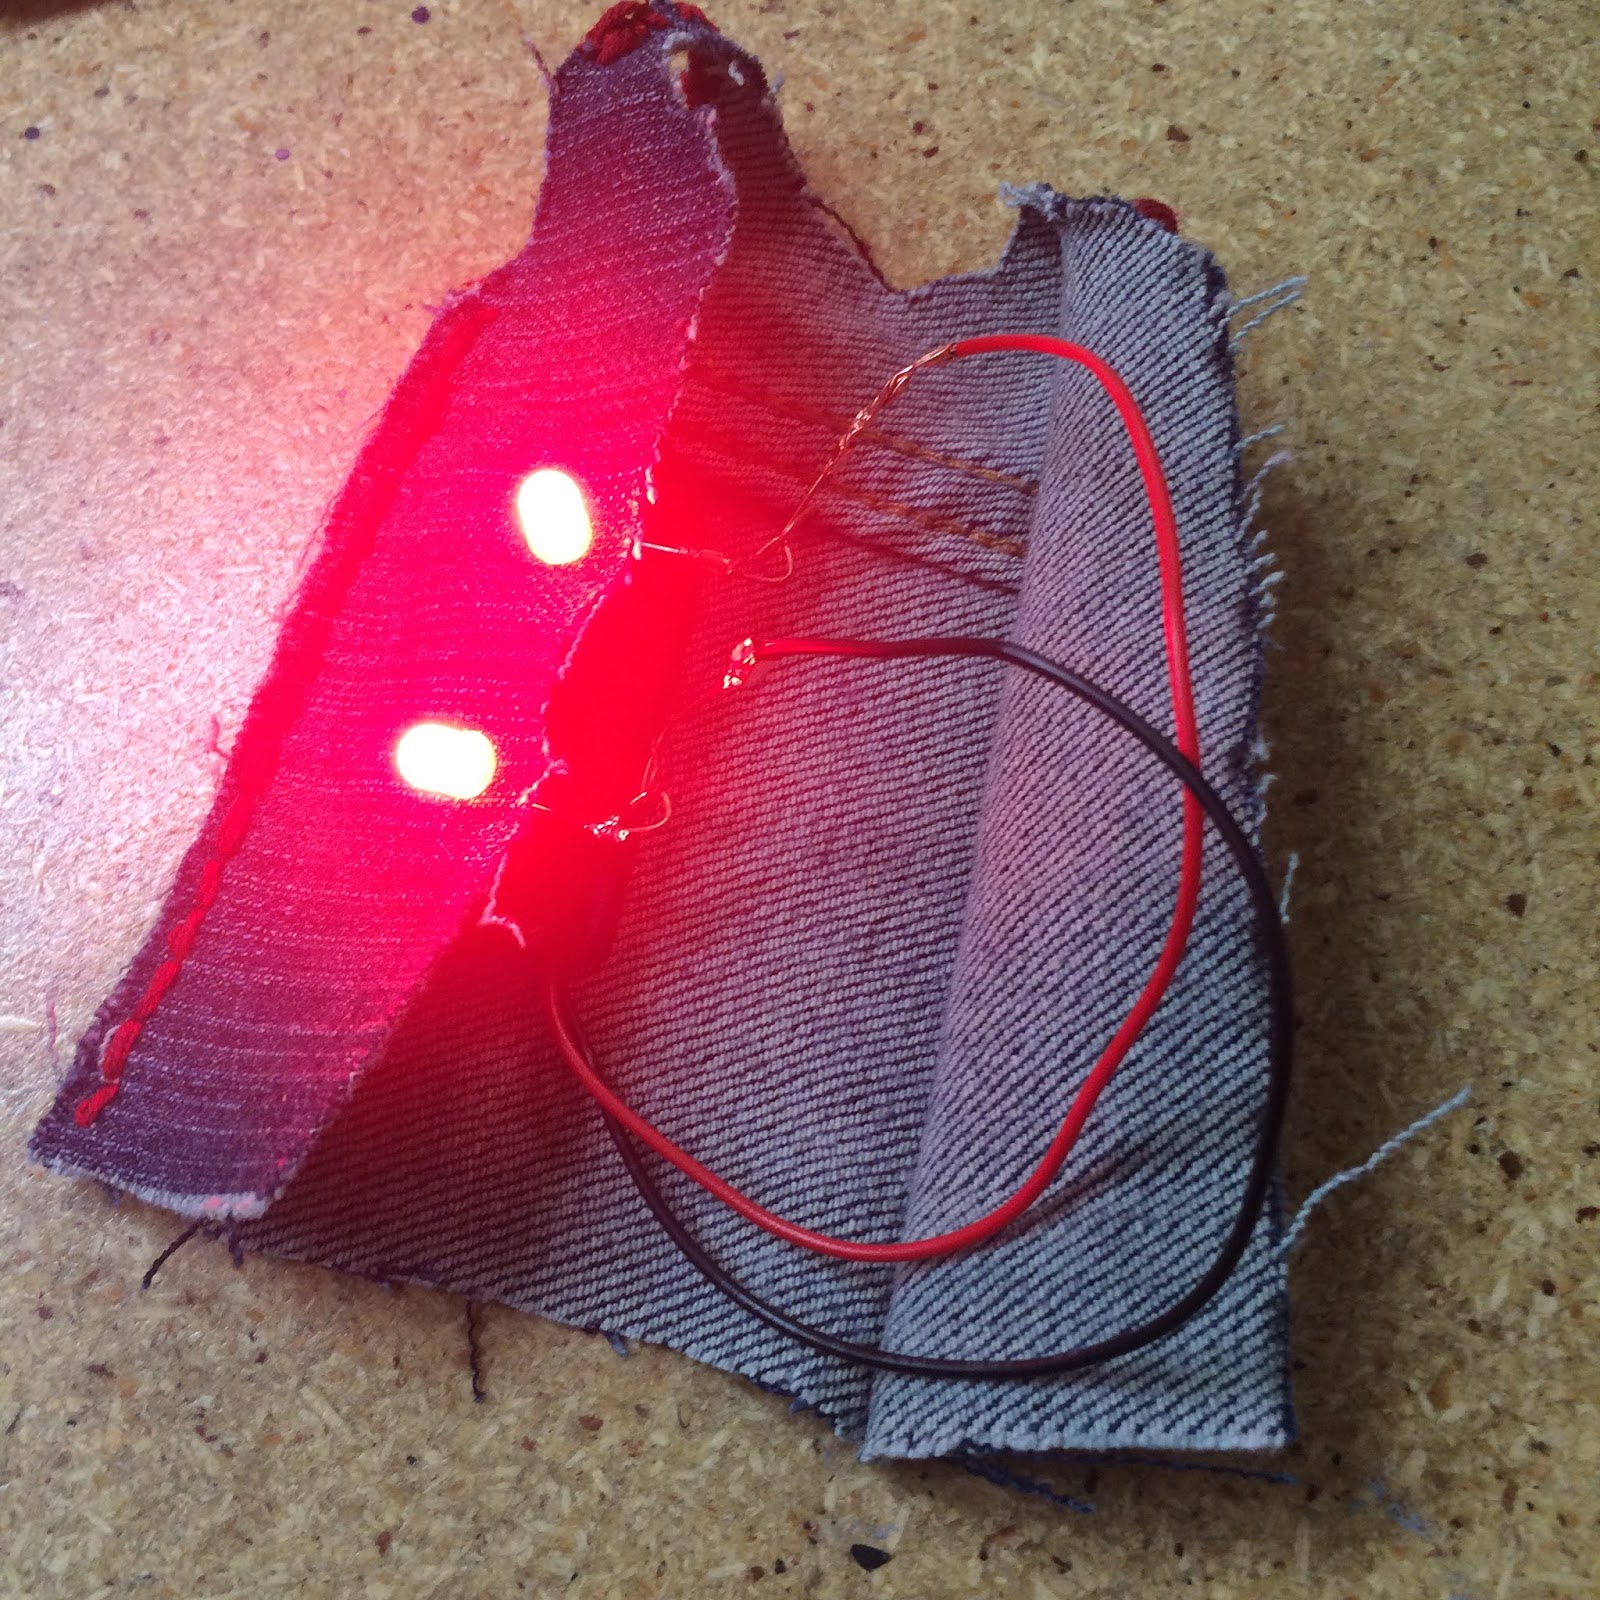 |
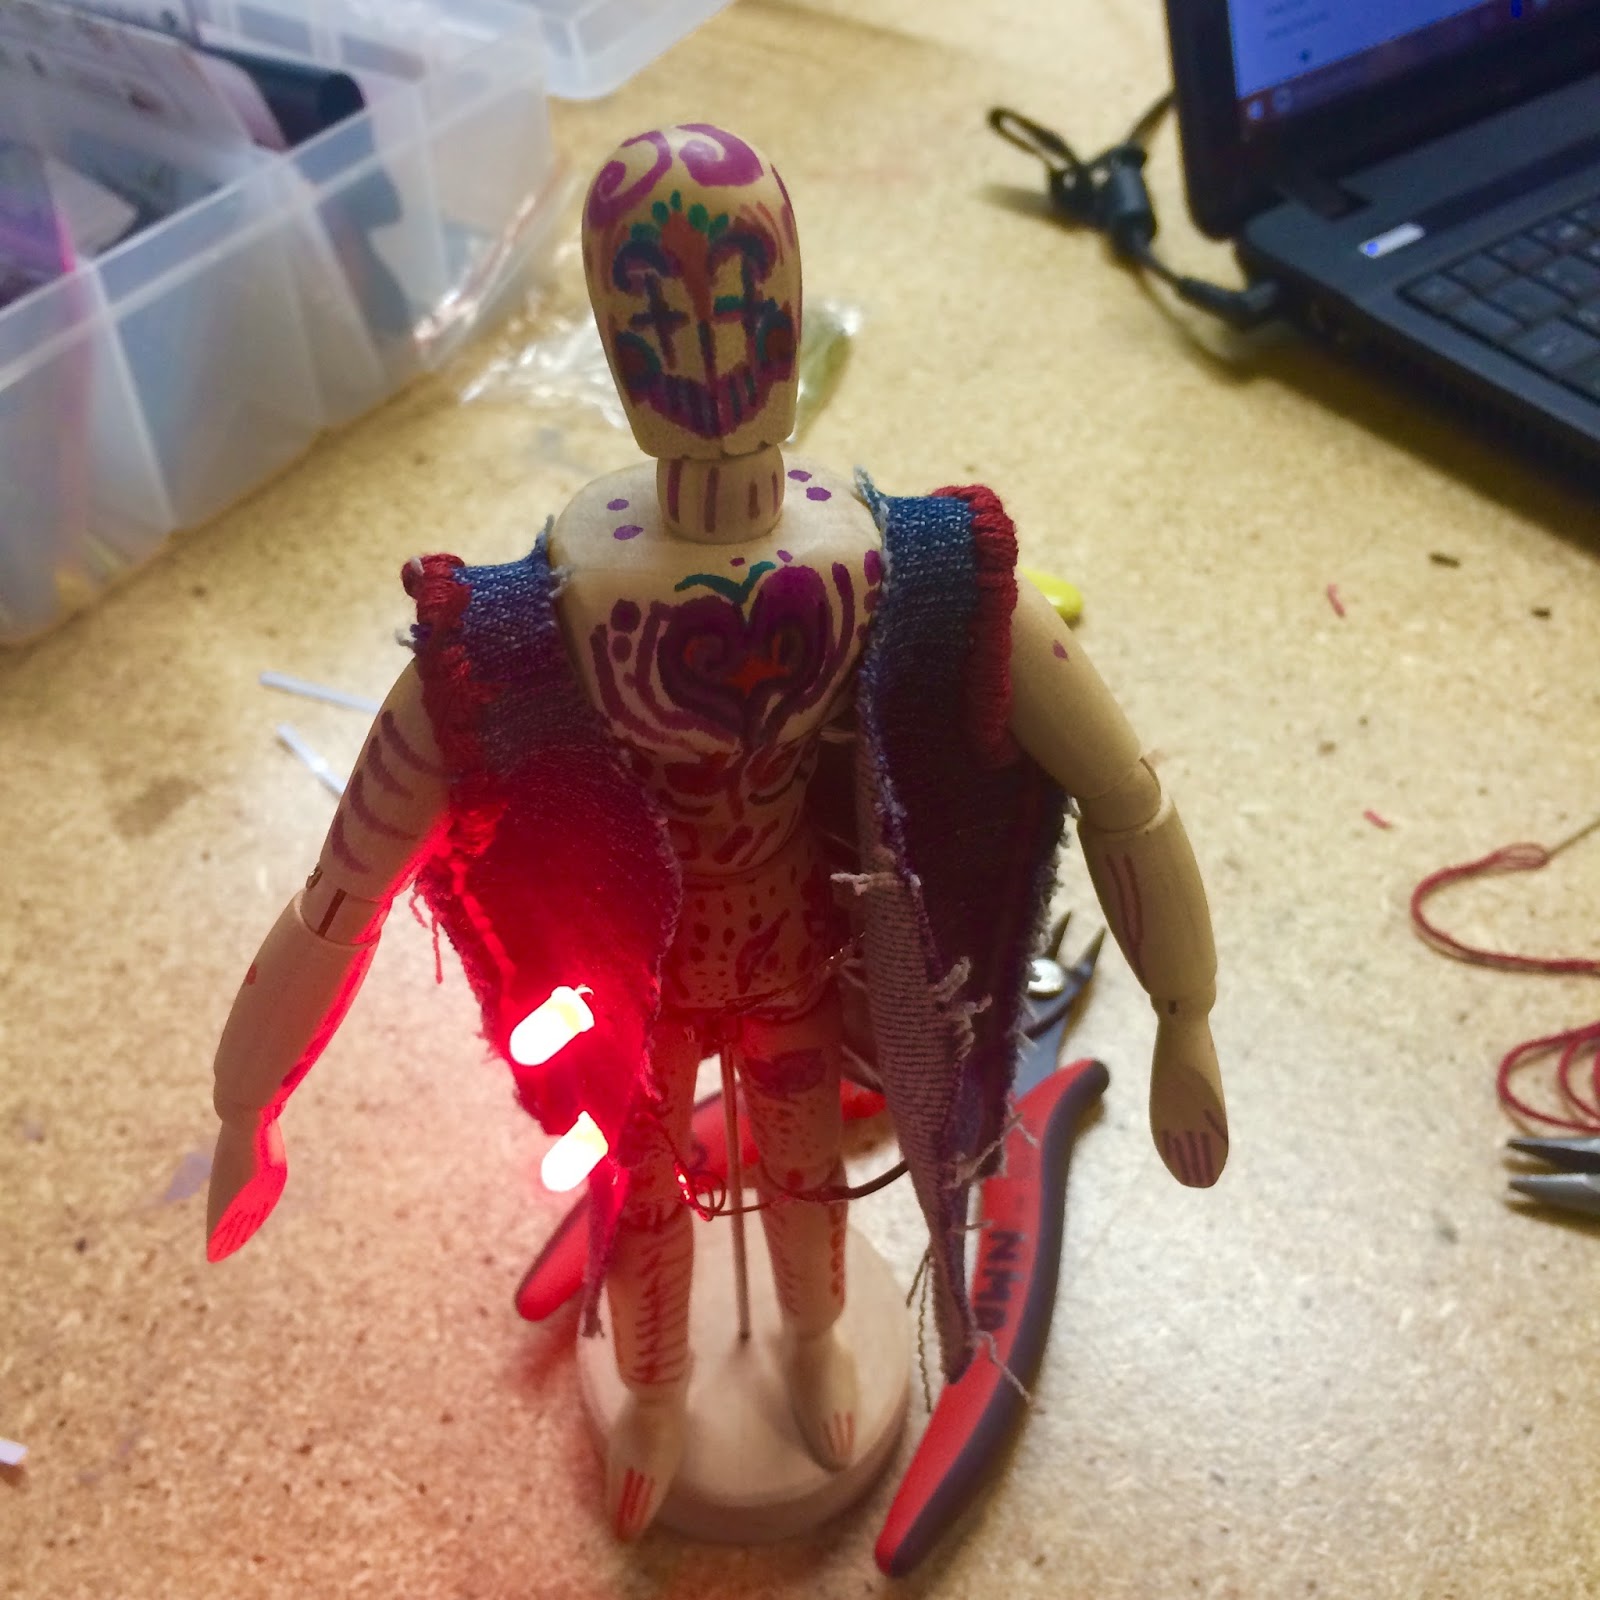
| Once everything is together and the test of the LED lights then you’re ready to add the Jacket to your model. |
Step 7.The Finished Product