Cup Lever Switch
Step 1 Materials
- A paper or plastic disposable cup
- One sided copper tape
- A metallic butter knife
- A push pin
- A 9-volt battery
- 2 3-volt LEDs
- 3 jumper leads
- Scissors
Step 2 Cup Modification
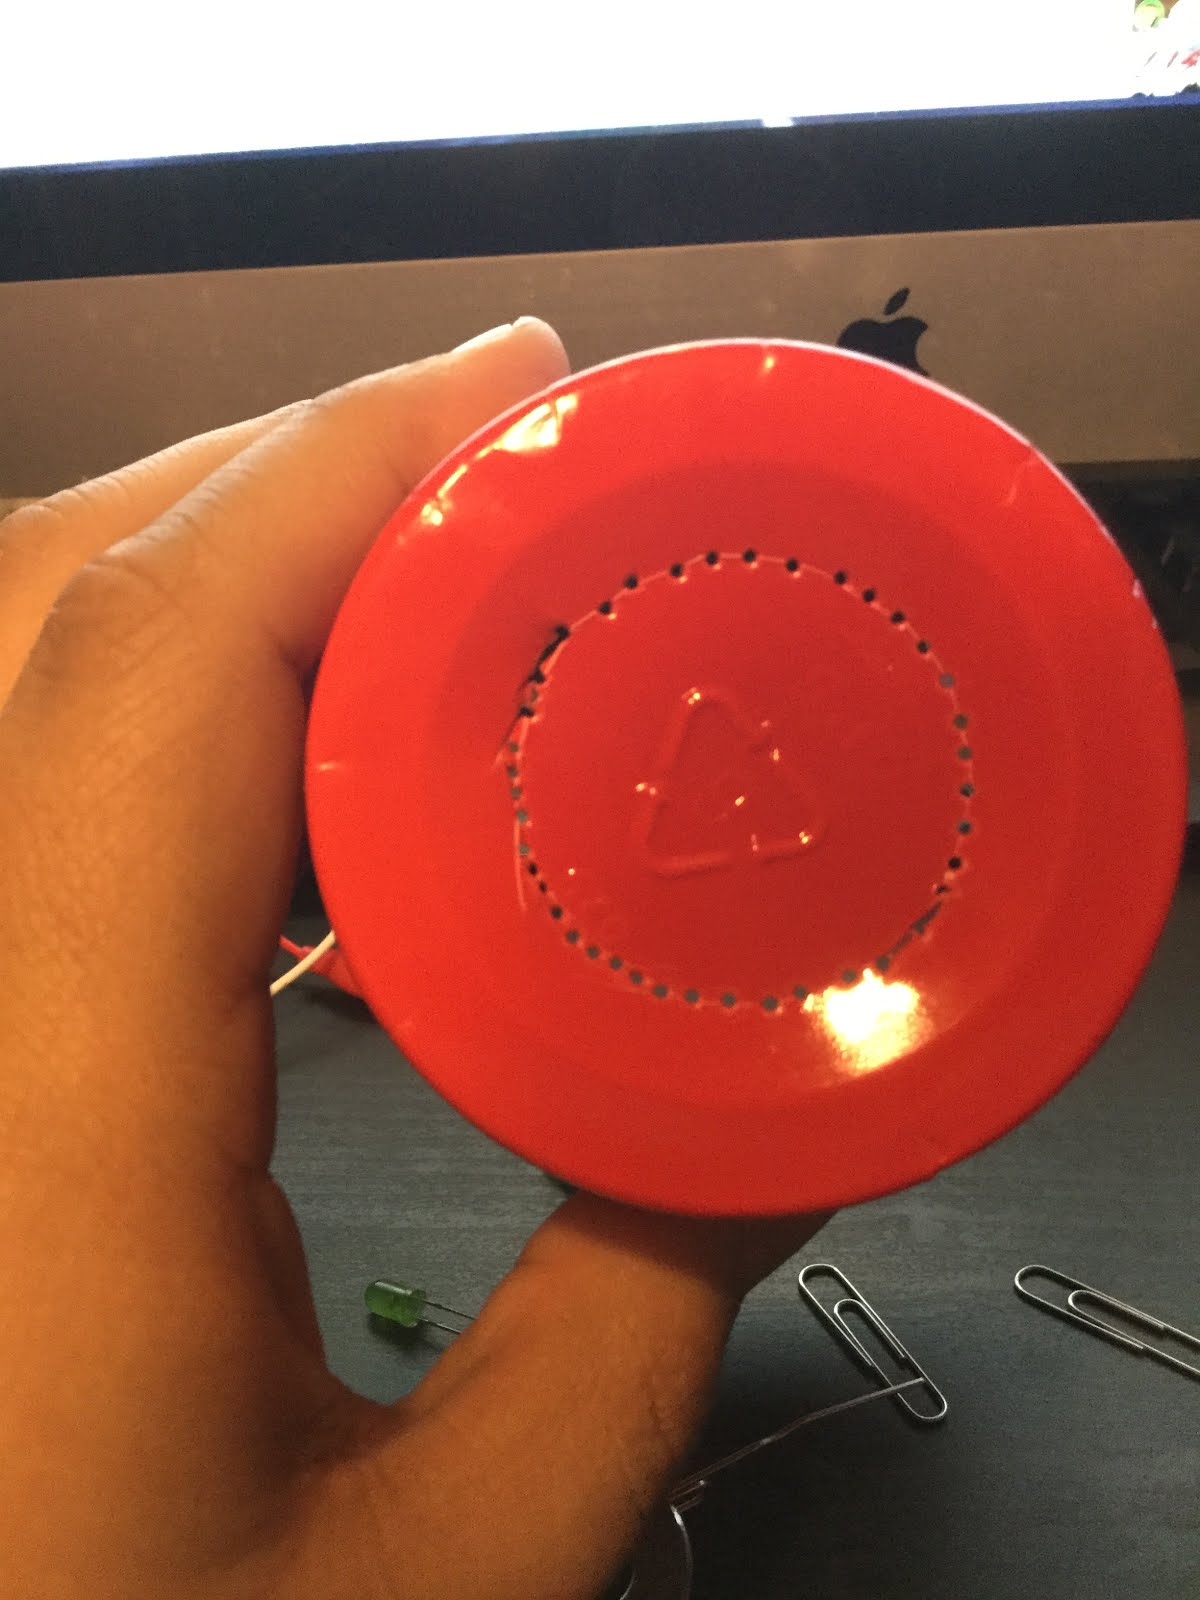
Begin by taking the push pin and poking holes into the bottom of the cup. After poking a ring into the bottom cut along the dots you just created and push out the bottom.
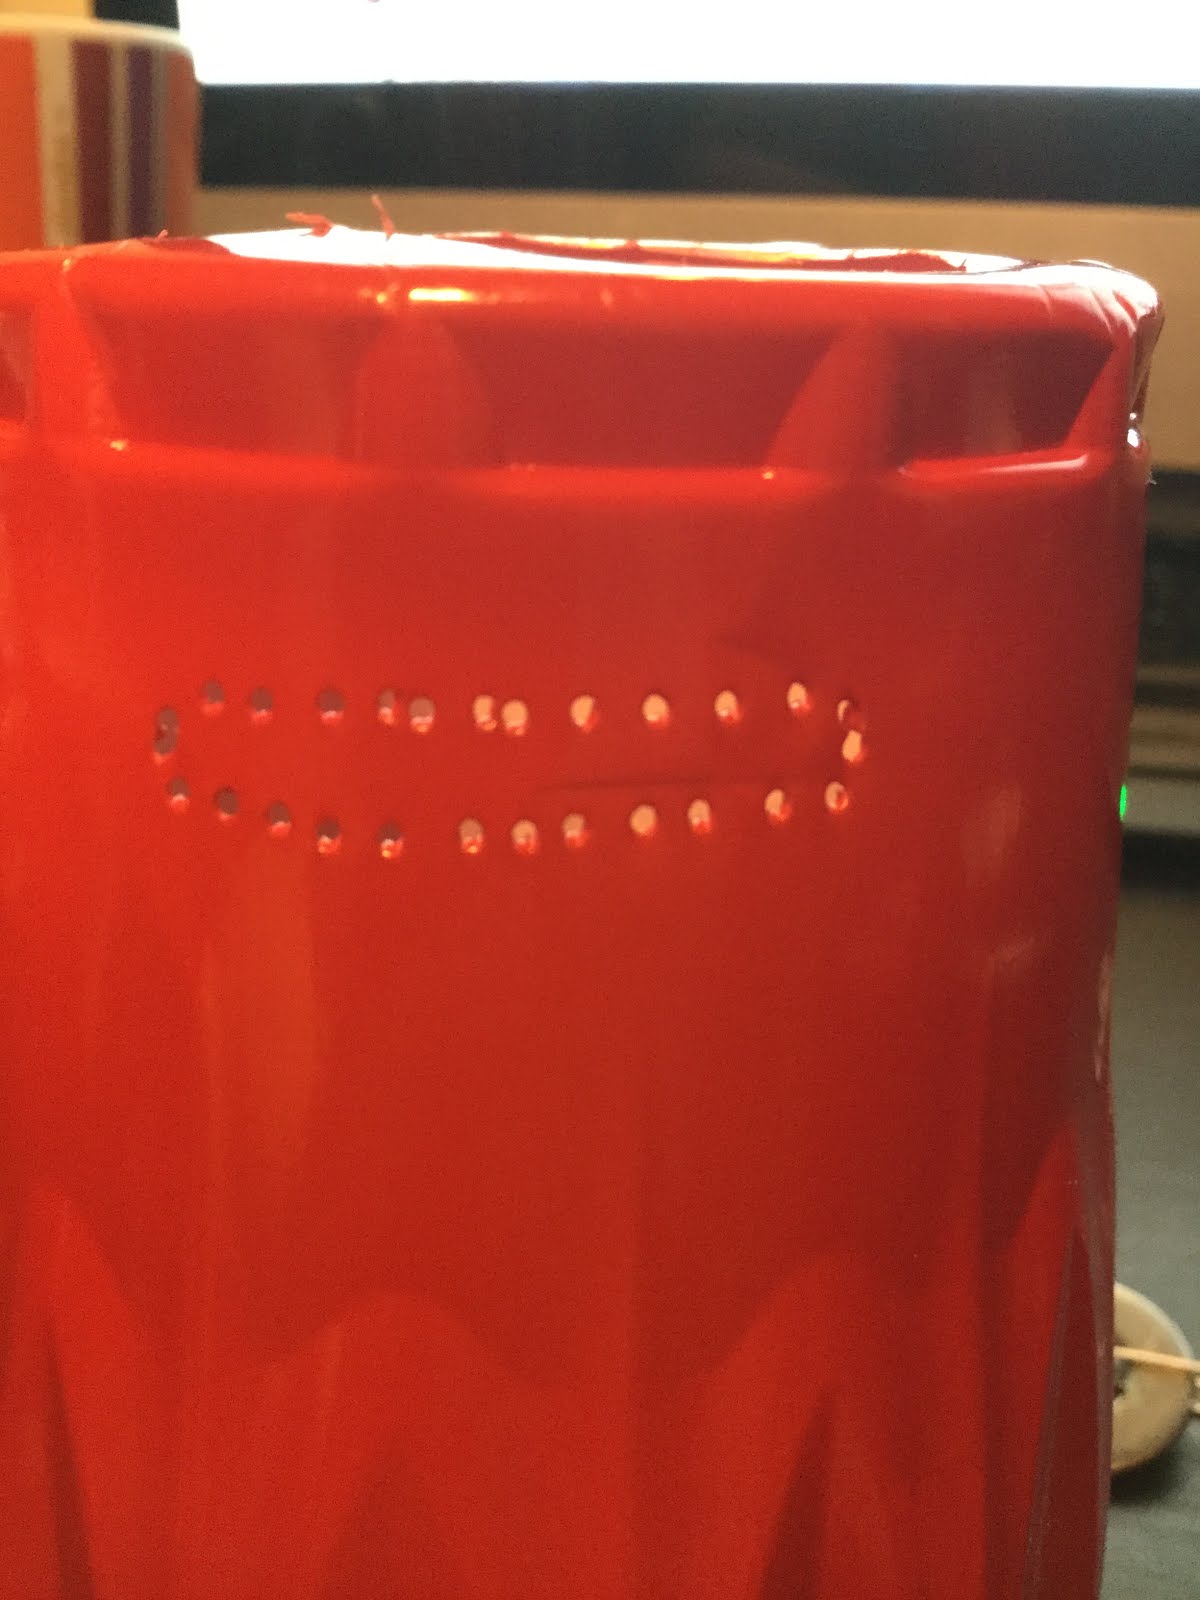
Then again use the push pin to create 2 holes along both sides of the cup that are 2 inches wide and a centimeter tall.
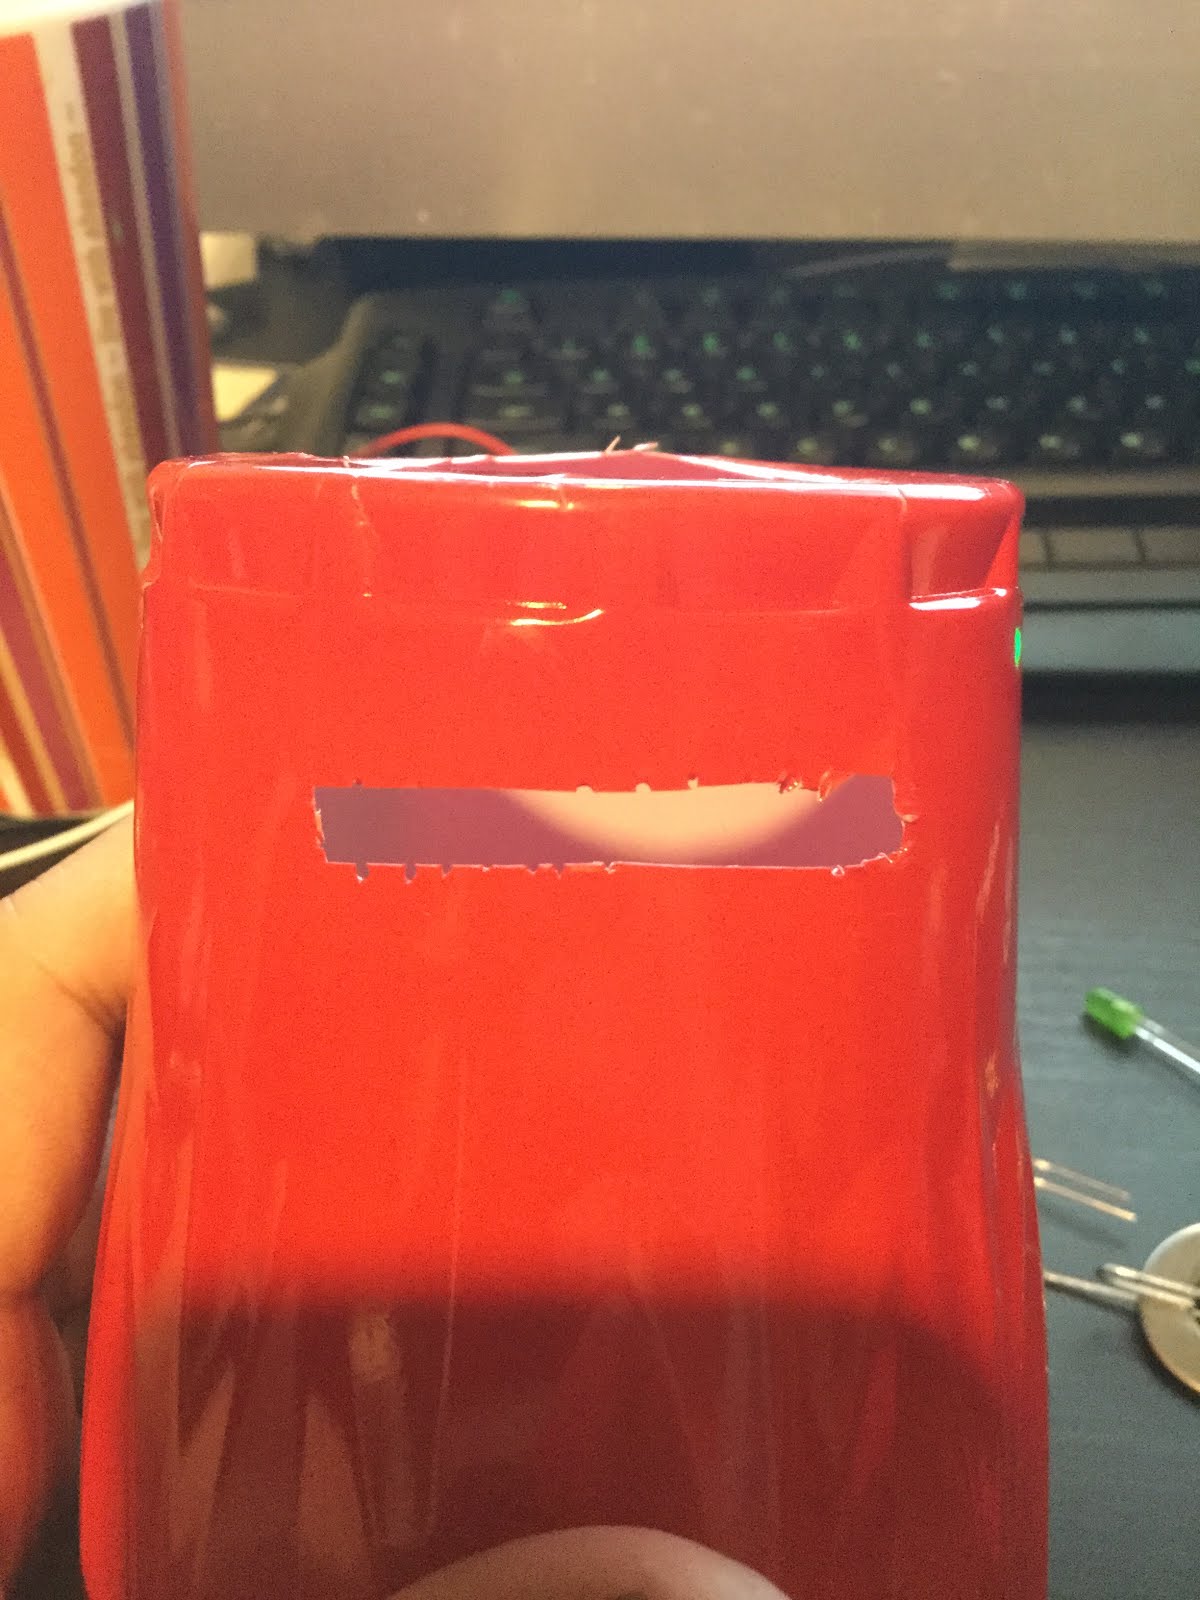
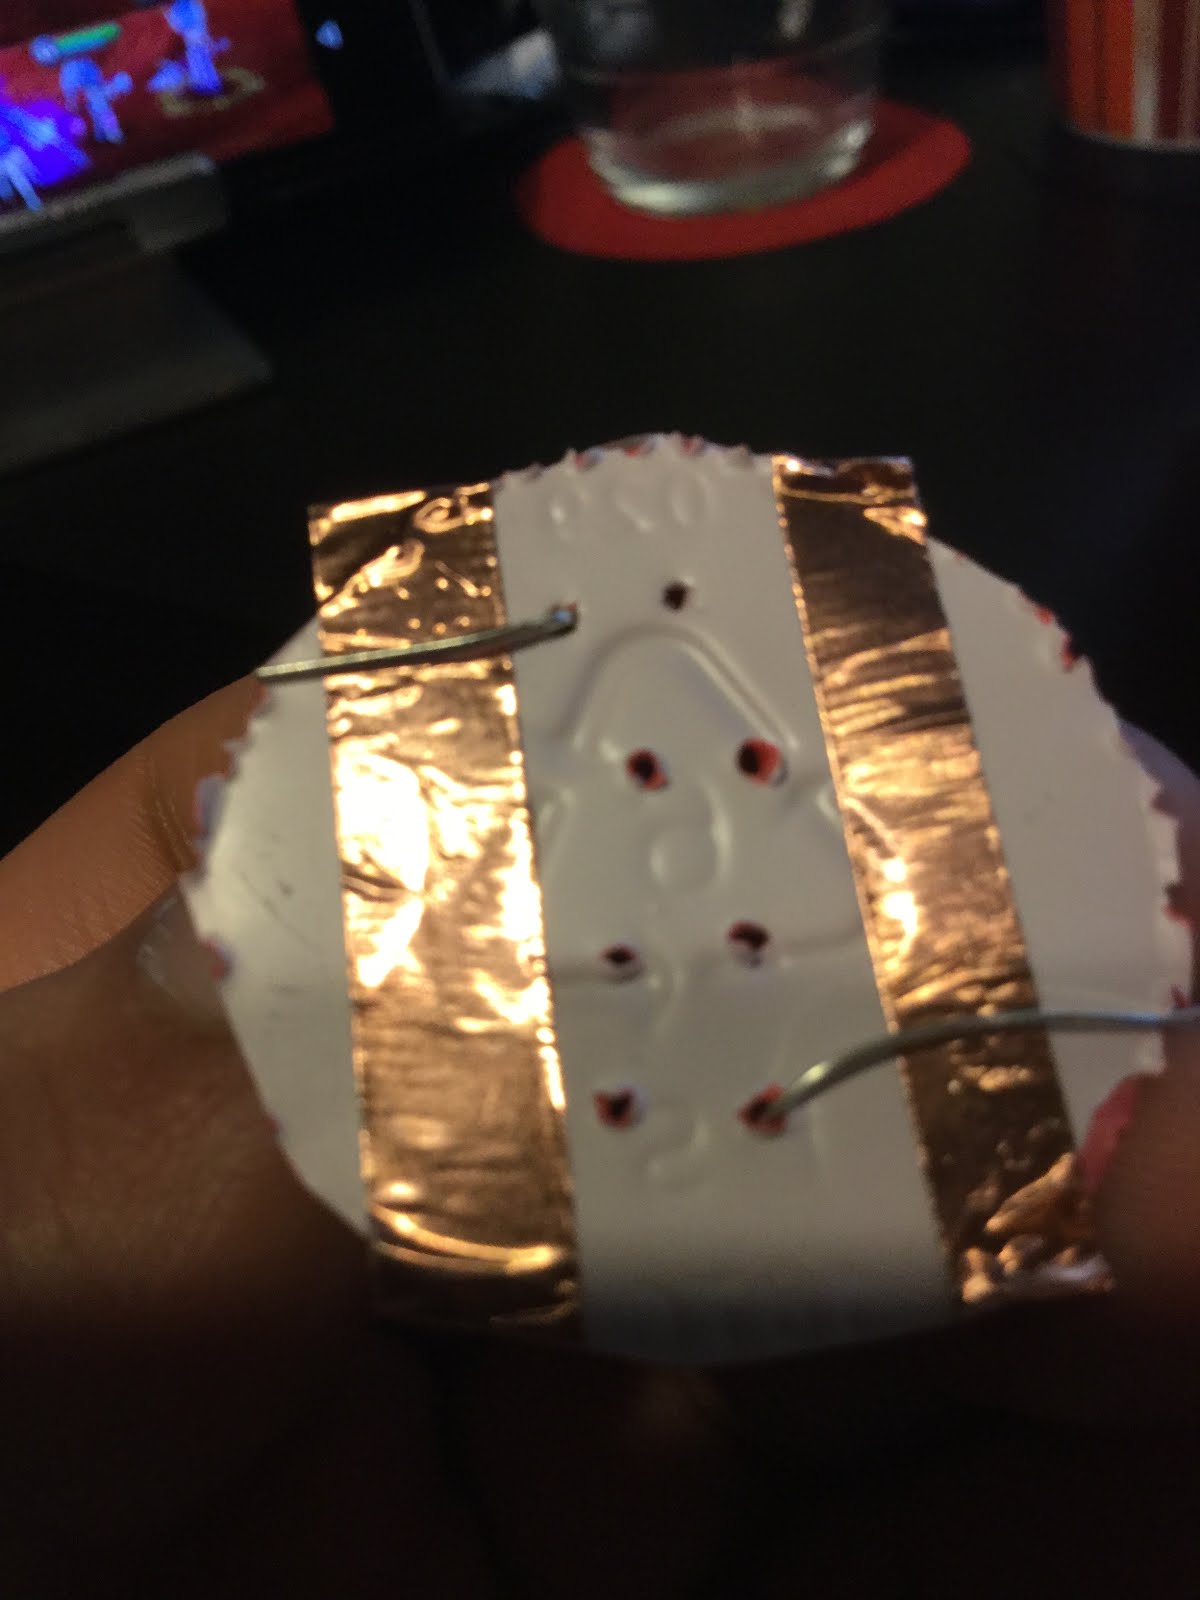
Remove this part as well. Take the removed bottom part of the cup and use the push pin one last time to create holes for the LEDs.
Step 3 Wiring
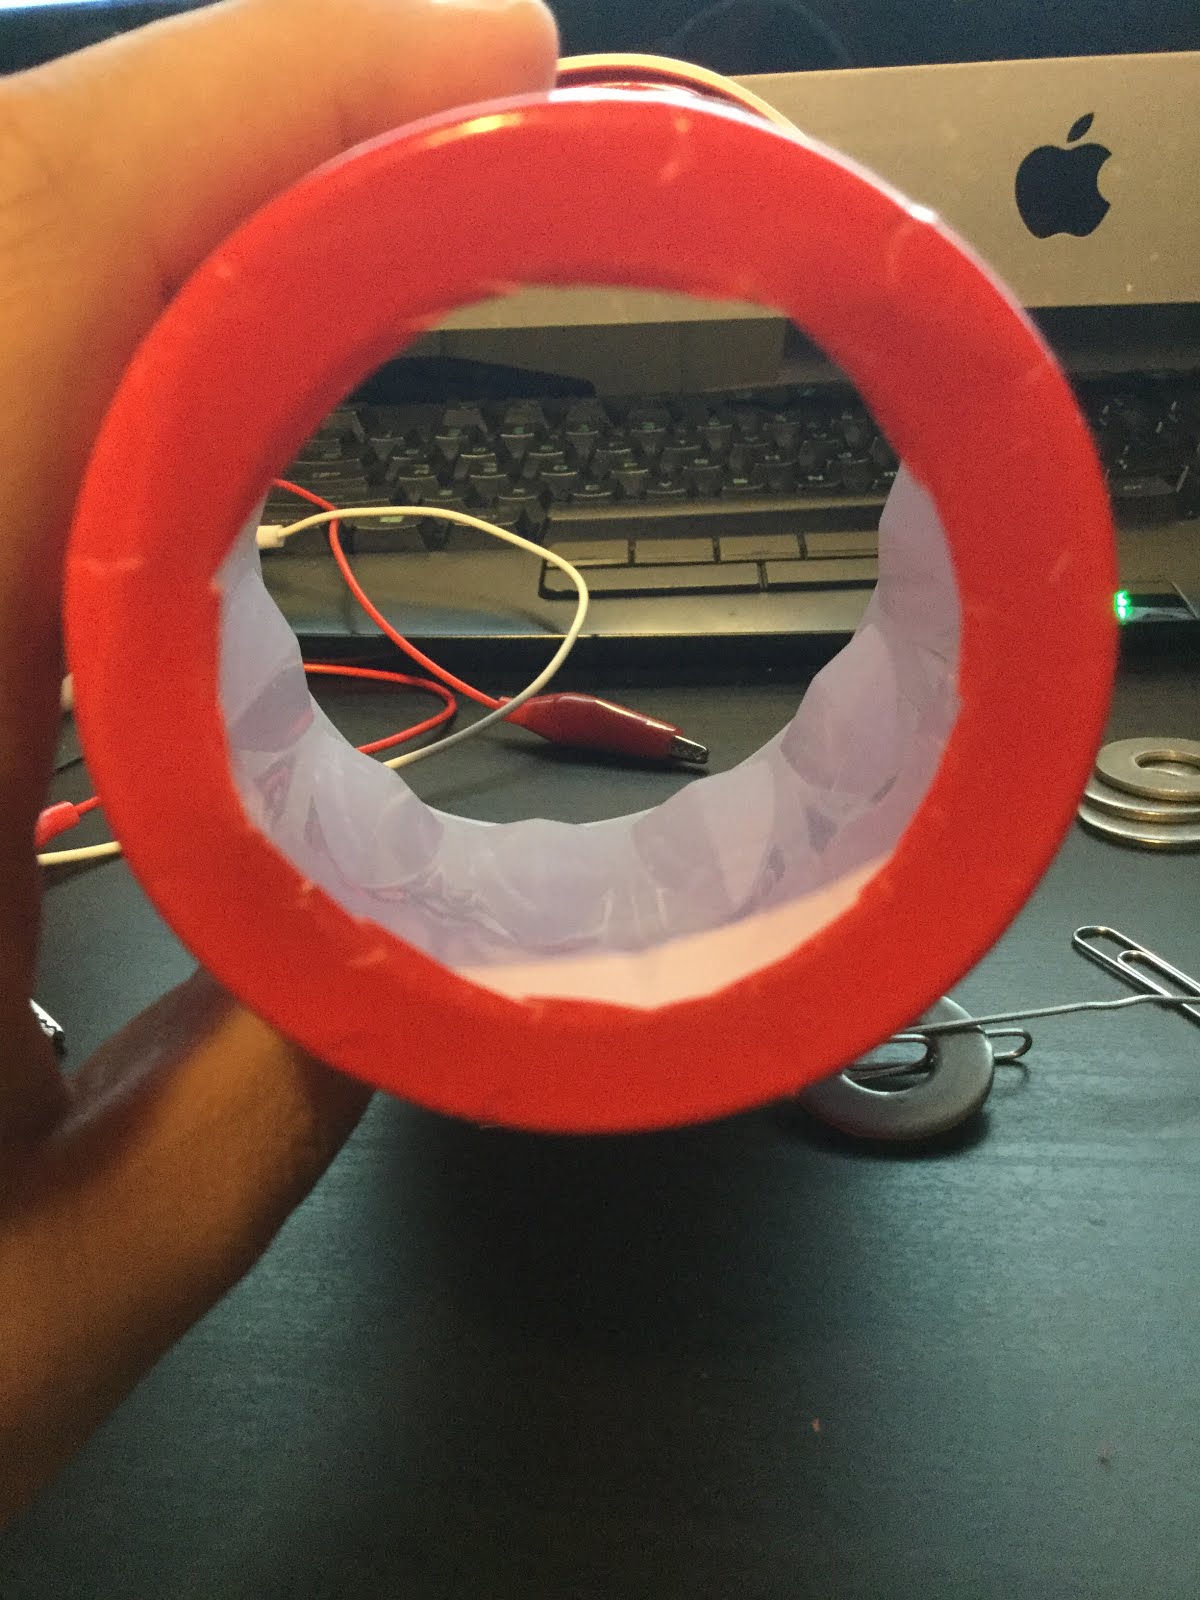
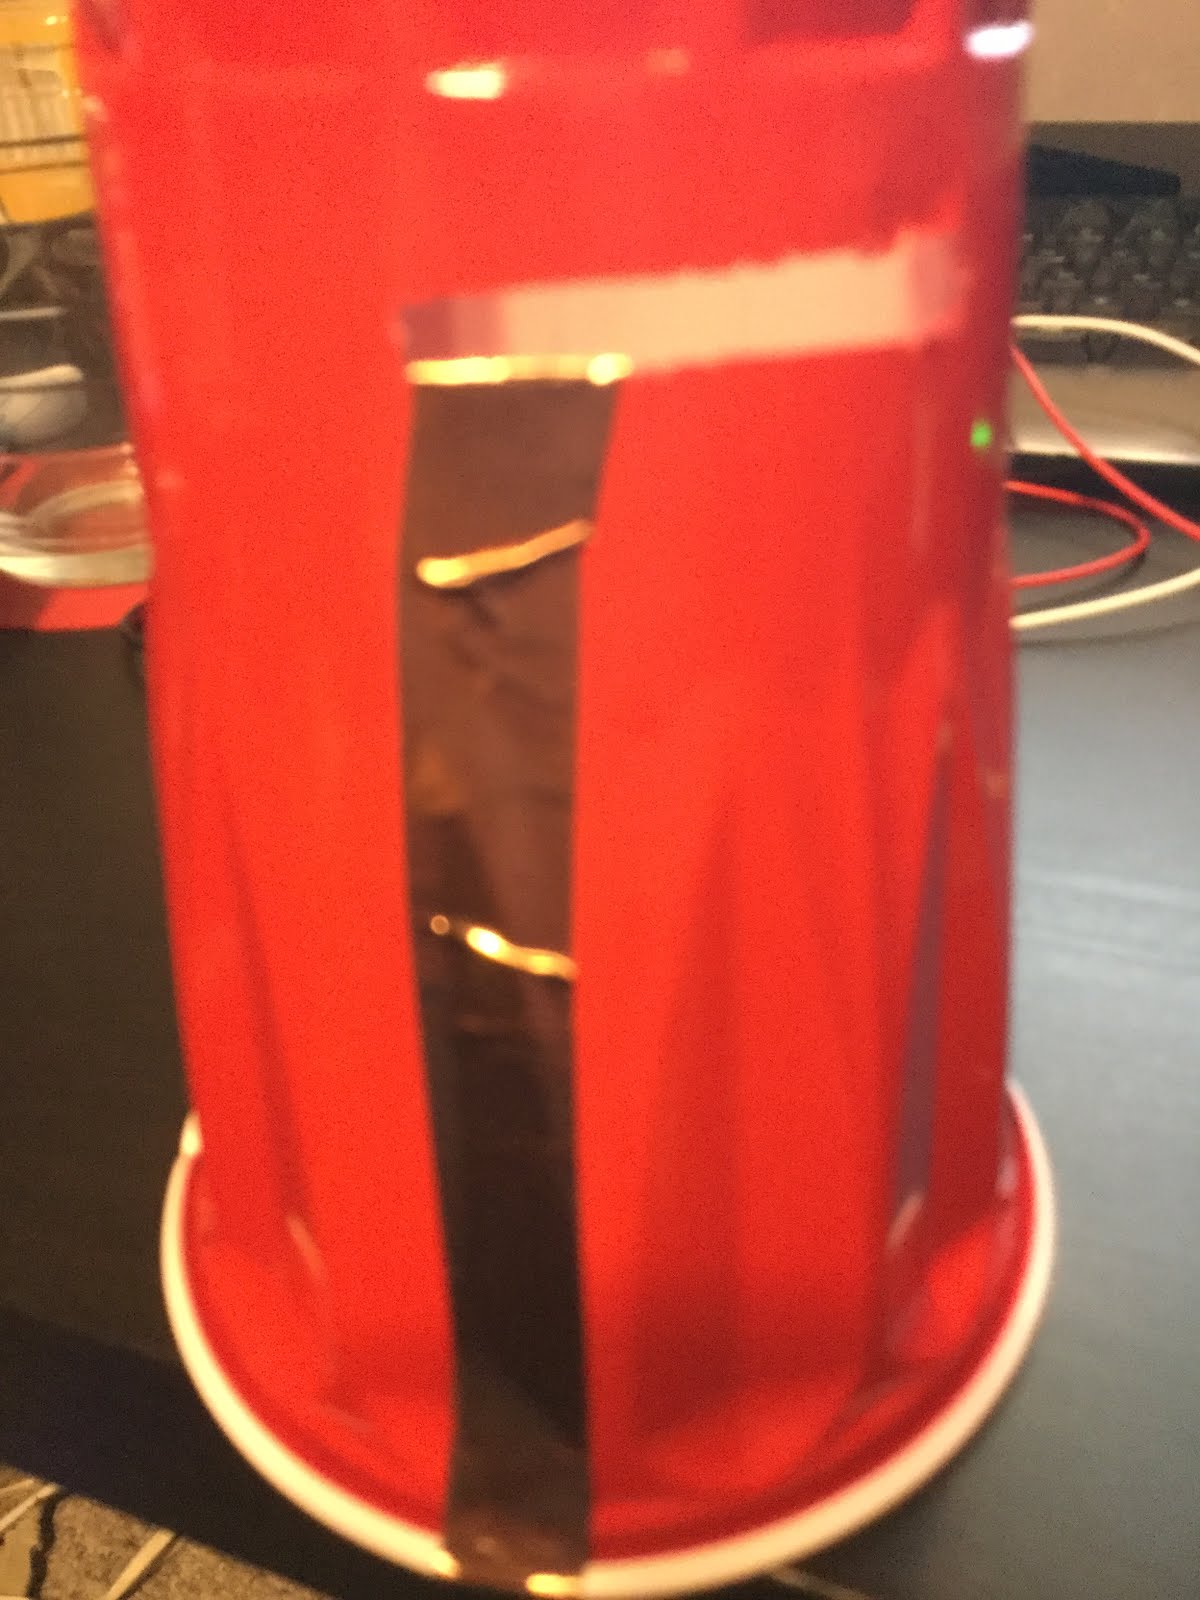
Cut the copper tape into strips that are the length of the bottom of the cup to the holes on the side and place them along the side of the cup. Make sure that they are on opposite sides of the holes and that they reach inside of the cup.

Next cut another piece of copper tape that is the length of the bottom of the cup. Cut the piece into 2 strands and place them on the cut off bottom.
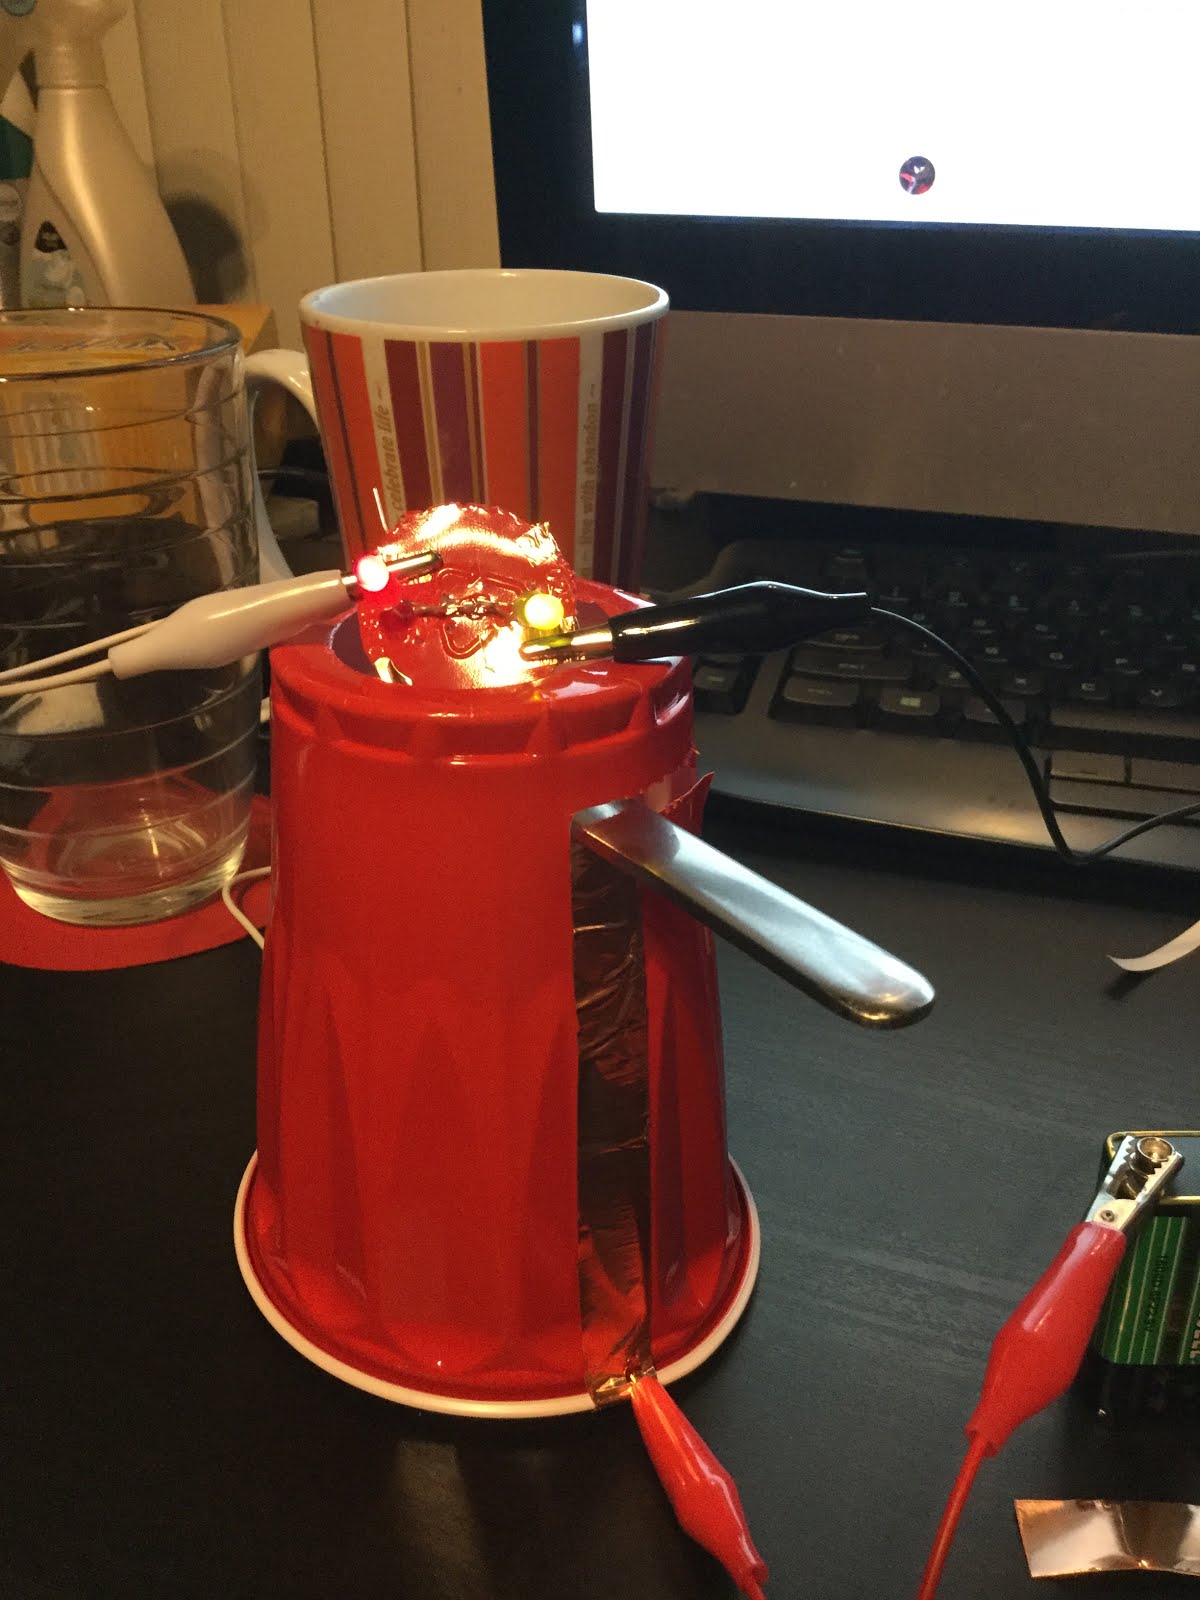
Step 4 Using the Switch
Place the LEDs into the removed bottom so that the legs touch the copper tape. Connect 2 of the jumper leads to the removed bottom on the copper tape and then connect one to the copper tape on the cup.
Take the third lead and connect it to the opposite end of the cup. Insert metallic butter knife into side holes of cup so that it’s not touching either end of the copper tape.

Finally connect jumper leads to battery and then switch on by touching the knife to both ends of copper tape. This will turn the lights on and off.