Winter LED GLove
Materials:
- 1 winter glove
- 2 LED lights (any color)
- 1 resistor
- 1 battery enclosure
- 2 3v button batteries
- copper cloth
- copper tape (optional)
- copper thread
- 1 wire
- 1 needle (for sowing)
- scissors
STEP 1:

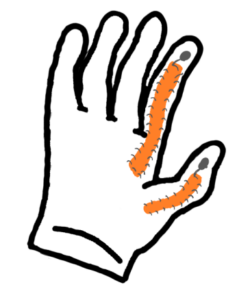
Start of by sowing the copper thread into the glove. One sow pattern should be on the tip of the index finger and the other should be on the top of the thumb. The sowing pattern does not matter; however, the copper thread pattern should be big enough to be visible enough and be able to make contact when the two fingers are touching.
STEP 2:
 Next. Flip the glove inside out. Using the scissors, cut 2 strips of copper cloth. Place each strip along the finger of the glove where the copper thread pattern was sown earlier. Then attach the copper cloth strips to the glove by using the copper thread. The glove should look like the image to the left.
STEP 3:
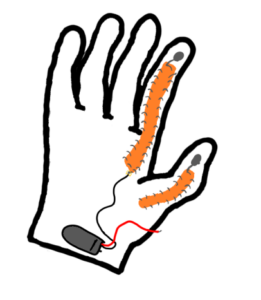
 Next. Place the 2 3v button batteries into the battery enclosure and place the enclosure on the glove, on the wrist. Attach the battery enclosure by sowing it to the glove. Then attach the black wire from the battery onto the copper cloth. To attach the wire, either solder the tow together or sow them together using the copper thread and wrap copper tape to keep the two pieces together and conductive.
STEP 4:

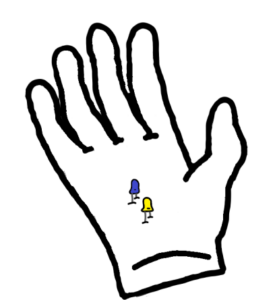
Next flip the glove back to normal, having all the wires on the inside of the glove. Then turn the glove so that the copper thread patterns are on the opposite side. Place 2 LED’s into the glove so that the ends of the LED’s are on the inside of the glove.
STEP 5:
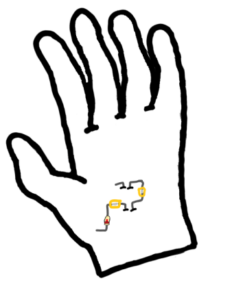
 On the inside of the glove, attach one of the LED’s leg to the other LED. the current should be able to run through it so the legs should match positive(+) to negative(-). Then attach a receptor to the other leg. The glove should look like the image.
STEP 6:
 On the other side of the glove is the battery enclosure with a lose red wire. Move the red wire to the side of the glove where the LEDs are. attach the red wire to the end of the receptor. Then grab an extra wire and attach one of the ends to the other leg of the LED.
STEP 7:
 To complete the circuit, just attach the wire that was attached to the LED and connect it to the copper cloth that is placed along the thumb.
The way this works is because when the thumb and index finger touch, the circuit closes which allows the power from the battery loop around which lights up the LEDS.