Materials Required
- One blank sheet of 9 x 12 in. Mixed media paper
- One blank sheet of standard letter-size printer paper
- 5 LEDs
- 2 Red LEDs
- 2 Green LEDs
- 1 yellow led
- (3) 3-Volt cell batteries
- Conductive tape
- Assorted construction paper
- One roll of clear tape
- Varying pens and pencils
- Ruler
Step 1:

- Gather materials.
- On the blank sheet of mixed media paper, use the ruler to measure and outline the area which will be covered by the printer paper (this should be approx. 8 x 11 inches of the centre of the mixed media paper).
Step 2:

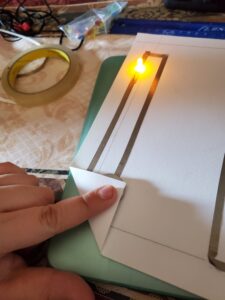
- Determine the location in which the cell batteries will be located at (I chose 3 corners of the mixed media paper) and mark where you will make any folds. These folds will allow for the closure of the circuit when a certain amount of pressure is applied.
Step 3:

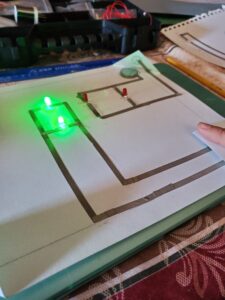
- Draw out your circuit; specify the location of any Led’s and/or resistors you will be using.
Step 4:

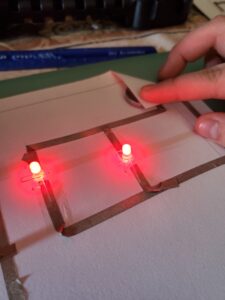
- Apply the conductive tape in the designated areas.
- Place the LEDs in the desired locations as well.
Step 5:


- Place the batteries in the corners/designated areas.
- Check to make sure circuit works well by applying pressing on the folds.
Step 6
- Tape down the batteries so that they stay put.
Step 7:

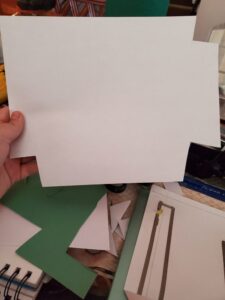
- Moving onto the printer paper, cut out the corners of the (printer) paper that lay on top of the folded corners of the mixed media paper.
Step 8:


- Pinpoint the location of the LEDs on the printer paper.
Step 9:


- Using these points as a reference, customize your image with whatever you want. (I used construction paper and colored pencils/pens.
Step 10:

- Once done decorating, place the printer paper back on top of the mixed media paper, and tape down the folds.