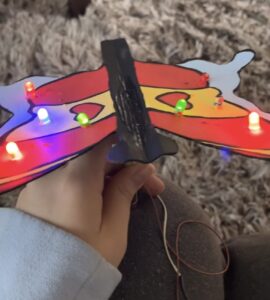
I wanted to create an interactive piece where it is shaped like a butterfly, and when you make its wings flap, the LEDs turn on. The switch aspect in this project is the loop made out of conductive fabric tape touching the copper tape to close the circuit and turn the LEDs on.
Supplies:
- 4 red, 2 green, 2 blue LEDs
- cardboard box
- acrylic paint
- hot glue gun
- wires
- copper tape
- conductive fabric tape
- battery pack (4.5 VDL)
Step 1: Assemble Cardboard Butterfly Body & Lever
My butterfly has an 8 inch wing span. You could make your butterfly any size, just make sure that the body of the butterfly is more wide. I recommend making the width of the butterfly body about an 1-1.5 inches thick. This allows for the butterfly to be foldedin the middle, which will help give the visual effect of flapping. The head of my butterfly was about 1.5 inches.
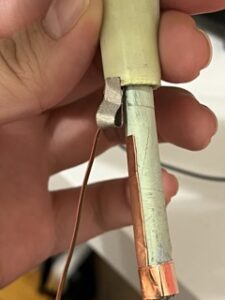
The lever that is used to close the circuit is composed of two pieces of cardboard. The shorter part of the lever is about 1.5 in by 2.5 in, the longer part of lever is around .75 in by 4.5 in. To make sure the pieces are the right size and will work properly, roll up the two parts and try to see if the shorter piece fits snug around the longer piece. If it does, then the circuit should close properly later on.
You could place the LEDs however you’d like, I placed four on each wing and made the locations mirrored on the wings. I used a pencil to poke holes for where the LEDs could be inserted.
Step 2: Assemble Wires
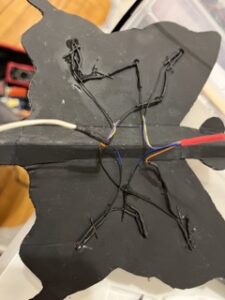
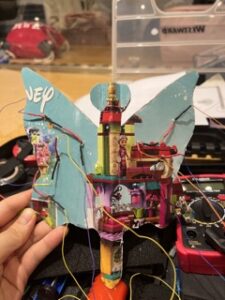
For each wire, I would have two LEDs connected in a series. In total I used two thinner wires per wing, having a total of four wires on the entire butterfly. I soldered the wires to the LEDs and placed heat shrinks around the exposed sections, with red representing positive and black representing a negative charge.
After, I connected all of the negative sides of the wiring together. I did the same with all of the positive wiring. I then soldered each side with a thicker wire, so I went from four wires total to two to make assembly a little less complicated.
I stapled the thinner wires to the butterfly body so that the overall appearance was a little more tidy, but I recommend using a hot glue gun for a cleaner appearance.
Step 3: Formation of Lever
I first painted the two pieces of cardboard that we designated earlier as components for the lever. I curled the two pieces so it would be easier to roll them up into tubes later.
On the shorter piece along the end of a shorter side on the interior, I placed conductive fabric tape. Then, I added a little loop of fabric tape.
On the longer piece along the end of a shorter side on its exterior, I placed copper tape.
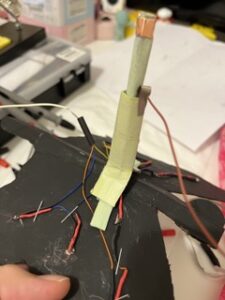
I curled both pieces to create tube-shaped parts and taped them to keep their shape. I then cut each piece down the middle byhalf an inch or so to create little arms. Each part should now resemble a “T” shape.I then slipped the shorter/thicker tube with fabric tape around the longer tube with copper tape.
Step 4: Putting Everything Together
Take the negative wire and connect this to the negative (black) wire of the battery pack.
The positive wire should go through the hole/middle of the lever. I then cut and stripped the positive wire and placed it behind the copper tape. I soldered a wire to the positive(red) wire of the battery pack, and after stripping its end, I attached it to the fabric tape loop.
I then taped the flaps of the lever to the body of the butterfly. I recommend hot-gluing them togetherfor better presentation and functionality.
Take the negative wire and connect this to the negative (black) wire of the battery pack.
The positive wire should go through the hole/middle of the lever. I then cut and stripped the positive wire and placed it behind the copper tape. I soldered a wire to the positive(red) wire of the battery pack, and after stripping its end, I attached it to the fabric tape loop.
I then hot-glued the flaps of the lever to the body of the butterfly.
Step 5: Decorate
I painted the butterfly body on both sides. On the more visible side, I painted the wings using red, yellow, and blue acrylic paints. On the underside of the butterfly, I painted it black to hide some of the wiring. Though I did this at the end, I suggest painting the butterfly just after cutting it out so that the paint does not cover the LED lights.
