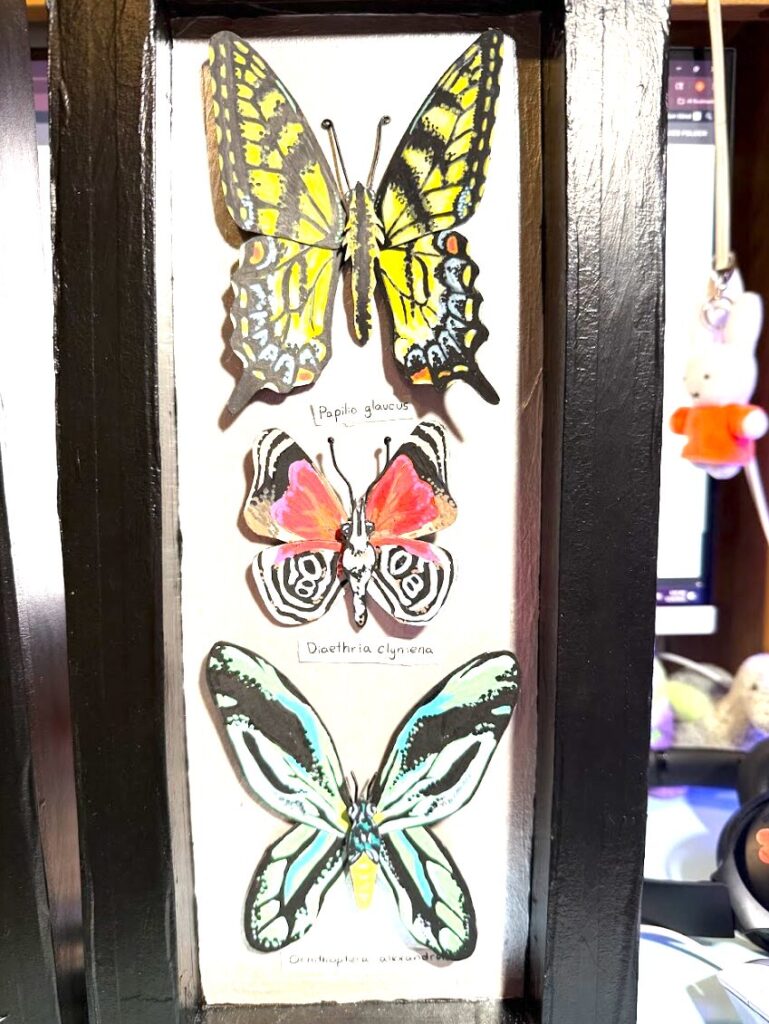
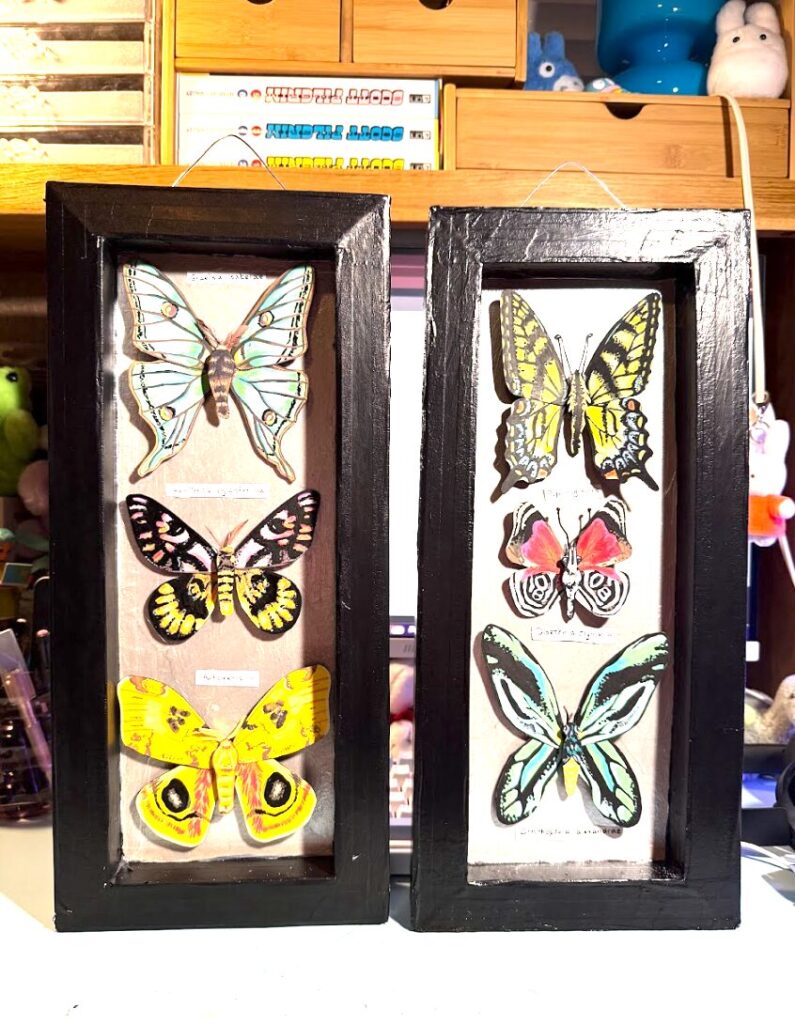
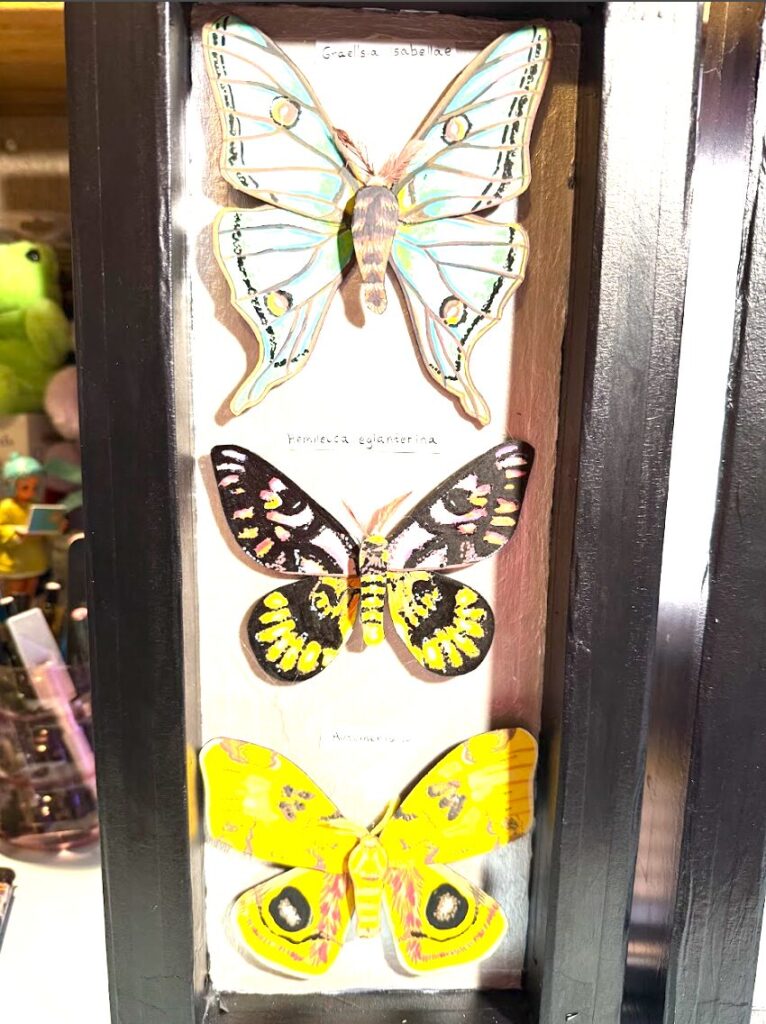
I wanted to make a project that’s purpose was almost to imitate life. I love butterflies and I was very inspired by the preserved butterfly displays in museums. I wanted to make a project that looked like it came alive after you shined light on it. I like the idea of it making people who like bugs excited and people who don’t like bugs scared/disturbed. I used foam board to make the frame, watercolor paper and pain to make the butterflies, and two servo motors to make either the left or right side of all three butterflies wings flap when light is shined on the board the butterflies are attached to the servo motors with an extended stick and wire is then wrapped around and glued. If you use a normal powerful flashlight it should work when you shine it just generally in the middle but if you have a poor quality light the sensor is under the middle butterflies species label.
Materials-
- White paints
- Black paint
- Acrylic paint markers
- Lighter
- Heat shrink
- Wooden dowel rod
- Kabob stick
- Square sticks
- Nail file
- Pencil
- Paper tape
- Pliers
- Wire cutters
- X acto knife
- Paint brush
- Hot glue sticks
- Hot glue gun
- Pony beads
- Cutting mat
- Illustration board
- Ruler
- Ribbon
- Wire
- Watercolor paper
- Battery pack
- Batteries
- Arduino board
- Wires for servo to arduino board
- Converter thing for battery pack to arduino board
- Bolts and screws to attach wires to arduino board
- Computer to write arduino code
- Flashlight
instructions –
- Measure out a 16×7 inch piece of illustration board and cut out
- Measure a 1×16 in x4 piece of illustration board to make the corners of the shadow box
- Measure a 1×7 in x4 piece of illustration board to make the corners of the shadow box
- Cut one inch off each end on two of the 1×16 pieces and two of the 1×7 pieces and then on the others measure an inch long box on each end and cut diagonally so they will fit together to make the frame.
- Tape the 1×14 pieces in the middle of the 1×16 pieces and repeat for the other smaller pieces
- Tape entire frame together and tape to the back 16×7 board
- Cut out 2×16 ⅛ x2 pieces of illustration board
- Cut out 2×7 ⅛ x2 pieces of illustration board
- Taper these pieces on the outside to finish the frame
- Make marks in the middle of the large board every 3.5 inches
- This is where the butterflies will go
- Cut .5x.5 in holes in the middle of each mark.
- Paint the back of the board and the frame whatever awesome color
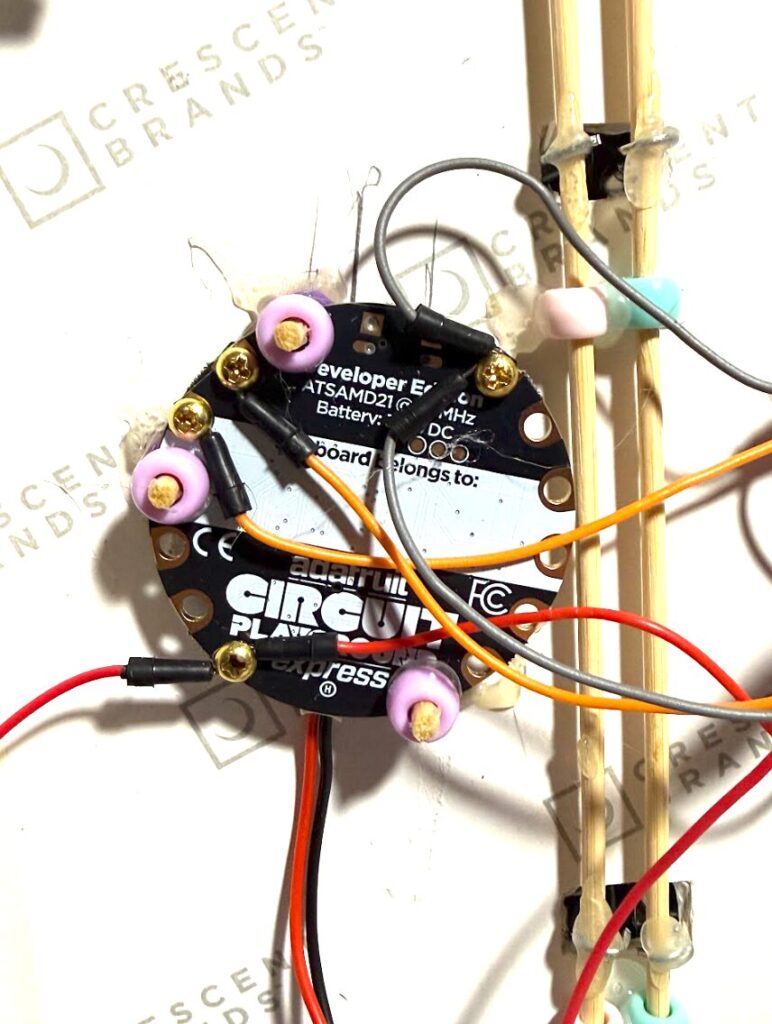
- Cut off protruding plastic on the inner sides of two servo motors
- Use heat shrink and two kabob sticks to stick the kabob sticks inside of the servo motor
- Glue the servo motors inwards flat behind the butterfly board so that you can see both of the sticks through the .5x.5 holes on the front.
- Glue pony beans to the back of the board with the kabob sticks running through them under each of the butterfly holes to make a track for the kabob sticks to turn into
- Design your butterflies within the size of the box
- Make sure the left wings, right wings, and butterfly body are all separated
- glue wire to the back of the left or right side of the butterfly wings and bend the wire to wrap around the kabob stick from the front and then glue to the stick.
- Repeat on each side for all butterflies
- Use wire to make a stand for the butterfly bodies to reach over the holes and the wings so that the wings do not hit the body when they flap.
- Design little butterfly antenna and glue to the underside of the body
- Now you will write all the arduino code and download it to the board. The code is written below.
- Connect servo motors to the back of the arduino board using screws and bolts
- Make species labels for each butterfly and before you glue all of them on cut a hole underneath one of them
- This is where the light sensor will go behind the label
- Use pony beads and kabob sticks to mount the arduino board behind the butterfly board so that the light sensor is behind one of the holes that you made underneath the species label.
- Attach a battery pack as a power source to the arduino board and make sure it remains in the butterfly box in the middle.
- Use a wooden dowel rod and ribbon to make a hinge attached to the shadow box frame and another 16×7 in board so that it makes a door to cover everything
- Repeat entire process twice to have both accompanying butterfly boxes
code-
#include <Arduino.h>
#include <Servo.h>
#include <Adafruit_CircuitPlayground.h>
#include <math.h>
int LEFT_SERVO_PIN = A2;
int RIGHT_SERVO_PIN = A3;
Servo leftWing;
Servo rightWing;
// —————- Wing movement settings —————-
int centerAngle = 90; // starts with wings open / flat
// How wide the wings flap at the start:
float startAmplitudeDeg = 65.0; // (10 – 30)=smaller flap //(40 – 80)=larger flap
float amplitudeDeg = startAmplitudeDeg;
// How fast the wings flap at the start (flaps per second)
float startFrequencyHz = 1.5; //(0.5 – 1.0) = slower starting flap, (1.5 – 3.0) = faster starting flap
float flapFrequencyHz = startFrequencyHz;
// The rate at which *the width* of the flap gets smaller. Range about 0.970 – 0.999
float amplitudeDecay = 0.9985; // Lower number = width diminishes sooner
// How quickly *the flap speed* slows down. Range about 0.970 – 0.999.
float frequencyDecay = 0.9999; // Lower number = slows down more quickly
// When speed drops below this number, stop. Good range: 2.0 – 20.0
float minAmplitudeDeg = 8.0;
float phaseCycles = .75; // 0 – 1 = full sine wave cycle (one left-right-left flap)
// How often the servos update (in milliseconds).
int updateEveryMs = 10; // 5 – 10 = smooth, 15 – 25 = less smooth
unsigned long lastFlapUpdateMs = 0;
// How long to rest between flap animations
int flapRestMs = 4000; // 4 sec
// —————- Light sensor setting —————-
// Only restart a new flap cycle if the light sensor is above this level.
int lightThreshold = 200; // 0 – 1023
// ———————————————————
void setup() {
Serial.begin(115200);
CircuitPlayground.begin();
// Servos start centered, then immediately detach
leftWing.attach(LEFT_SERVO_PIN);
rightWing.attach(RIGHT_SERVO_PIN);
leftWing.write(centerAngle);
rightWing.write(centerAngle);
leftWing.detach();
rightWing.detach();
lastFlapUpdateMs = millis();
}
// ———————————————————
void loop() {
// ——— ALWAYS CHECK LIGHT FIRST ———
int lightLevel = CircuitPlayground.lightSensor();
Serial.print(“Light level: “);
Serial.println(lightLevel);
if (lightLevel < lightThreshold) {
// Too dark → stay still + save battery
leftWing.detach();
rightWing.detach();
return;
}
// If bright enough → run a FULL flap cycle
// (Routine will NOT be interrupted by light checks)
leftWing.attach(LEFT_SERVO_PIN);
rightWing.attach(RIGHT_SERVO_PIN);
leftWing.write(centerAngle);
rightWing.write(centerAngle);
// Reset cycle variables
amplitudeDeg = startAmplitudeDeg;
flapFrequencyHz = startFrequencyHz;
phaseCycles = 0.75;
lastFlapUpdateMs = millis();
// ——— Flap Routine ———
while (true) {
unsigned long now = millis();
if (now – lastFlapUpdateMs >= (unsigned long)updateEveryMs) {
float dt = (now – lastFlapUpdateMs) / 1000.0f;
lastFlapUpdateMs = now;
float sinePos = sinf(2.0f * M_PI * phaseCycles);
float easeFactor = 0.35f + 0.65f * fabsf(sinePos);
// flapAmount: 0 = wings flat, 1 = wings fully lifted
float flapAmount = (sinePos + 1.0f) * 0.5f;
// Opposite movement
int leftAngle = centerAngle + (int)roundf(flapAmount * amplitudeDeg);
int rightAngle = centerAngle – (int)roundf(flapAmount * amplitudeDeg);
leftAngle = constrain(leftAngle, centerAngle, 160); // movement limits
rightAngle = constrain(rightAngle, 20, centerAngle); // movement limits
leftWing.write(leftAngle);
rightWing.write(rightAngle);
// advance the sine wave
phaseCycles += flapFrequencyHz * dt * easeFactor;
if (phaseCycles >= 1.0f) {
phaseCycles -= floorf(phaseCycles);
}
// slowly shrink flap motion and speed
amplitudeDeg *= amplitudeDecay;
flapFrequencyHz *= frequencyDecay;
// ——— End routine ———
if (amplitudeDeg < minAmplitudeDeg) {
break; // exit the flap loop when flap too small
}
}
}
// ——— reset wings ———
leftWing.write(centerAngle);
rightWing.write(centerAngle);
leftWing.detach(); // save the motors
rightWing.detach();
delay(flapRestMs);
}
photos- ( I don’t know why they came out such high in contrast)

video- ( I hope you have access to it )
https://drive.google.com/file/d/1jriZIltygR4QaG63Dtparf3eDQTmBppS/view?t=6