Materials used:
- Copper Tape
- 3x size 312 1.45V batteries
- 3x LED Lights
- Straw
- Paper
- Hair Clip
- Popsicle Stick
- Electrical Tape
- Colored Pencils
- Acrylic Paint
- Hot glue
Concept:
I chose to base this creative switch on the action of putting a flower behind your ear during the summertime or when visiting a tropical place. I wanted the act of wearing the flower to be what activates the LEDs, so the motion of placing the flower behind your ear closes the circuit and turns on the lights. By making it wearable, the user becomes part of both the artwork and the circuit, rather than just simply being a viewer. I chose to construct the flower out of a plastic straw and paper to keep it lightweight and comfortable, since it needs to be worn behind the ear. On the interior, there is a popsicle stick to mount the circuit to. This popsicle stick easily and clearly separates the positive and negative sides of the circuit to ensure the circuit doesn’t short. It also extends past the stem of the flower to form the stigma, which 3 LED lights will be sticking out of (having the positive and negative rods attached to each side of the popsicle stick). I chose these materials because they were both accessible and easy to shape, but also allowed the flower to look like a real hibiscus flower while also keeping the structure light and wearable.
Part 1: Hair Piece
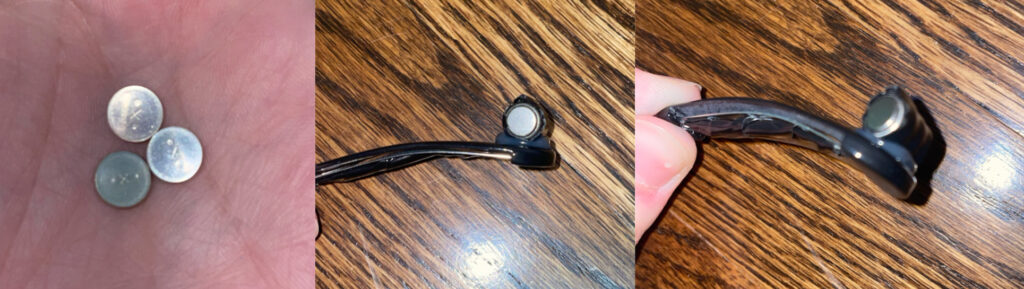
Step 1: Take 3 size 312 1.45V batteries and place them in a row with each one connecting positive to negative. Wrap them in electrical tape, only exposing the very bottom negative side and the very top positive side. Hot glue the new combined battery to a hair clip.
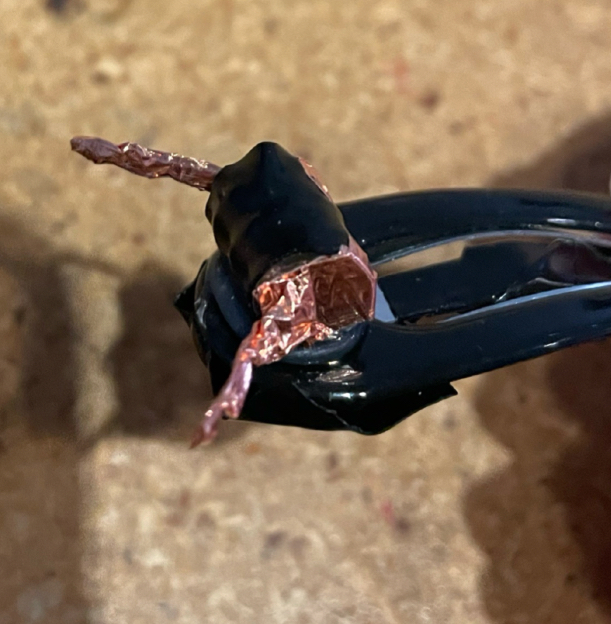
Step 2: Create 2 small antennae out of copper tape to allow the battery to connect to the rest of the circuit when the flower is placed behind the ear.
Part 2: Flower
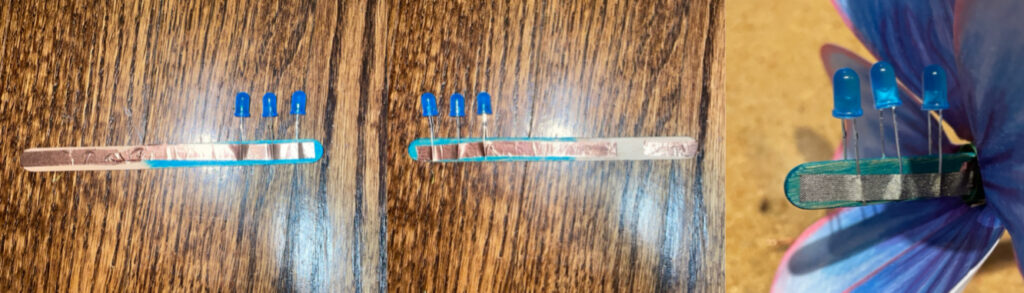
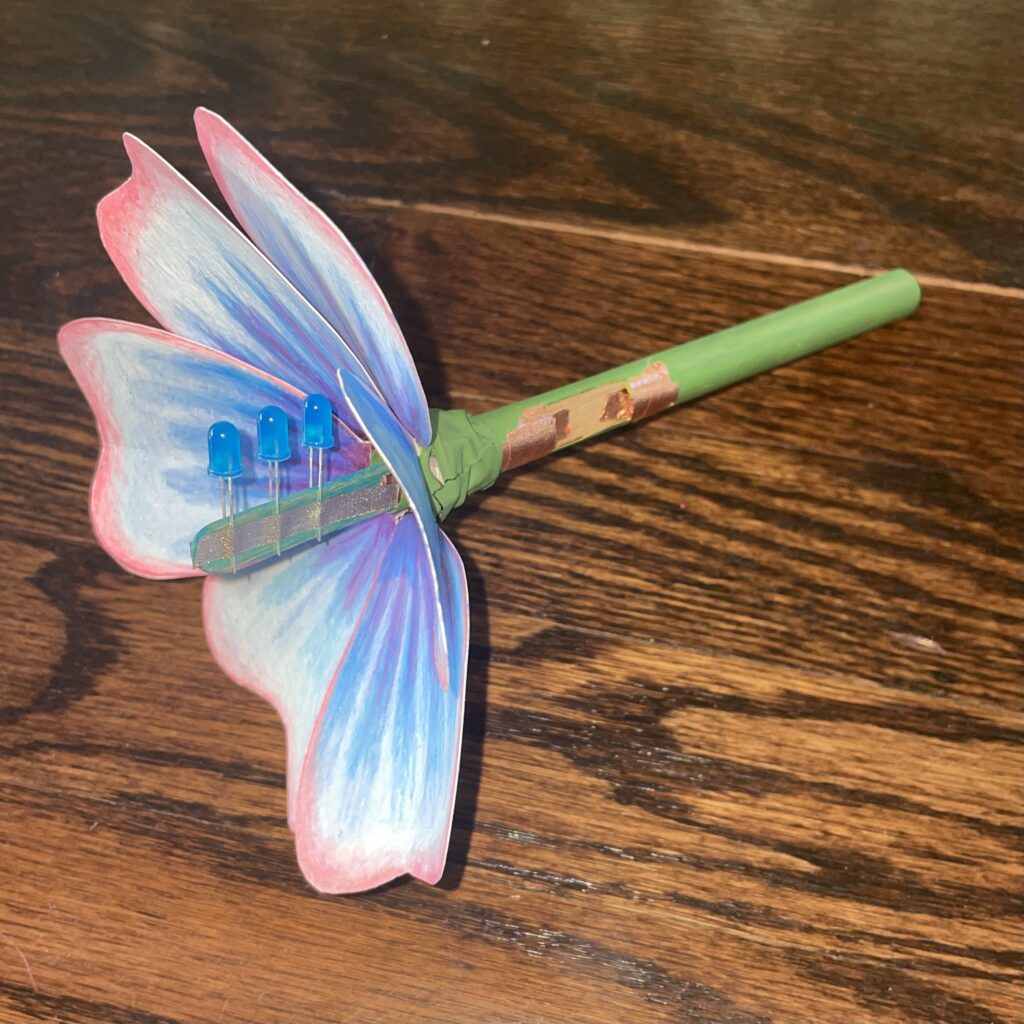
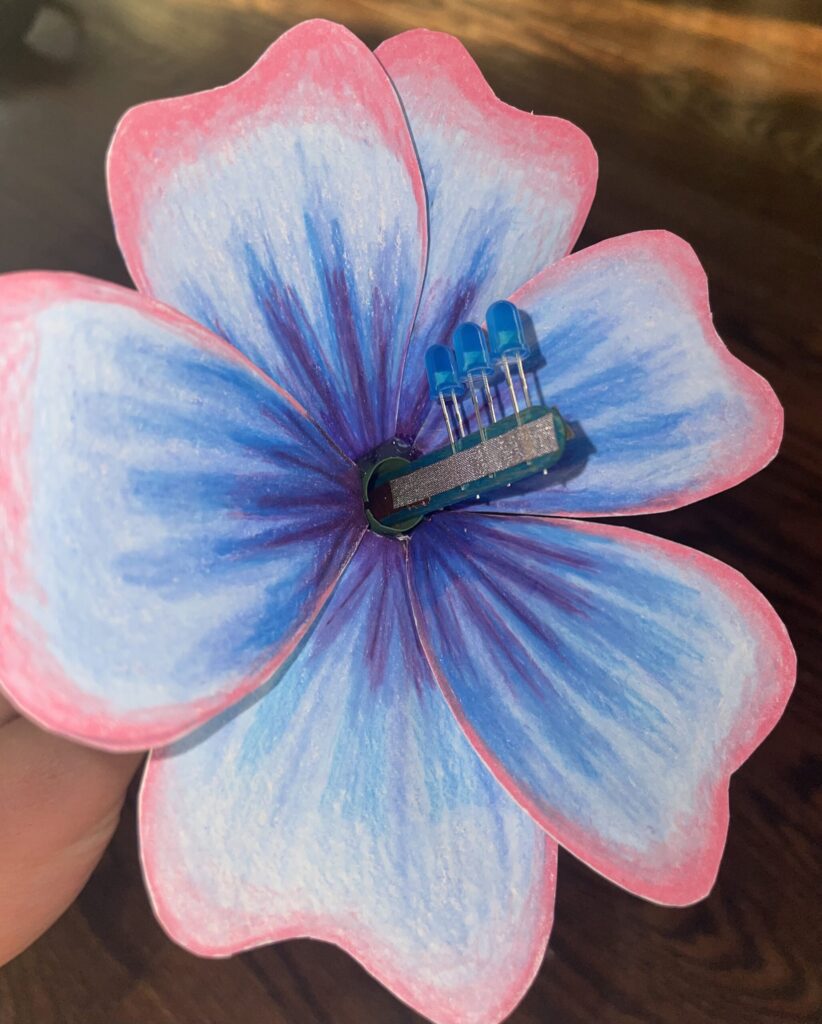
Step 1: Take a popsicle stick and color it to your desired stigma color. Place your 3 LEDs facing the same direction, with all of the positive rods on one side of the popsicle stick and all of the negative rods on the other side. Place copper tape over the positive rods and extend it 2/3 of the way down the popsicle stick. Place copper tape over the negative rods and wrap it over the bottom of the stick to end up on the same side as the positive. There should be a gap between the 2 pieces of copper tape to ensure the circuit doesn’t short. I later replaced the top parts of the copper tape with fabric tape to have a better connection to the LEDs.

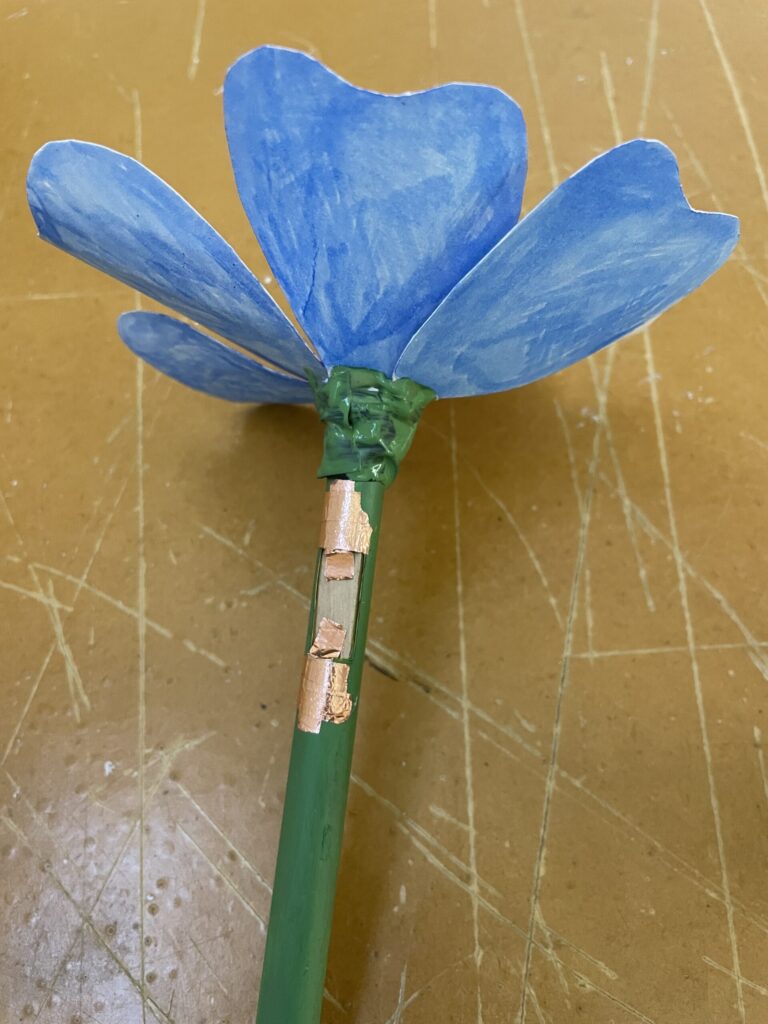
Step 2: Cut a square hole in your painted (green) straw. Insert the popsicle stick, making sure the 2 ends of the copper tape are visible through the hole. Add copper tape extending from each end (positive and negative) on the popsicle stick over the straw itself. This will create pads that the antennae on the clip can easily connect to when the flower is placed into your hair.

Step 3: Draw the petals for your flower, adding small rectangles to the bottoms, which will allow you to attach the petals to the stem later. Cut these drawings out.
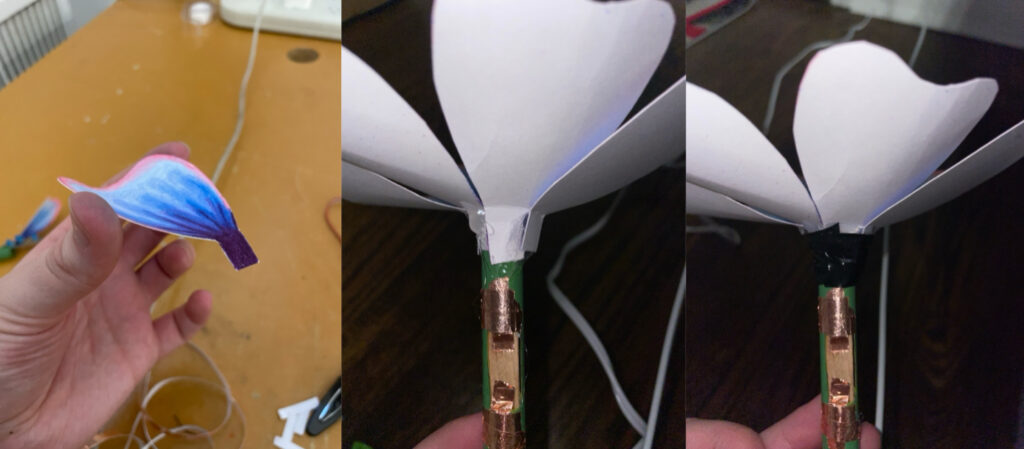
Step 4: Bend your petals at the rectangle you drew. Hot glue these rectangles to the straw (stem) in a circular pattern. Cover the bottoms of the petals in electrical tape to both add extra support and hide the hot glue.
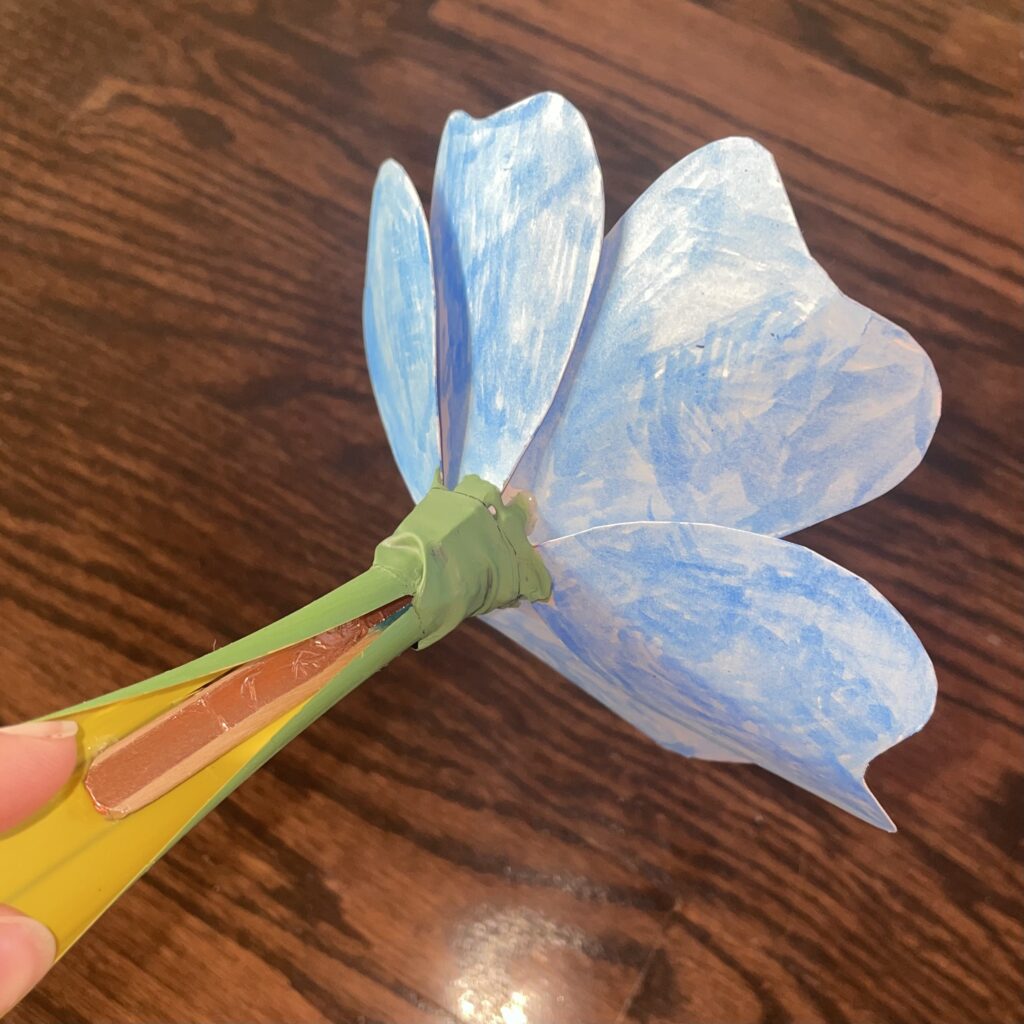
Step 5: Paint over the electrical tape with green to blend it into the stem. Color the backs of the petals in a matching color. This will ensure the outside of the piece looks finished and like a flower.
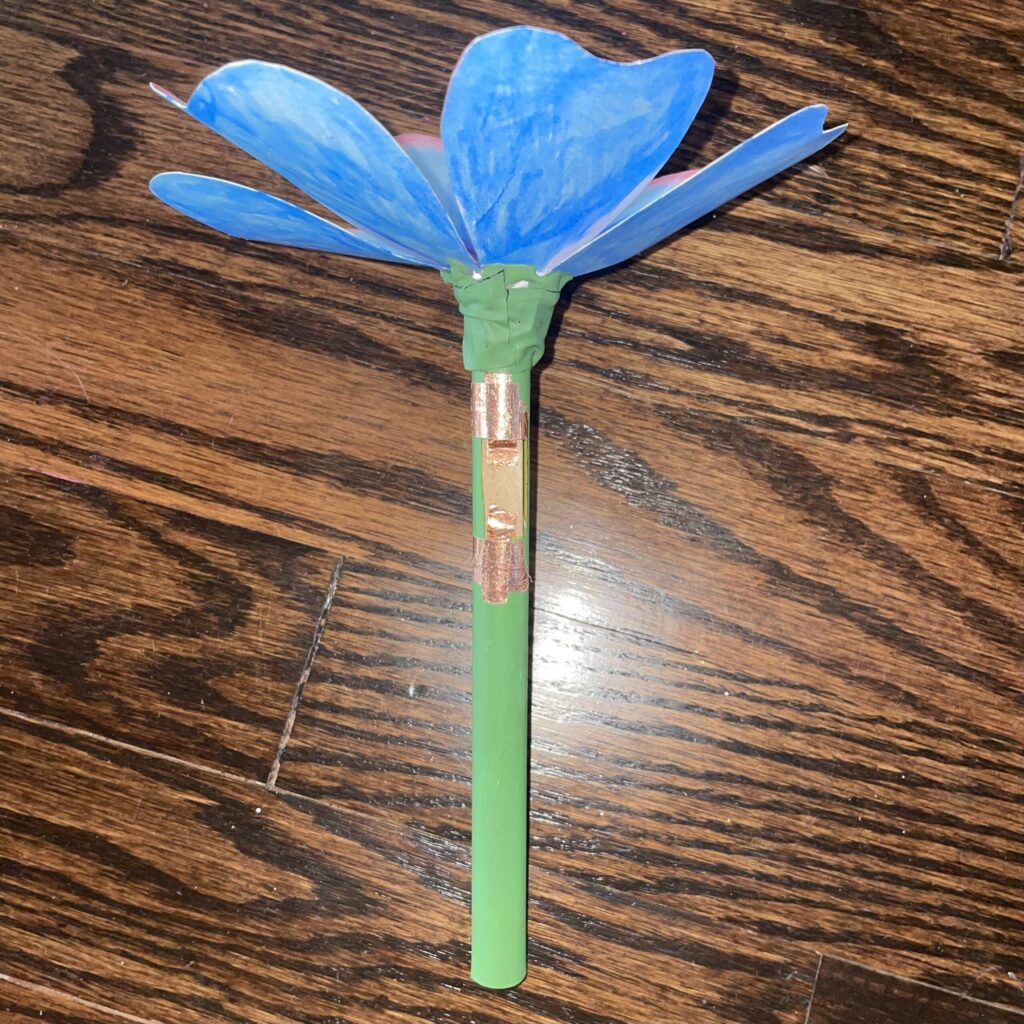
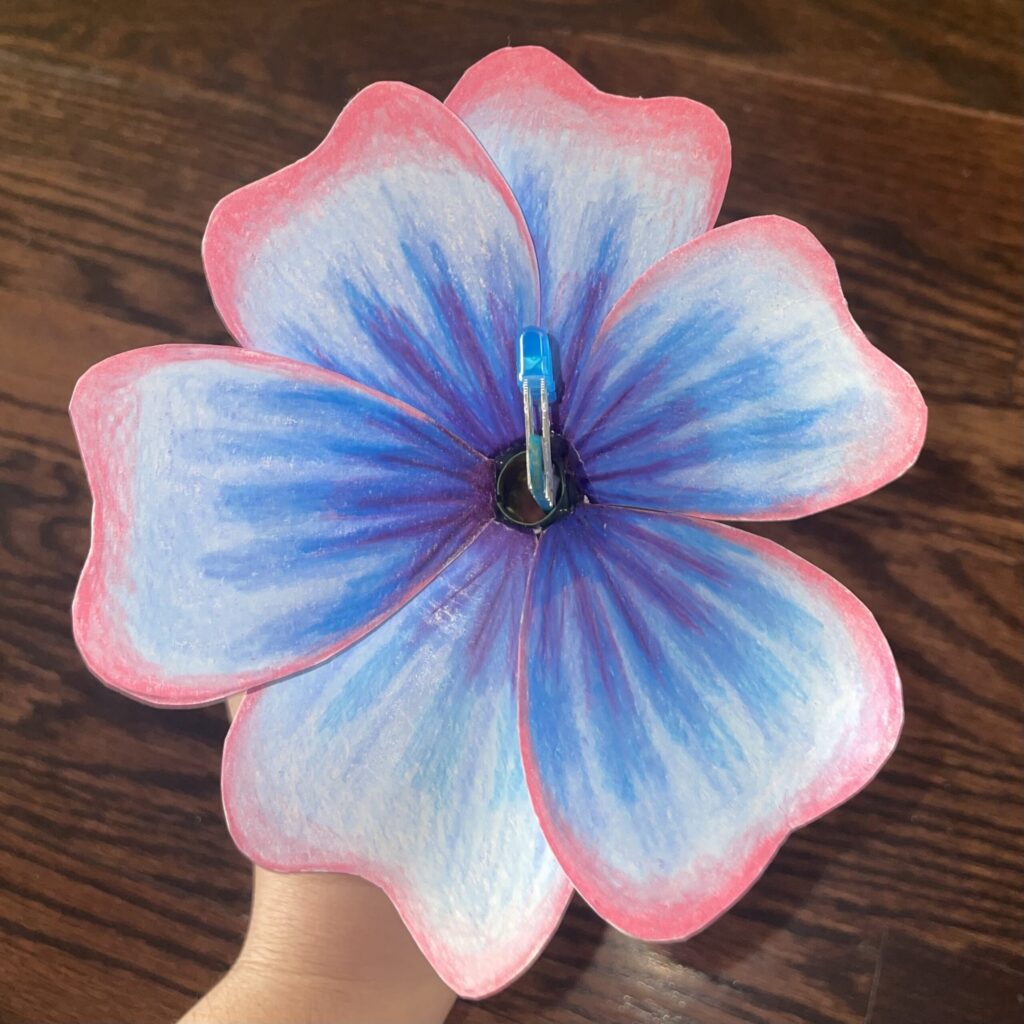
Pictures of the final product:
Final video: