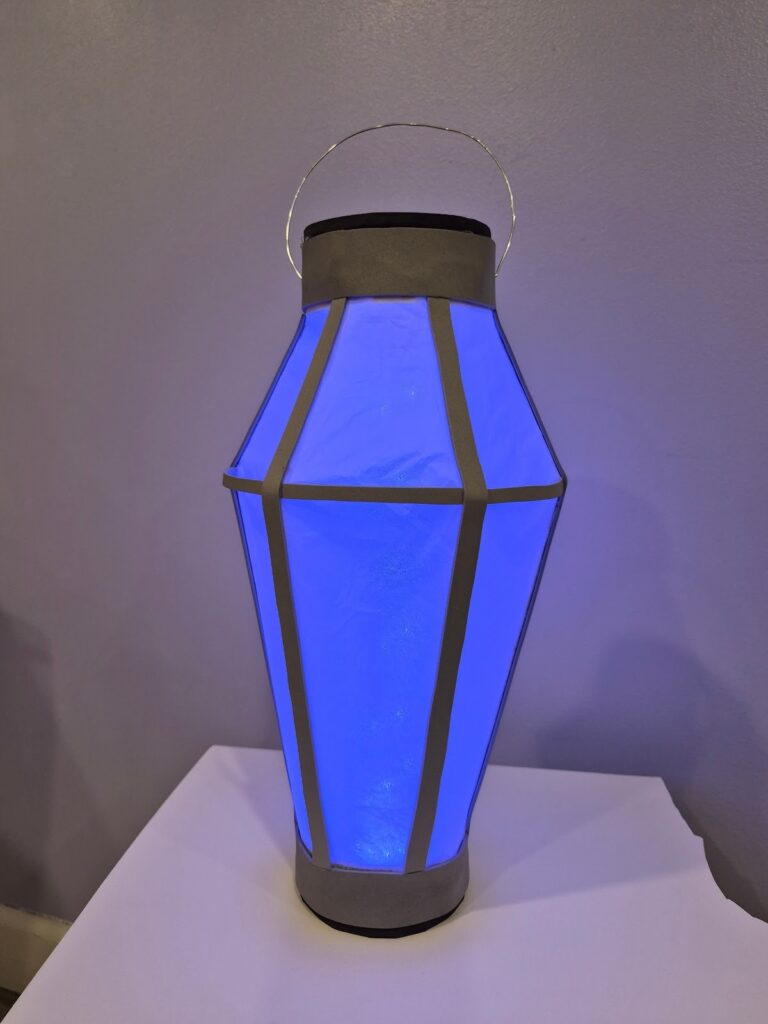
This interactive project is a lantern that changes color when it is shaken. The inspiration came from a video game character that I really like, and my interest in making a functioning item that has a purpose. The change of color is created by the circuit registering being shaken, which records the motion.
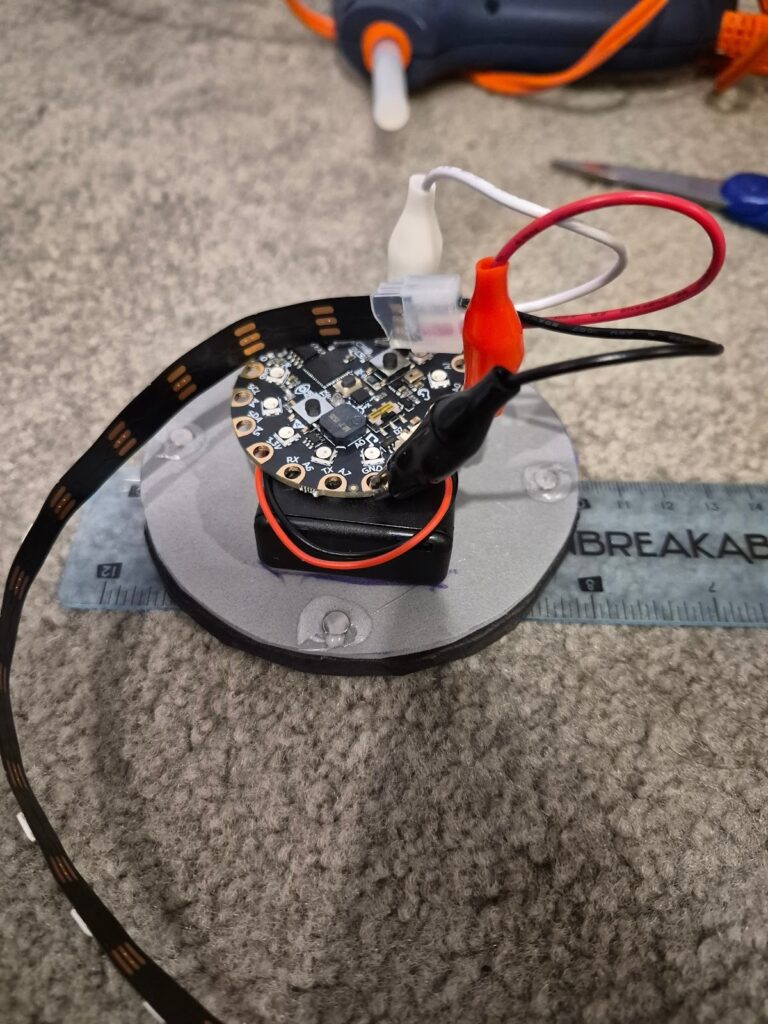
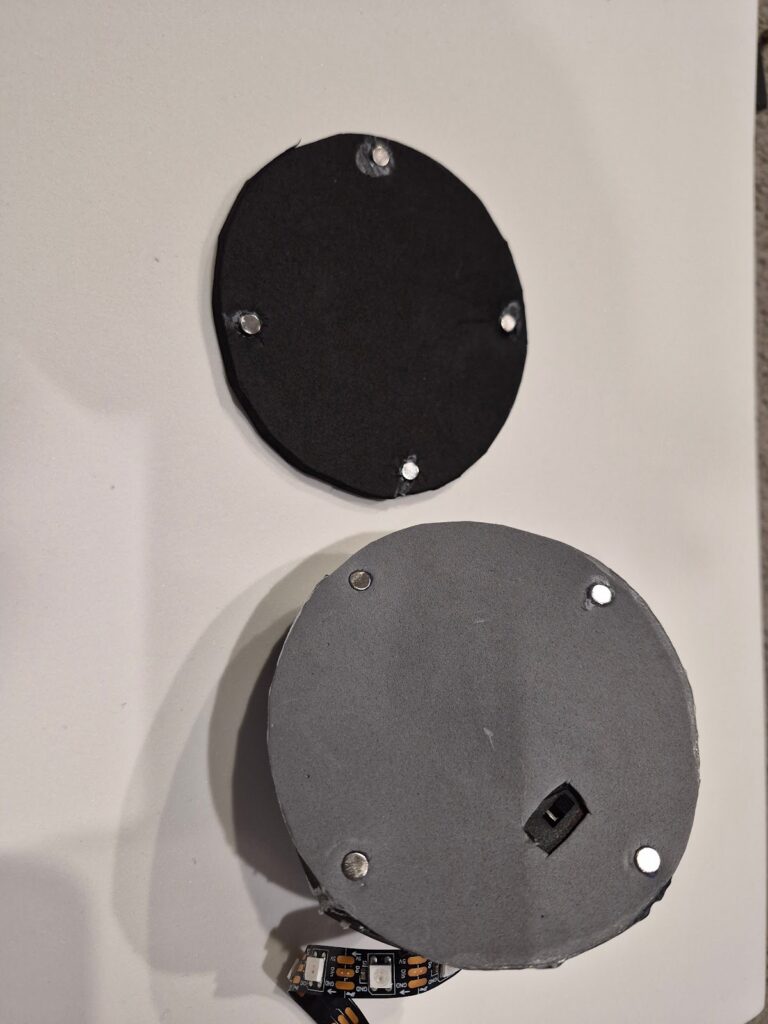
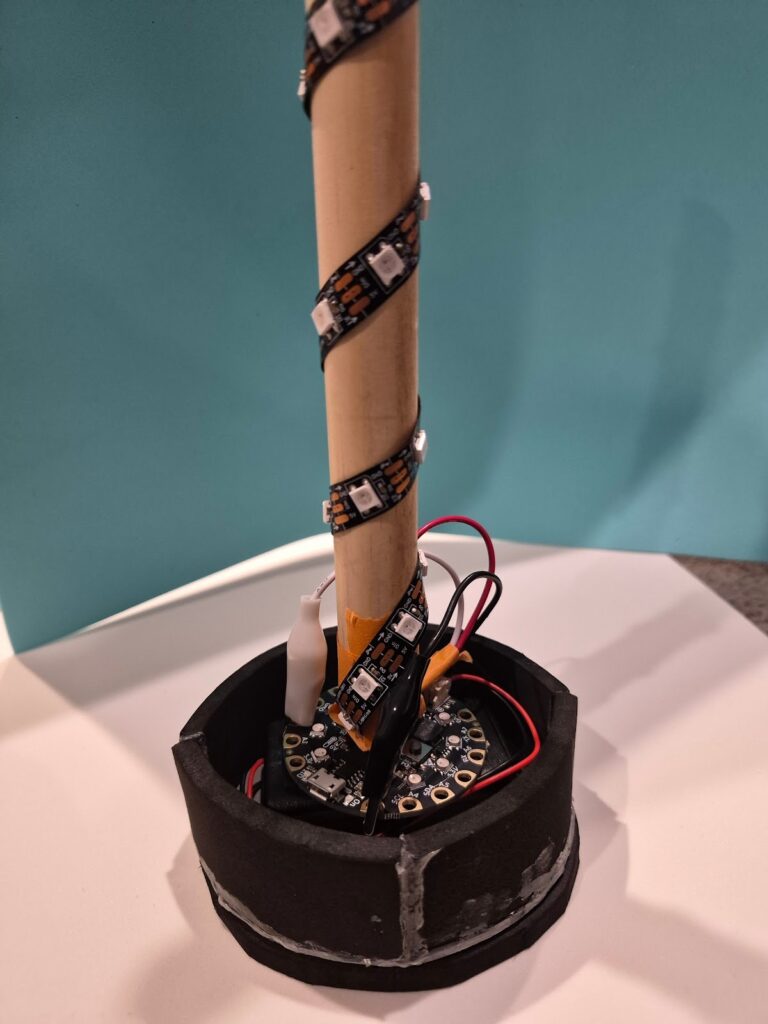
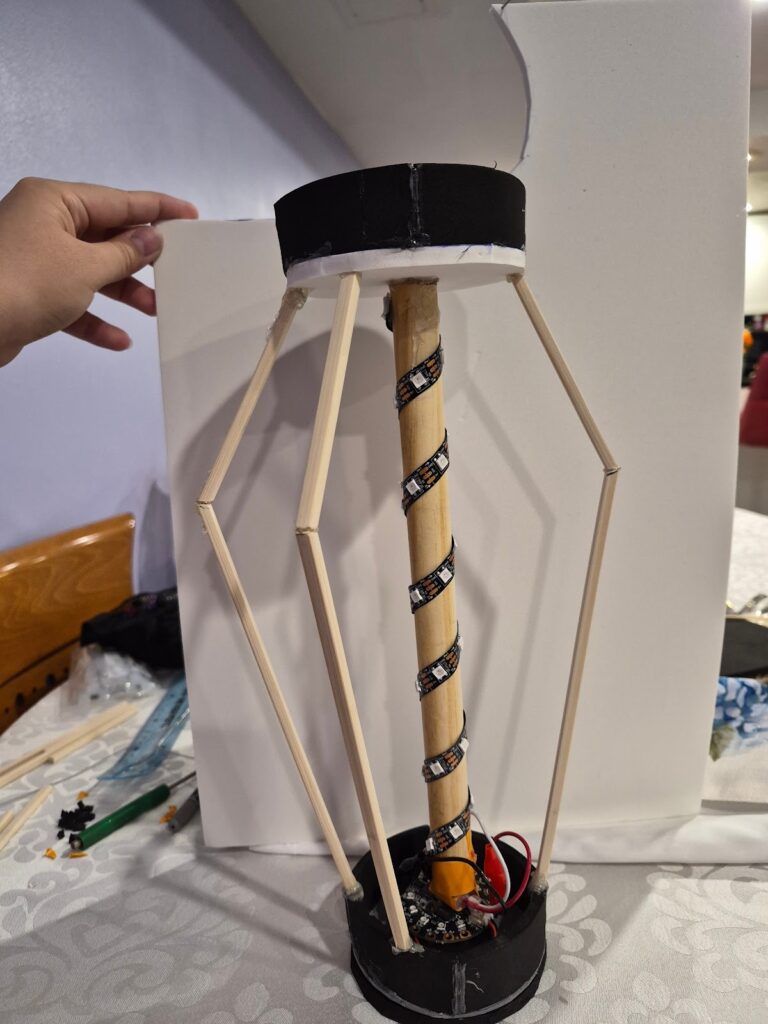
Through the circuit playground, an LED strip is attached to a wooden dowel. The circuit is connected to a battery pack and set in a base created of foam. Wooden chopsticks are attached to the base and top to create the frame. Tissue paper is used to fill in the frame.
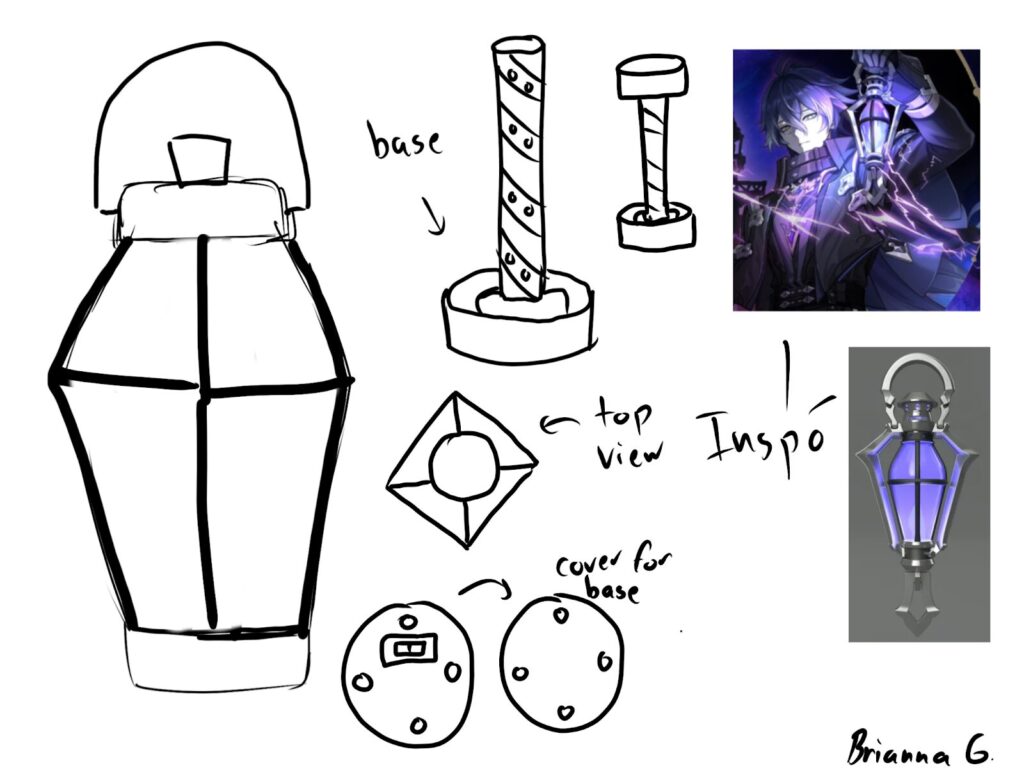
Initial project proposal:
A glowing lantern that when sensing either sound or movement will switch the color from purple to pink.
List of Materials:
- Circuit playground
- Three double a batteries
- Batterie pack
- LED strip
- Wooden dowel
- Hot glue
- Thick sheet of foam
- Thin sheet of foam
- Tiny magnets
- Flat wooden chopsticks
- Thin wire
- Tissue paper
Code:
#include <Adafruit_CircuitPlayground.h>
#include <FastLED.h>
#include <Wire.h>
#include <SPI.h>
// — External strip —
#define STRIP_PIN A2
#define STRIP_LEDS 30
#define LED_TYPE WS2812B
#define COLOR_ORDER GRB
CRGB stripLeds[STRIP_LEDS];
int sensorPin = A10;
int sensorValue = 0;
int brightVal = 20;
// — Color list: {red, green, blue} —
const uint8_t colors[][3] = {
// { 0, 180, 255}, // cyan
{ 9, 9, 217}, // blue
// {140, 0, 255}, // purple
{252, 3, 82}, // hot pink
};
const int NUM_COLORS = sizeof(colors) / sizeof(colors[0]);
int colorIndex = 0;
// — Shake detection tuning —
const float SHAKE_THRESHOLD = 15.0;
const int SHAKE_COOLDOWN = 500;
unsigned long lastShakeTime = 0;
bool wasShaking = false;
void setup() {
CircuitPlayground.begin();
CircuitPlayground.clearPixels();
CircuitPlayground.setBrightness(brightVal);
FastLED.addLeds<LED_TYPE, STRIP_PIN, COLOR_ORDER>(stripLeds, STRIP_LEDS)
.setDither(brightVal < 255);
FastLED.setBrightness(brightVal);
// Sanity flash: red on both outputs for 1 second
fill_solid(stripLeds, STRIP_LEDS, CRGB::Red);
FastLED.show();
for (int i = 0; i < 10; i++) CircuitPlayground.setPixelColor(i, 255, 0, 0);
CircuitPlayground.strip.show();
delay(1000);
fill_solid(stripLeds, STRIP_LEDS, CRGB::Black);
FastLED.show();
for (int i = 0; i < 10; i++) CircuitPlayground.setPixelColor(i, 0, 0, 0);
CircuitPlayground.strip.show();
}
void setAllPixels(uint8_t r, uint8_t g, uint8_t b) {
// CPX onboard 10 pixels
for (int i = 0; i < 10; i++) {
CircuitPlayground.strip.setPixelColor(i, r, g, b);
}
CircuitPlayground.strip.show();
// External 30-pixel strip
fill_solid(stripLeds, STRIP_LEDS, CRGB(r, g, b));
FastLED.setBrightness(brightVal);
FastLED.show();
}
void loop() {
// Brightness from pot
sensorValue = analogRead(sensorPin);
brightVal = map(sensorValue, 0, 1023, 0, 225);
CircuitPlayground.setBrightness(brightVal);
// Shake detection
float x = CircuitPlayground.motionX();
float y = CircuitPlayground.motionY();
float z = CircuitPlayground.motionZ();
float magnitude = sqrt(x*x + y*y + z*z);
float shakeForce = abs(magnitude – 9.8);
unsigned long now = millis();
if (shakeForce > SHAKE_THRESHOLD) {
if (!wasShaking && (now – lastShakeTime > SHAKE_COOLDOWN)) {
colorIndex = (colorIndex + 1) % NUM_COLORS;
lastShakeTime = now;
}
wasShaking = true;
} else {
wasShaking = false;
}
setAllPixels(colors[colorIndex][0], colors[colorIndex][1], colors[colorIndex][2]);
}
How to:
- Connect the LED strip & battery pack to the Circuit playground
- Create a base out of the thin foam that is big enough for the circuit and battery pack
- Create a hole in the base to access the on and off switch.
- Create another base out of the thick foam. Align the magnets and attach to create a lid.
- Cut out four long rectangles of thick foam to add height to the base
- Glue the LED strip to the wooden dowel
- Glue the dowel with LED strip to the circuit
- Create a second base to use as the top of the lamp
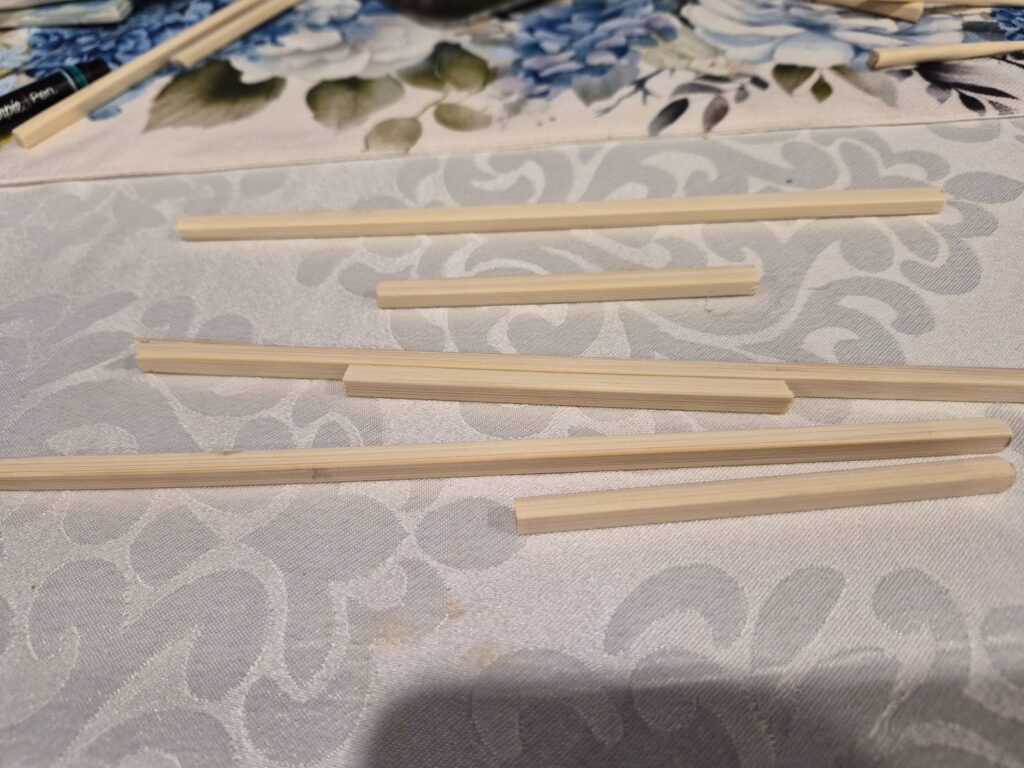
- Cut and sand down nine chopsticks. Have six longer ones, with six shorter ones
- Attach the top onto the wooden dowel, and begin gluing the chopsticks to create the shape of the lantern
- Once the lantern shape is completed. Begin gluing sections of the panels with tissue paper. Laying the paper flat and going one by one

- Cut out rectangles and strips of thin foam to cover up the base and exposed wooden chopsticks. Adding extra strips for decoration
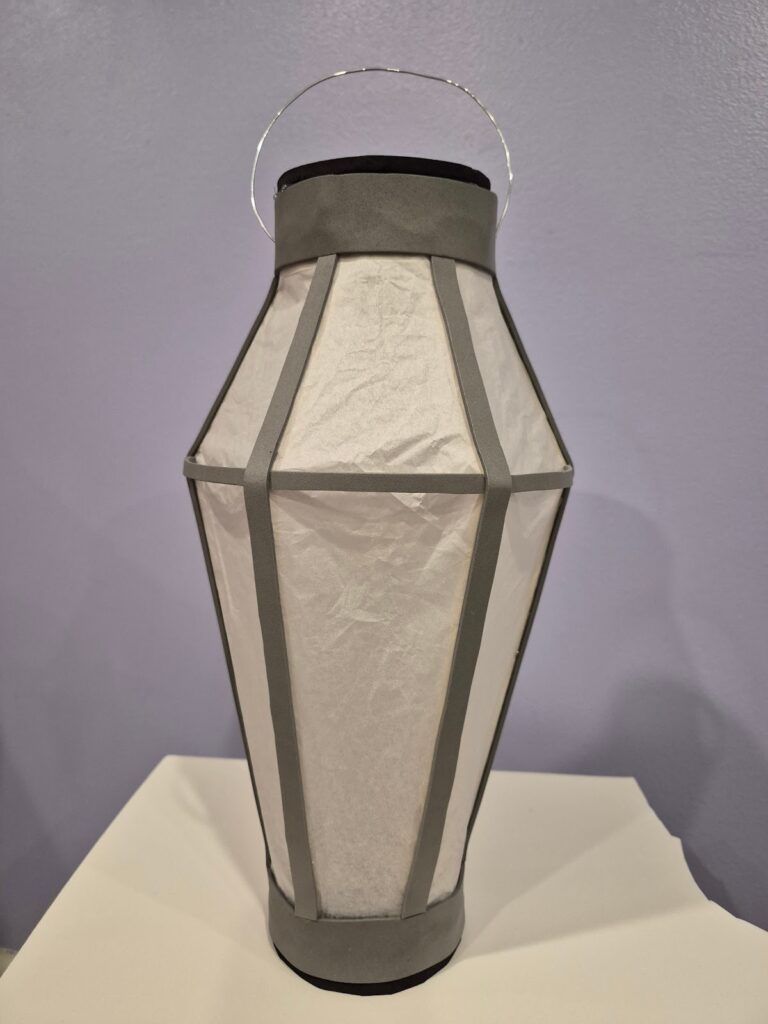
- Bend metal wire to create a handle and stick it through the top

- Turn on the LED from the bottom, and shake to change color.